Resin art projects are super cool but can go wrong if you’re not careful. First, always read the instructions; ignoring them can leave you with sticky messes. Get your measurements right because even a little off can ruin your piece. Mix your resin thoroughly; otherwise, you’ll have annoying soft or sticky spots. Slow and steady wins the race, especially with mixing, to avoid those pesky bubbles. Choose the right resin for your project and avoid going overboard with dyes. Keep your workspace clean and temperature-controlled for the best results. Stick around to discover more tips and tricks for perfect resin art projects!
Key Takeaways
- Not measuring resin and hardener precisely can lead to improper curing and weak results.
- Failing to mix resin thoroughly for 3-5 minutes causes sticky spots and incomplete curing.
- Fast stirring introduces air bubbles, affecting the clarity and finish of the resin.
- Ignoring environmental conditions, like temperature and humidity, can result in improper curing and defects.
Not Reading Instructions
Failing to read and follow the instructions provided by epoxy resin manufacturers can result in incomplete curing and suboptimal finishes. Imagine spending hours on a beautiful resin project, only to find it sticky and ruined because you overlooked the instructions. Each epoxy brand, like IntoResin, has specific guidelines that are vital for success. For instance, IntoResin requires a precise 1:1 mixing ratio by volume. Ignoring this can throw off the chemical balance, leading to a disaster.
Reading comprehension is key here—every detail matters. Mix times usually range from 3 to 5 minutes, and skimping on this could mean your resin won’t harden properly. You also have a limited working time of 20-30 minutes, so being prepared is essential. Imagine racing against the clock and realizing halfway through you didn’t read the instructions thoroughly!
Instruction adherence isn’t just a suggestion; it’s a necessity. Full curing times can be between 8 to 12 hours, with a minimum of 24 hours recommended for a complete set. Skipping these steps can leave your project sticky and unusable. Always consult the technical data sheets for specific guidance on pot life, curing time, and temperature conditions.
Incorrect Epoxy Selection
Just as adhering to instructions is essential, selecting the appropriate epoxy resin for your project is equally important to achieve the desired results. The range of epoxy types available can be overwhelming, but understanding their specific resin applications is vital. For example, UV-resistant epoxy is ideal for projects exposed to sunlight, preventing yellowing and degradation. Thicker resins may not flow well into intricate designs, leading to uneven finishes, while thinner resins are better suited for detailed work.
Here’s a quick reference to help you select the right epoxy type:
| Epoxy Type | Ideal Application |
|---|---|
| UV-Resistant | Outdoor projects, jewelry |
| Thick Resin | Large surfaces, tables |
| Thin Resin | Intricate designs, molds |
Understanding the depth of pour is another important factor. Some resins are formulated for shallow layers, while others can handle deeper pours, often requiring a layering technique. Always consult the product datasheets to guarantee compatibility and follow the recommended application guidelines.
Choosing the wrong epoxy can lead to unsatisfactory results, such as yellowing, uneven finishes, or even structural failures. As a result, taking the time to select the appropriate epoxy type for your specific resin applications will greatly enhance the quality and durability of your resin art projects.
Inaccurate Measurements
Accurate measurement in resin art is like baking a cake; if you mess up the ratios, you’ll end up with a sticky mess instead of a masterpiece.
It’s important to use the right tools, like graduated measuring cups or digital scales, to get those ratios just right.
Failing to measure correctly can wreck your project and waste materials, so precision is key to creating stunning, durable resin art.
Precision in Ratios
Achieving the correct resin-to-hardener ratio is imperative to guarantee proper curing and a high-quality finish in resin art projects. Imagine spending hours on a piece, only to find it sticky or not set properly—frustrating, right? Precision in ratios is essential, and a little ratio experimentation goes a long way in mastering this craft. Understanding the specific mixing techniques for your chosen resin can save you from these heartbreaks.
Many epoxy brands specify exact ratios, like a 1:1 ratio by volume. Deviating from these can lead to:
- Incomplete curing, leaving your project tacky or soft
- Excessive hardener, which can cause brittleness or cloudiness
Mixing your resin and hardener correctly involves more than just eyeballing it. Always follow the manufacturer’s guidelines closely, as different products may have unique requirements.
Measuring Tools Importance
Guaranteeing the accuracy of your measurements is just as important as adhering to the correct resin-to-hardener ratio for achieving ideal results in resin art. Imagine spending hours on a project, only to have it fail because of inaccurate measuring tools. Frustrating, right? That’s why getting your measurement techniques spot-on is vital.
Using the right measuring tools, like graduated measuring cups for volume and digital scales for weight, can make all the difference. Each epoxy brand might require different mixing ratios, so always check the manufacturer’s guidelines. It’s not just about a simple 1:1 ratio—some brands have their own specific needs. Skipping this step can lead to sticky spots or soft mixtures, which nobody wants.
Think of it like baking a cake: if you don’t measure the ingredients correctly, the cake might not rise or could be too dense. Similarly, in resin art, precise measurements guarantee a successful chemical reaction, giving you that perfect, glossy finish.
Effects of Inaccuracy
Inaccurate measurements in resin art can lead to a myriad of issues, including sticky spots, incomplete curing, and compromised structural integrity. Imagine spending hours perfecting your design, only to find out that your resin hasn’t set properly. The heartbreak! This often happens due to not following the right measurement techniques. When it comes to resin, precision is everything.
Failing to measure your resin and hardener accurately can turn your masterpiece into a sticky mess. Most epoxy brands have specific mixing ratios, commonly a 1:1 ratio by volume. Deviating from these can ruin the chemical reaction needed for curing. Even a few grams off can spell disaster.
Here are some common effects of inaccurate measurements:
- Sticky spots: These occur when the resin doesn’t cure properly, leaving parts of your project gooey and unusable.
- Incomplete curing: If the mixture is off, your resin may never fully harden, making the artwork fragile.
Measurement techniques like using graduated measuring cups for volume or digital scales for weight are essential for accurate impact assessment.
Insufficient Mixing
Frequently, insufficient mixing of resin and hardener can result in soft or sticky spots that compromise the final product’s integrity and appearance. This common mistake can be incredibly frustrating, especially after investing time and effort into your project. Proper mixing techniques are critical to maintain resin integrity and achieve a flawless finish.
The recommended mixing time is typically 3-5 minutes, but always check the specific product instructions for best results. While mixing, aim for a smooth, consistent blend without syrupy strings, as their presence indicates inadequate mixing and can lead to uneven curing. Make certain to scrape the sides and bottom of your mixing container to guarantee all unmixed resin is incorporated into the mixture. Missing these steps can result in those dreaded sticky patches.
To avoid air bubbles—another potential issue—stir slowly and gently. Fast stirring can introduce unwanted bubbles into the resin, which can be a headache to remove later. So, take your time and mix thoroughly.
With the right approach, you can avoid the pitfalls of insufficient mixing and create stunning resin art that stands the test of time.
Fast Stirring
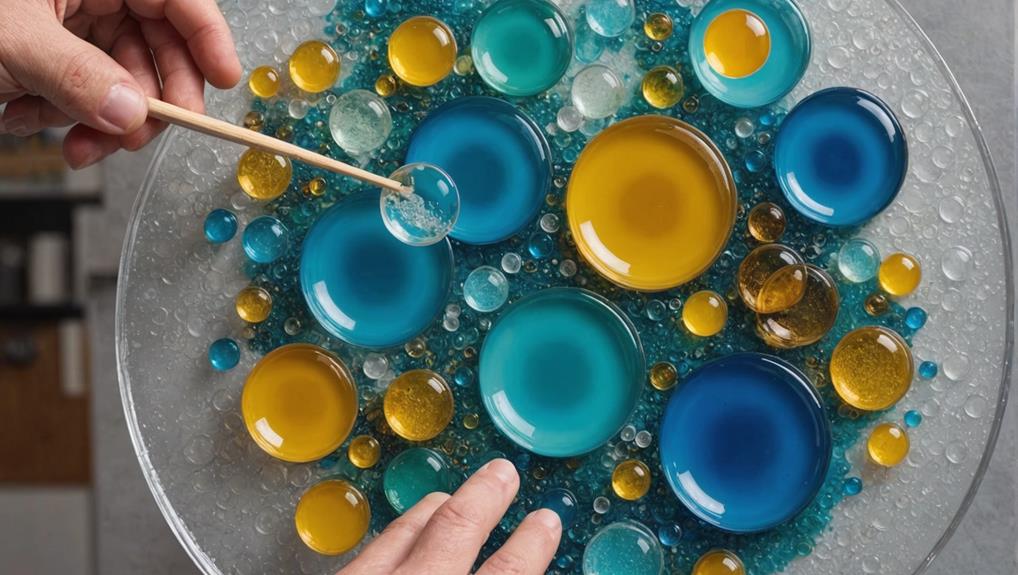
When it comes to stirring resin, fast and furious isn’t the way to go.
Speedy mixing can turn your clear, beautiful resin into a bubbly mess, making your art look like it has air pockets instead of that smooth, glassy finish you’re aiming for.
Instead, slow and steady wins the race—stir gently and methodically to keep those pesky bubbles at bay and guarantee your resin stays crystal clear.
Bubble Formation Issues
Rapid stirring of resin and hardener can introduce numerous air bubbles, leading to a cloudy final product that necessitates additional remediation efforts. Imagine spending hours on your resin art, only to find it riddled with pesky bubbles! To avoid this frustration, let’s explore some bubble prevention techniques.
First off, it’s essential to mix gently and consistently. This isn’t a race, so take your time. Rushing might seem tempting, but it guarantees a bubbly disaster. Aim for a slow, steady pace to keep those bubbles at bay.
- Scrape the sides and bottom: Ensuring all components are thoroughly mixed prevents unmixed resin, which can cause sticky spots and additional bubbles.
- Use a heat gun or torch: After pouring, carefully applying heat can help with surface bubble removal, giving your piece a smooth finish.
Optimal Stirring Speed
Understanding the importance of stirring speed is crucial for achieving a clear and flawless resin art piece. Fast stirring might seem like a good idea to quickly mix your resin, but it can actually introduce numerous air bubbles into the mixture. These bubbles can be quite a nuisance, compromising the clarity and overall quality of your final product.
When you stir too quickly, you’re effectively whipping air into the resin, much like beating eggs. Instead, adopting gentle stirring techniques is recommended. Aim for a consistent, slow speed during mixing to maintain a smooth mixture and minimize bubble formation. It might feel like you’re moving at a snail’s pace, but trust me, your patience will pay off.
The ideal mixing duration should match the instructions in your resin kit, usually around 3-5 minutes. However, don’t hesitate to extend this time if needed to achieve a uniform consistency. Stirring at an appropriate speed also prevents the resin from becoming too thick too quickly, which can make pouring a real headache.
Resin Clarity Impact
Fast stirring greatly affects resin clarity by introducing numerous air bubbles, resulting in a cloudy and less professional finish.
When you’re working on resin art, it’s essential to understand how the way you stir can impact the final look of your project. Imagine spending hours on a beautiful piece, only to have it ruined by tiny bubbles trapped inside!
To keep your resin clear and stunning, remember these key points:
- Gentle stirring: Mix your resin types and curing agents slowly to minimize air bubble formation.
- Mixing duration: Stir for at least 3-5 minutes, guaranteeing thorough blending without rapid agitation.
Mixing your resin too fast can be a recipe for disaster. It’s like trying to whip cream at lightning speed—you’ll end up with a frothy mess instead of a smooth, glossy finish.
By taking your time and stirring gently, you’ll make sure that your resin cures to a clear, bubble-free masterpiece.
Temperature Mismanagement
Proper temperature management is essential in resin art to guarantee a flawless finish and avoid common issues such as bubbling or uneven curing. The temperature effects on resin are quite significant; it should be mixed and poured at an ideal temperature of 75°F-80°F (24°C-26°C). Anything outside this range can lead to curing challenges, making your beautiful piece look like a disaster.
If it’s too cold, the resin gets thick and stubborn, which makes mixing a nightmare. Too hot, and it cures way too fast, often leading to cracks.
Imagine pouring hours of work into your resin art, only to see bubbles pop up everywhere or the surface looking like the moon’s cratered landscape. Not fun, right? To keep your resin happy, avoiding direct sunlight is a must since UV rays can make your resin yellow and murky.
Keeping a consistent temperature is like giving your resin a comfy blanket; it prevents those annoying imperfections.
And here’s a handy tip: if your resin is cold, warm the sealed bottles in warm water before mixing. It’s like giving it a spa day, and you’ll get a smoother, more cooperative resin that’s ready to shine!
Oversized Projects
Tackling oversized resin projects presents unique challenges, particularly with the increased risk of exothermic reactions that can lead to flash curing, bubbles, or cracks. When you’re scaling up your project, it’s vital to understand that larger quantities of resin generate more heat, which can cause these undesirable effects. To avoid these pitfalls, keep an eye on a few important factors.
Project Scaling: Start small and gradually increase your project size as you become more familiar with resin behavior. This way, you’ll reduce the chances of making costly mistakes.
Mold Selection: Choosing the right mold is essential. Avoid using large molds initially, as they complicate the curing process and can lead to waste if things go wrong.
Thickness Management: Keep your project to a maximum thickness of 1/3 inch. This helps guarantee proper curing and minimizes the risk of distortion.
Mixing and pouring large batches of resin can be tricky. Uneven distribution and temperature-related issues can compromise your project’s final outcome.
Uneven Surfaces
Making certain a level surface is fundamental to achieving a flawless resin art piece, as any tilt or irregularity can lead to uneven resin distribution and aesthetic imperfections.
Imagine pouring your heart into a masterpiece, only to find the resin pooling in one corner—heartbreaking, right? To dodge this disaster, grab a trusty spirit level and confirm your workspace is perfectly even. It might seem like a small step, but it’s a game-changer.
Surface preparation is equally vital. Dust, oils, or even the tiniest debris can mess up your resin’s adhesion, leading to those dreaded uneven patches.
Give your surface a good clean, getting rid of anything that might interfere. Think of it as giving your canvas a fresh start!
Next, a light sanding can work wonders. It helps the resin stick better and guarantees a smooth, uniform finish.
If you’re working with porous materials, consider applying a sealant first. This minimizes bubbling, which can also contribute to an uneven surface.
Taking these steps may seem tedious, but they’re essential for resin art success.
Excessive Dye Addition
Adding too much dye can transform your resin art into a colorful disaster!
When you exceed the 6% limit of colorant, the intense hues might look appealing at first, but they can mess up the curing process and weaken the structure of your piece.
It’s like trying to bake a cake with too much frosting; it might seem tempting, but it just won’t hold together properly.
Color Intensity Control
Maintaining proper color intensity when working with resin requires careful control of dye addition to prevent negative effects on curing and clarity. Adding too much colorant can ruin your project. It’s vital to know the right amount and proper mixing techniques to achieve the desired result. There are different colorant types, such as liquid and powder, and each requires a slightly different approach.
For instance, you should never exceed 6% of the total resin volume when adding colorant. If you’re working with 100ml of resin, that’s just 6ml of dye. Using more than this can lead to a cloudy finish, affecting the transparency and visual appeal of your art. Proper mixing guarantees the colorant dissolves completely, which is essential for maintaining clarity.
Here’s what to keep in mind:
- Measure accurately: Use a precise measuring tool to avoid overloading the resin with dye.
- Mix thoroughly: Guarantee the colorant is fully dissolved to prevent uneven coloring and cloudiness.
Resin Composition Impact
Excessive dye addition in resin compositions can severely disrupt the curing process and compromise both the clarity and structural integrity of the finished piece. Imagine spending hours on your resin art project, only to find it cloudy and sticky because you added too much color!
It’s essential to keep the amount of colorant—whether liquid or powder—to no more than 6% by volume. For example, if you have a 100ml resin mixture, stick to a maximum of 6ml of dye.
Different colorant types bring their own challenges, but the key is in your mixing techniques. Make sure the colorant is fully dissolved and mixed evenly; otherwise, you risk an uneven chemical reaction, which can lead to a disappointing finish.
Overloading the resin with dye not only affects clarity but can also create a weak, brittle piece that’s prone to breaking.
Moisture Contamination
Moisture contamination is a common issue in resin art that can result in cloudiness and improper curing, emphasizing the need for a dry working environment. Identifying moisture sources and implementing humidity control are essential steps to prevent these problems. Even the smallest amount of moisture can disrupt the curing process, leading to unsatisfactory results.
Making certain that all tools, surfaces, and molds are completely dry before applying resin is critical. Humidity levels above 60% can negatively impact the clarity and adhesion of the resin, so it’s advisable to monitor and control humidity in the workspace.
Here are some tips to help you maintain a dry environment:
- Use a dehumidifier or silica gel packets to keep humidity levels low.
- Allow any porous materials to fully dry and seal them if necessary, to prevent trapped moisture from creating bubbles or causing improper curing.
Delayed Usage
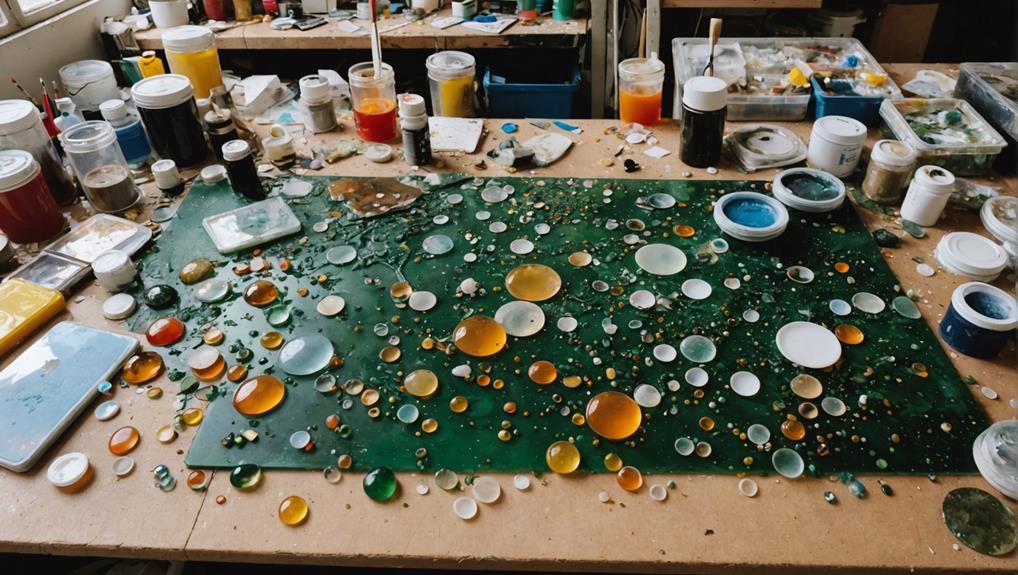
Ensuring a dry working environment is essential, but equally important is the timely use of mixed resin to prevent premature curing and material waste. If you’ve ever mixed resin, you know it can go from smooth and pourable to thick and unusable faster than you might think—often within just 20-30 minutes! To avoid this sticky situation, having a solid timing strategy is vital.
First, set up your workspace and materials before you mix the resin. This way, you’ll be ready to pour as soon as it’s mixed, avoiding any frustrating delays. Timing strategies are vital; always check the working time on the resin packaging and stick to it like glue. Delays can cause the resin to start curing in the mixing container, making it a hard, lumpy mess that’s impossible to use.
Optimizing your workflow is another lifesaver. A quick and efficient workflow can mean the difference between a flawless finish and a sticky, uneven disaster. Think of it like a race against the clock—every second counts. By being prepared and organized, you’ll make sure your resin art turns out just the way you envisioned, instead of becoming an expensive mistake.
Improper Storage
Proper storage of resin is essential to maintaining its quality and ensuring successful projects. When resin isn’t stored correctly, it can lead to resin degradation, which can ruin your art before you even start. So, let’s break down what you need to do to keep your resin in tip-top shape.
First and foremost, resin hates moisture. Moisture absorption can seriously mess with the curing process, leading to sticky or improperly hardened pieces. Keep your resin in tightly sealed containers to prevent any unwanted moisture from sneaking in.
Here are some key tips to remember:
- Store resin in a cool, dry place: Aim for a temperature range between 60°F and 90°F (15°C to 32°C) to maintain its ideal viscosity.
- Avoid direct sunlight: UV rays can degrade the resin, altering its consistency and effectiveness.
Additionally, always store hardeners separately from resin to avoid any premature chemical reactions. Make sure both components are kept upright to prevent leaks, and you’ll be well on your way to mastering resin art.
Ignoring Environmental Factors
Ignoring environmental factors can ruin your resin art faster than you can say ‘oops.’
It’s essential to work in the right temperature range, typically between 75°F-80°F, to guarantee your resin cures properly without any unwanted surprises.
Plus, keeping your workspace dust-free is a must to avoid those annoying little particles that love to sneak into your masterpiece.
Temperature Control Importance
Temperature control plays a pivotal role in achieving high-quality results in resin art. Imagine spending hours on a piece only to have it ruined by temperature fluctuations. Ensuring your workspace maintains a stable ambient temperature is essential for the curing process of epoxy resin. The ideal range is between 75°F-80°F (24°C-26°C), where the resin cures perfectly without hiccups.
Why is this so important? Well, cold environments can slow down the chemical reactions necessary for curing, leading to longer times and potential issues with the final product’s strength and clarity. On the other hand, high temperatures can speed things up too much, causing flash curing, cracks, or bubbles. Neither of these scenarios is what you want!
Here’s why you should care about temperature:
- Cold environments: Longer curing times, weaker final product.
- High temperatures: Risk of flash curing, cracks, and bubbles.
Clean Workspace Necessity
Maintaining a pristine workspace is essential to ensuring the quality and clarity of your resin art. Envision spending hours on a beautiful piece, only to find dust and particles embedded in your cured resin. Talk about frustration!
Workspace organization is key; keep your area free from oils and debris before you even think about pouring resin. This isn’t just about being tidy—it’s about contamination prevention.
A dust-free environment is your best friend during the curing process. Any stray particles can mess up the clarity and overall look of your artwork, which no one wants. Imagine this: you’ve poured your resin, everything looks perfect, but by the time it cures, there are mysterious specks everywhere. Ugh!
Using painter’s tape can be a lifesaver for creating clean edges and preventing resin overflow. And who doesn’t love clean lines?
Also, regularly cleaning your tools and equipment can save you from cross-contamination headaches. Envision using a spatula with leftover resin from a previous project—disaster!
Neglecting Surface Preparation
Proper surface preparation is essential for achieving a flawless resin finish, as it guarantees even application and strong adhesion. Imagine spending hours on your resin art, only to see it ruined by bubbles, peeling, or uneven surfaces. It’s the nightmare of any artist! To avoid this heartbreak, focus on surface cleaning and sanding techniques.
First off, surface cleaning is a must. Dust, oils, and even tiny particles can mess up your resin’s adhesion, causing imperfections. So, grab a cloth and some isopropyl alcohol, and give your surface a good wipe-down.
Next, let’s talk about sanding techniques. Sanding your surface before pouring resin is like giving it a little grip. It helps the resin stick better, reducing the chances of peeling or bubbling. Use fine-grit sandpaper and sand in a circular motion for the best results.
Here’s a quick checklist to keep you on track:
- Level the surface: Verify your workspace is perfectly flat to prevent resin from pooling.
- Seal porous materials: Apply a sealant to prevent bubbles.
Neglecting these steps can lead to a resin art disaster, so take your time and prep right!
Frequently Asked Questions
What Are the Common Mistakes in Resin Art?
Common mistakes in resin art include inaccurate color mixing, improper surface preparation, not reading epoxy instructions, incorrect resin-hardener ratios, insufficient mixing, stirring too quickly, and neglecting environmental conditions, all of which can affect the final product’s quality.
What Not to Do With Resin?
When working with resin, avoid deviating from recommended mixing ratios to guarantee proper resin curing. Additionally, adhere to safety precautions, such as using protective gear and working in a well-ventilated area, to prevent health risks.
What Are the Concerns of Resin Art?
Addressing the concerns of resin art involves prioritizing safety precautions such as proper ventilation and PPE, and ensuring meticulous material selection to avoid curing failures, temperature sensitivity issues, and aesthetic flaws like bubbles or cloudiness.
What Is Point of Trouble in Resin?
A key point of trouble in resin art is improper mixing techniques and resin temperature management. Inaccurate measurements and insufficient stirring can disrupt curing, while working in cold conditions affects viscosity, leading to unsatisfactory results.
Conclusion
In resin art projects, meticulous attention to detail is essential. Ensuring accurate measurements, thorough mixing, and adherence to instructions can greatly enhance outcomes.
Consideration of environmental factors and proper storage are also vital. By avoiding common pitfalls such as incorrect epoxy selection, fast stirring, and neglecting surface preparation, the potential for success is greatly increased.
A thoughtful and methodical approach will ultimately yield more satisfying and professional results in resin art endeavors.

Leave a Reply