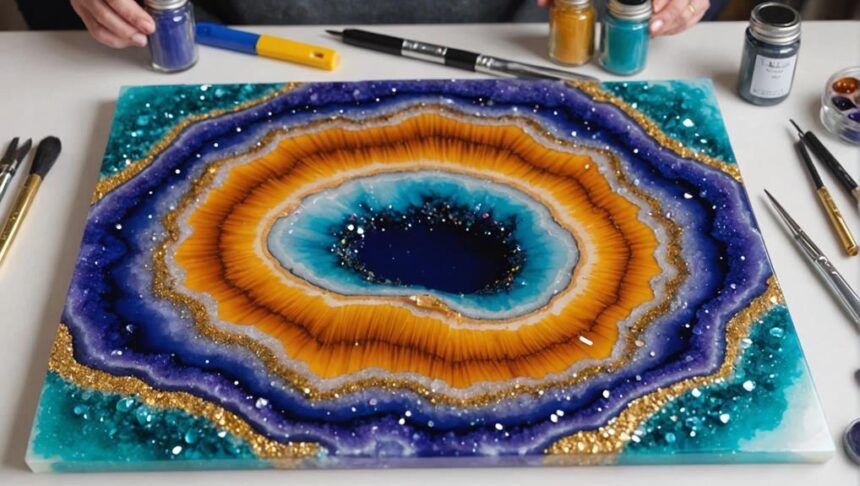
Creating stunning resin geode art can be a fun and rewarding project, even for beginners. First, gather your materials: high-viscosity epoxy resin, mixing cups, stir sticks, and safety gloves. Trust me, you need the gloves. Next, design your geode by placing the largest crystals in a balanced, eye-catching pattern. Gold fire glass works wonders for those sparkly details. Finally, mix and pour the resin slowly, watching it create mesmerizing layers. Use a heat tool to pop pesky bubbles and add glitter when the resin is tacky. Ready for a masterpiece? There's more to discover in the next steps!
Key Takeaways
- Gather materials: epoxy resin, mixing cups, stir sticks, safety gloves, and an 18 x 18 white-painted wood panel.
- Arrange largest crystals as focal points, using gold fire glass to define boundaries.
- Mix equal parts of resin (A and B) slowly to avoid bubbles.
- Pour resin gradually from one edge, using a craft stick or heat tool to guide and smooth.
Gather Your Materials
To begin your resin geode art project, gather essential materials including high-viscosity epoxy resin, mixing cups, stir sticks, and safety gloves. These items might seem basic, but they are vital for creating stunning geode art.
When it comes to material selection, choose a sturdy surface like an 18 x 18 white-painted wood panel. Make sure it's clean and level, so your resin dries evenly.
Now, let's talk about safety precautions. Resin can be a bit tricky and sometimes smelly, so work in a well-ventilated area. Cover your workspace with protective coverings because resin can be super sticky and messy. Trust me, you don't want to ruin your mom's favorite table! Safety gloves are a must to protect your hands from the resin. It's like wearing armor, but for art!
Next, grab some painters tape to mask off areas where you want clean edges. This will give your piece a professional touch.
Design Your Geode
Begin by selecting the largest crystals, as they will serve as the focal points in your geode design. These crystals will draw the eye and set the stage for the rest of your artwork.
When considering crystal placement, think about whether you want a symmetrical or abstract pattern. Both styles can be beautiful, but referencing natural geodes can provide valuable pattern inspiration.
- Arrange the largest crystals: Place these crystals first, ensuring they are well-spaced to create balance in your design.
- Outline with gold fire glass: Use the fire glass to create defined boundaries around your crystals, enhancing their prominence.
- Adjust with a paintbrush: Carefully move the crystals and fire glass until you achieve the desired arrangement, taking your time to get it just right.
- Embrace uniqueness: Each piece will differ, reflecting your personal expression and creativity.
Pour and Finish
With your geode design finalized, the next step is to carefully mix and pour the resin to bring your artwork to life.
Start by mixing equal parts of resin (A and B). This is where the magic begins! Use slow, steady mixing techniques to guarantee the resin is fully combined. Make sure there are no streaks or bubbles, or you'll end up with a bumpy mess instead of a smooth masterpiece.
Now comes the exciting part: pouring the resin. Begin from one edge of your surface and pour slowly. This helps create those cool layering effects. If you pour too fast, the colors might blend too much, and you'll lose those distinct layers that make geodes so fascinating.
Keep a craft stick or heat tool handy. Use it to guide the resin into any gaps and to pop any pesky air bubbles that might show up.
Want to add glitter or embellishments? Wait until the resin is slightly set but still tacky. This way, they won't sink.
Frequently Asked Questions
How to Make Geode Resin Art Step by Step?
To create geode resin art, begin with geode color selection, draft your design, and paint the canvas. Use layering techniques with colored resin and heat tools to eliminate bubbles. Add embellishments and finish with a glitter-embedded resin layer.
How to Do Resin Art Beginners?
For beginners in resin art, start with resin mixing according to manufacturer instructions. Focus on color blending techniques to create striking effects. Guarantee workspace preparation and proper safety gear for a successful and vibrant resin art project.
Which Resin Is Best for Geode Art?
For geode art, high-viscosity, UV-resistant, heat-resistant, slow-curing, and non-toxic resin types are recommended. These resins maintain the layout, prevent color choices from blending, guarantee durability, and provide a safe crafting environment.
What Is the Best Art Resin for Beginners?
The best art resin for beginners is a high-viscosity epoxy resin, ensuring stability and self-leveling. Select resin types that are low odor, non-toxic, and UV-resistant. Adhere to safety precautions and follow clear mixing instructions for ideal results.
Conclusion
Creating resin geode art can be an enjoyable and rewarding experience.
By following the steps of gathering materials, designing the geode, and pouring and finishing, one can achieve professional-looking results.
This process not only fosters creativity but also teaches patience and attention to detail.
Mastering these basic techniques lays the foundation for more advanced projects in the future.
Therefore, engaging in resin geode art serves as both an educational and artistic endeavor.


Leave a Reply