Get ready to plunge into the vibrant world of resin art with these stunning ideas that combine creativity and craftsmanship. Start with the glossy impact technique, flowing clear resin mixed with dyes for dazzling, marble-like effects. Make waves by layering colors for an ocean feel, using a heat gun for a seamless blend. Turn your doodles into 3D masterpieces with colored resin drops or try abstract designs by mixing resin and pigments. Craft functional items like unique coasters, shimmering keychains, or elegant floral paperweights. Even everyday objects like door knobs transform into art. There’s so much more to discover!
Key Takeaways
- Experiment with ocean wave effects using layered clear and colored resin, blending with a heat gun for realistic water patterns.
- Create personalized resin jewelry with dried flowers and glitter, utilizing silicone molds for unique shapes.
- Design resin coasters using silicone molds and mix-ins like glitter and dried flowers for visually stunning pieces.
- Craft decorative bowls and trays by mixing metallic powders or foil into resin for shimmering, artistic home accents.
Prepping for Resin Crafts
To guarantee a successful resin art project, it is essential to gather important supplies and prepare your workspace adequately. First things first, you need your resin, gloves, mixing cups, and stir sticks. These items are non-negotiable! Trust me, you don’t want to be halfway through mixing and realize you forgot something significant.
Safety precautions are super important. Resin can be messy and a bit stinky, so make sure you’re working in a well-ventilated area. And those gloves? They’ll protect your hands from sticky situations—literally!
Now, let’s talk workspace organization. Choose a dust-free environment, as even a tiny speck of dust can ruin your masterpiece. The temperature should be between 65°F and 70°F to confirm your resin cures properly. Cover your tables and floors with heavy-duty plastic to protect them from spills. Imagine this: your project goes great, but your floor looks like a resin disaster. Yikes!
Use a level to make sure your work surface is flat. An even surface helps the resin spread smoothly, avoiding those frustrating pools of resin. Start simple, maybe with coasters or small artwork, to build your skills. Happy crafting!
Glossy Impact
Let’s explore the Glossy Impact technique, which brings a stunning, high-gloss finish to your artwork!
We’ll cover the essential materials you’ll need, walk through a step-by-step guide, and share tips on preventing dust issues to guarantee a flawless result.
Get ready to transform your creations into eye-catching pieces perfect for any room!
Essential Materials Needed
Creating resin art with a glossy impact requires a carefully selected set of essential materials to guarantee both safety and quality in the final product.
To start, having a high-quality epoxy resin kit is critical. These kits typically contain both resin and hardener in a 1:1 ratio, securing ideal curing and a smooth, glossy finish. Equally important is resin safety; using protective gear like disposable gloves and a ventilated mask is non-negotiable due to the chemical components involved.
Accurate mixing techniques are another aspect to master. Here, mixing cups and stir sticks play a key role. They help you measure and combine the resin and hardener thoroughly, achieving the perfect consistency and securing vibrant colors.
To emphasize the essentials, consider the following items:
- Epoxy Resin Kit – Secures a perfect mix and glossy finish.
- Protective Gear – Includes disposable gloves and a ventilated mask for safety.
- Mixing Tools – Cups and stir sticks for precise mixing and vibrant colors.
Lastly, a dust-free workspace is fundamental. Cover all surfaces with heavy-duty plastic and maintain a controlled temperature of 65°F to 70°F to prevent contaminants from ruining your masterpiece.
Happy creating!
Step-by-Step Guide
Commence your resin art project by securely attaching art paper to a canvas using a decoupage medium, providing a stable foundation for the resin application. This step guarantees your art paper stays in place during the resin pour.
Now, it’s time to get creative with some resin techniques. Pour clear resin into the center of the canvas and let it naturally flow to the edges. It’s like watching water spread across a flat surface—mesmerizing!
To make those colors pop, try some color mixing. You can add a few drops of resin dye or pigment to part of your resin mix. Swirl the colors gently with a stick for a marbled effect or use different sections for a vibrant, segmented look. Use your fingers to smooth the edges of the resin, making sure it covers every corner.
Once your masterpiece is poured, cover it with a box or protective cover to keep dust away as it cures. This part requires patience; let it sit for 24 to 48 hours.
The wait is worth it—a glossy, glass-like finish that’s sure to wow anyone who sees it! Happy creating!
Preventing Dust Issues
Ensuring a dust-free environment is essential for achieving a flawless, glossy finish in resin art. You know how frustrating it is to spot tiny dust particles messing up your masterpiece. So, let’s explore some dust prevention techniques and clean workspace essentials to keep your resin art pristine.
First off, cover your artwork with a box or plastic container during the curing process. This simple trick creates a dust-free environment, shielding your piece from any pesky particles. Imagine it like a little fortress for your art!
Next, before you even start mixing your resin, make sure your workspace is spick-and-span. A clean workspace is essential to keep dust from settling on your fresh resin. Sweep, dust, and wipe down surfaces. Think of it as giving your art the best possible start.
Lastly, using a heat gun or torch can help remove bubbles and any dust trapped in the resin. But, be careful not to overheat the resin, or you might end up with more problems than you started with.
Here’s a quick recap:
- Cover artwork with a box or plastic container.
- Clean your workspace thoroughly.
- Use a heat gun or torch cautiously.
Happy crafting, dust-free!
Making Waves
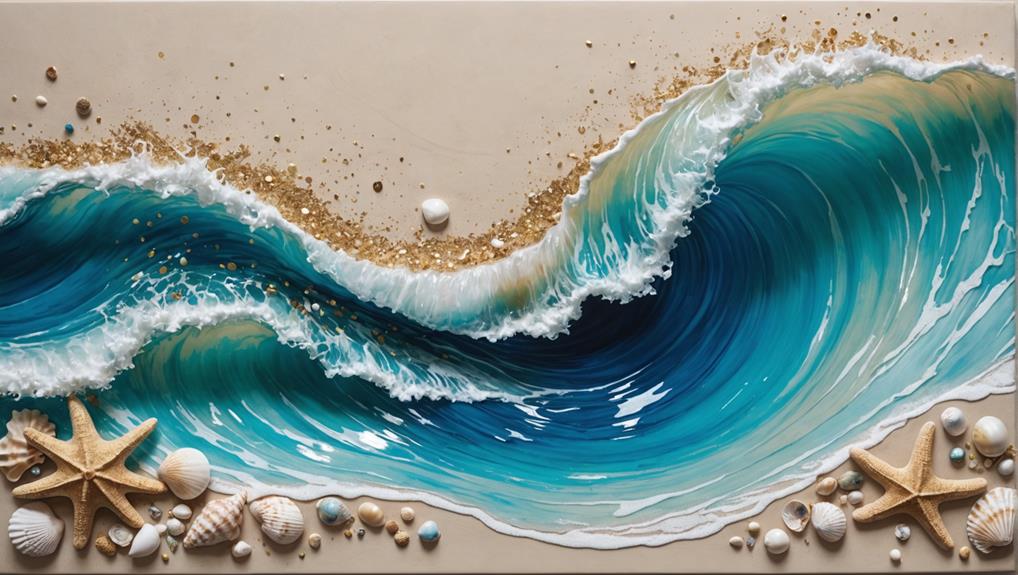
How can one capture the mesmerizing movement of ocean waves in resin art? By using oceanic textures and layering techniques, you can create stunning, lifelike wave patterns. Begin by layering clear and colored resin on a canvas, pouring in stripes to mimic the natural flow of ocean waves. The use of a heat gun is essential; it blends the colors seamlessly, making them flow together like real water.
To enhance the oceanic look, consider adding glitter or small decorative elements. These additions catch the light and give your piece a shimmering, dynamic quality. Experiment with different shades of blues, greens, and whites to achieve a realistic ocean effect. This careful blending and layering will capture the essence of the sea in your artwork.
Here’s a quick reference table to guide you through the process:
| Step | Action |
|---|---|
| 1 | Layer clear and colored resin in stripes |
| 2 | Use a heat gun to blend colors smoothly |
| 3 | Add glitter or decorative elements for shimmer |
| 4 | Experiment with different shades of blue, green, and white |
| 5 | Allow sufficient curing time to prevent pattern distortion |
Doodle Resin Craft
Building on the dynamic movement seen in oceanic resin art, doodle resin craft offers a more personalized and intricate approach to resin decoration. This technique involves drawing organic shapes with a marking pen, which form the basis for your design. These doodles can vary from simple lines to elaborate patterns, making each piece unique and full of doodle inspiration.
To add depth, drops of colored resin are strategically placed over the doodled designs. This gives the artwork a 3D effect, making it pop. The artistic techniques used here are versatile and can be applied to many surfaces like coasters, art pieces, or even decorative items. The fun part? Experimenting with colors and shapes is highly encouraged. You can create textures and patterns by tapping tinted resin onto the designs, making each piece truly one-of-a-kind.
Consider these points to get started:
- Personal Touch: Use your doodles to make your art uniquely yours.
- 3D Effects: Apply colored resin drops to enhance depth and visual interest.
- Versatility: This technique works on various items, from coasters to wall art.
Dive into doodle resin craft to explore endless creative possibilities!
Art Resin Pouring

Art resin pouring offers an exquisite method for creating enchanting abstract designs by blending mixed epoxy resin with various colors on a chosen surface. It’s like magic happening right before your eyes!
First, mix your resin with a hardener in a 1:1 ratio; this guarantees your masterpiece will cure correctly and stay clear. Once mixed, add your favorite colors and pour the blend onto your canvas.
Here’s where the fun begins: using resin techniques like a heat gun or stirring sticks, you can manipulate the resin to blend colors, create cells, or even form intricate patterns. Imagine the colors swirling and merging—each piece is a unique work of art!
But don’t forget, a level surface is vital. If your canvas isn’t level, the resin might pool in one area and mess up your design.
Patience is key, too. Most epoxy resins need about 24 hours to fully harden. This waiting period is important for avoiding imperfections. So, while you might be enthusiastic to show off your creation, trust the process and let it cure completely.
When it’s done, you’ll have a stunning, glossy piece of art that’s truly one-of-a-kind!
Resin Coasters
Creating resin coasters offers a versatile and aesthetically pleasing way to incorporate customized designs into functional home decor. These coasters can be crafted using silicone molds, enabling unique shapes and designs that truly reflect your personal style.
The magic of resin art lies in its ability to mix and match various materials, rendering each piece one-of-a-kind. Imagine incorporating glitter, dried flowers, or colored pigments to create stunning visual effects that captivate anyone who sees them.
For those looking to explore their artistic side, experimenting with creative patterns and color blending can lead to remarkable results. You can make your coasters resemble artistic elements like geodes or ocean waves by layering colored resin and manipulating the design during the pouring process. This not only adds a touch of uniqueness but also transforms everyday items into conversation starters.
To guarantee your resin coasters are both beautiful and durable, remember to apply a clear topcoat over the cured resin. This enhances the aesthetics and functionality, providing a glossy and solid finish.
Here are three steps to get you started:
- Choose your mold and design elements.
- Mix and pour resin, incorporating creative patterns.
- Apply a clear topcoat for durability.
With these steps, your resin coasters will be a true masterpiece!
Jewelry Making
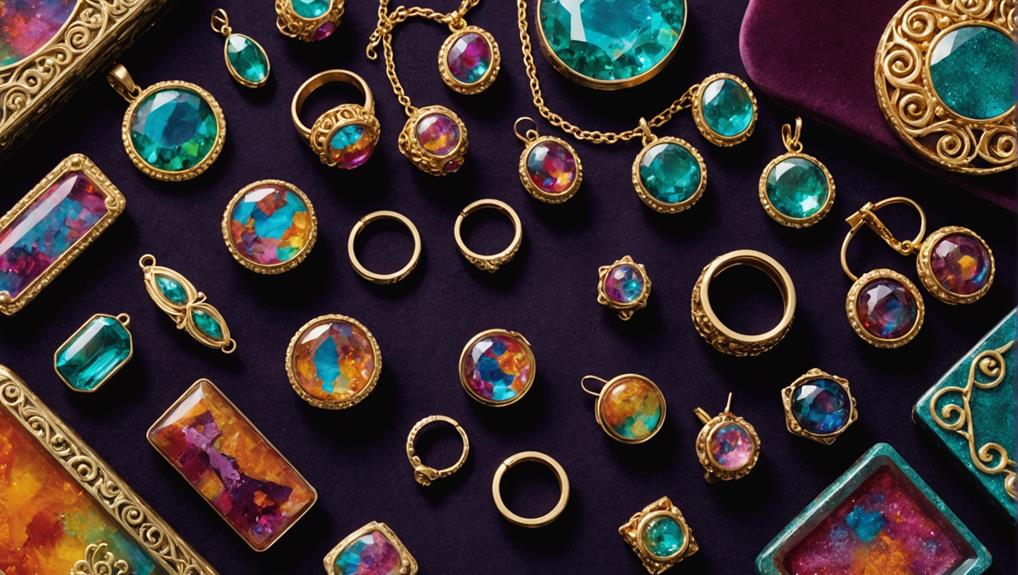
Resin jewelry making offers an enchanting avenue for crafting personalized accessories by incorporating decorative elements such as dried flowers, glitter, and colored pigments. Imagine creating unique pendants, earrings, and rings that sparkle with your favorite colors and designs.
The magic begins with resin color mixing, where you can blend different pigments to get the perfect hue for your pieces.
Using silicone molds is crucial. These molds come in all shapes and sizes, from simple circles to intricate designs, helping you shape your jewelry just the way you want. Once your resin is poured into the molds, patience is key. Proper curing time, usually 24 hours, guarantees your jewelry will be durable and ready for wear.
After it’s cured, the fun continues with sanding and polishing. This step makes your pieces crystal clear and shiny, removing any imperfections.
Then, you can add jump rings and chains to transform your resin creations into wearable art. With the right jewelry design techniques, you can create custom necklaces and bracelets that are truly one-of-a-kind.
Home Decor Accents
Home decor accents made with resin are a fantastic way to add a splash of creativity to your space.
Imagine having a decorative bowl filled with shimmering metallics or a floral paperweight preserving the beauty of fresh blooms on your coffee table.
These resin pieces not only enhance the look of your home but also make for great conversation starters!
Resin Decorative Bowls
Crafting resin decorative bowls offers a versatile and artistic way to enhance home decor with personalized and functional pieces.
These bowls are not just practical; they can be stunning works of art. Using silicone molds, you can create intricate designs that fit perfectly with any home decor style. Add creative embellishments like dried flowers or glitter to make your bowl unique. For a touch of festivity, think about incorporating seasonal themes — imagine a bowl with autumn leaves for fall or pastel petals for spring.
Creating these bowls is a fun and rewarding project. Here are three key steps to get started:
- Preparation: Choose a silicone mold and gather your resin, pigments, and any embellishments.
- Pouring and Curing: Mix and pour the resin into the mold, then let it cure for 24 to 48 hours.
- Finishing: Apply a clear topcoat to enhance durability and give your bowl a glossy finish.
These bowls can serve as eye-catching centerpieces or handy storage solutions. The beauty of resin art lies in its ability to transform everyday items into extraordinary decor pieces.
Trays With Metallics
Incorporating metallic elements into resin trays enhances them into sophisticated home decor accents that captivate attention. Imagine a tray that sparkles when it catches the light, shimmering with gold or silver accents. This effect is easily achieved with metallic techniques, such as mixing metallic powders or adding foil to the resin. Not only do these techniques bring a touch of luxury, but they also make your tray designs stand out in any room.
Silicone molds are perfect for this kind of project. They allow you to create intricate shapes and designs, providing endless possibilities for personalized trays that match your style. You can even layer clear resin over the metallic elements, adding depth and dimension that makes your tray look like a piece of art.
Experimenting with different colors of metallics, combined with vibrant resin hues, can also create striking contrasts. This is particularly great for modern and contemporary decor themes. Imagine a deep blue tray with shimmering gold accents—it’s like having a piece of the night sky right in your home!
In short, trays with metallics are a fun and creative way to add a touch of elegance to your home decor.
Floral Paperweights
Floral paperweights, created by encasing dried flowers and foliage in clear epoxy resin, offer a timeless way to preserve nature’s beauty while adding a functional and elegant touch to any desk or shelf. Imagine having a piece of springtime captured forever, right on your workspace! These paperweights are not just pretty; they’re practical too.
To get started, pick small, flat flowers that hold special meaning—think flower symbolism like roses for love or daisies for innocence. Arrange them in a silicone mold and pour in the mixed resin, ensuring every petal is covered. Waiting might be the hardest part, as the resin needs 10-24 hours to harden. But trust me, it’s worth the patience!
Here are some tips to make your floral paperweights stand out:
- Contrast Elements: Add a layer of colored resin or glitter beneath the flowers to create a stunning visual contrast.
- Personal Touch: Choose flowers that are meaningful to the recipient for a personalized gift.
- Resin Techniques: Experiment with different resin techniques like layering or adding tiny beads for extra flair.
Floral paperweights are a beautiful blend of art and function, perfect for any decor style.
Functional Items
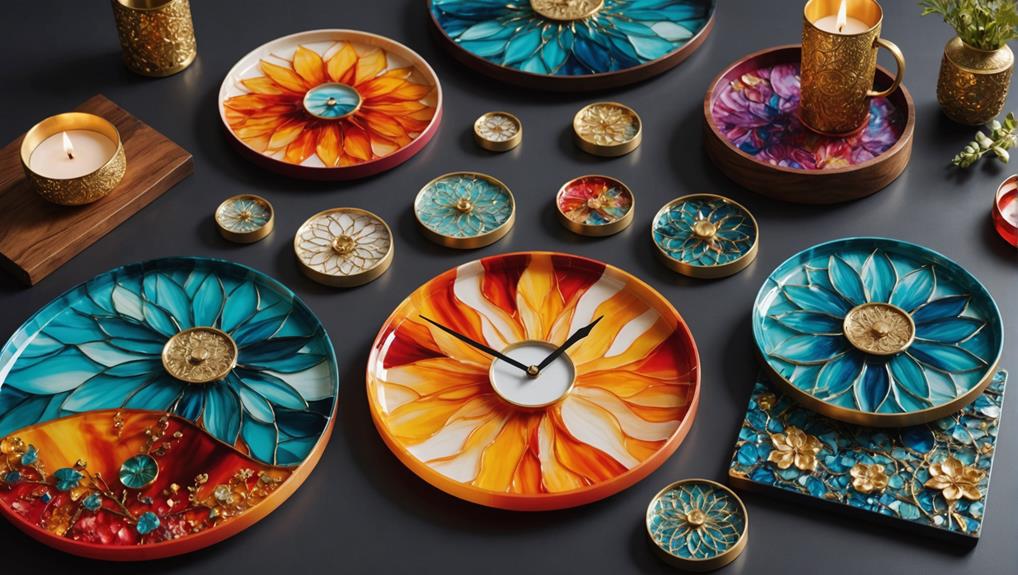
Resin art offers a versatile medium for creating functional items that blend utility with aesthetic appeal. One of the coolest things you can make is resin storage. Imagine having unique cabinet knobs that no one else has! By using contact lens cases as molds, you can create amazing designs and even add vintage jewelry for a special touch. It’s a fun way to make something useful and pretty.
Another neat idea is making napkin rings with resin. You can use fondant molds to add beautiful details, making your dining table look super stylish. Plus, they’re a great conversation starter!
Candle holders are another fantastic functional design you can create with resin. Adding flowers or crystals inside the resin makes them not only practical but also eye-catching. They’ll light up any room with a touch of elegance.
Don’t forget about key holders! Crafting these with resin is perfect for keeping keys organized. You can mix in different colors or tiny decorations to make each one unique.
Lastly, custom-made resin buttons are a fun way to add flair to your clothes or craft projects. With endless colors and patterns, you can let your creativity run wild!
Personalized Items
Let’s talk about personalized resin items that add a special touch to your creations.
Custom resin keychains make awesome gifts, especially when you add initials, small photos, or charms.
And how cool is resin photo art? It seals your favorite pictures in glossy resin, making the colors pop and keeping them safe forever.
Custom Resin Keychains
Crafting custom resin keychains offers a versatile and creative way to personalize everyday items by embedding small charms, initials, or photos into epoxy resin.
One of the most exciting aspects of this craft is resin color mixing. You can create stunning hues and gradients by combining different pigments. This allows you to match the keychain with your favorite colors or even make it reflect a special theme.
Charm selection is another fun part of the process. Whether you choose tiny animals, glittery stars, or miniature initials, these elements can make your keychain truly one-of-a-kind. The possibilities are endless, and it’s a great way to express your personality.
Here’s a simple guide to get you started:
- Resin Color Mixing: Combine pigments to create unique colors, adding depth to your designs.
- Charm Selection: Pick small charms that reflect your interests or initials for a personal touch.
- Curing Time: Guarantee patience during the 10 to 24-hour curing period for a durable finish.
To make these keychains, use silicone molds designed for easy removal after the resin cures. A touch of glitter or dried flowers can add extra flair.
Once finished, attach them to keyrings or chains, creating practical yet stylish accessories.
Unique Resin Photo Art
Building on the creativity of custom keychains, unique resin photo art offers a sophisticated way to preserve cherished memories within personalized decorative items.
Imagine capturing your favorite moments, from family vacations to precious pet photos, and turning them into stunning pieces of art. The process is straightforward: trim your photographs to fit the chosen mold, spread resin evenly over the image, and let it cure for a glossy, durable finish.
One of the coolest things about resin preservation techniques is how you can personalize each piece. Want to make a set of coasters featuring your kids’ silly faces? You got it. How about some wall art with embedded memories of your wedding day? Absolutely!
To make your resin photo art even more special, you can add dried flowers, glitter, or colored pigments alongside the photographs. This not only enhances visual appeal but also makes each piece unique.
Don’t forget the magic touch—a heat gun! Using it during resin application helps eliminate bubbles, giving you a smooth surface. While the curing process takes 10 to 24 hours, the result is a long-lasting, beautiful display of your treasured images.
Decorative Accents
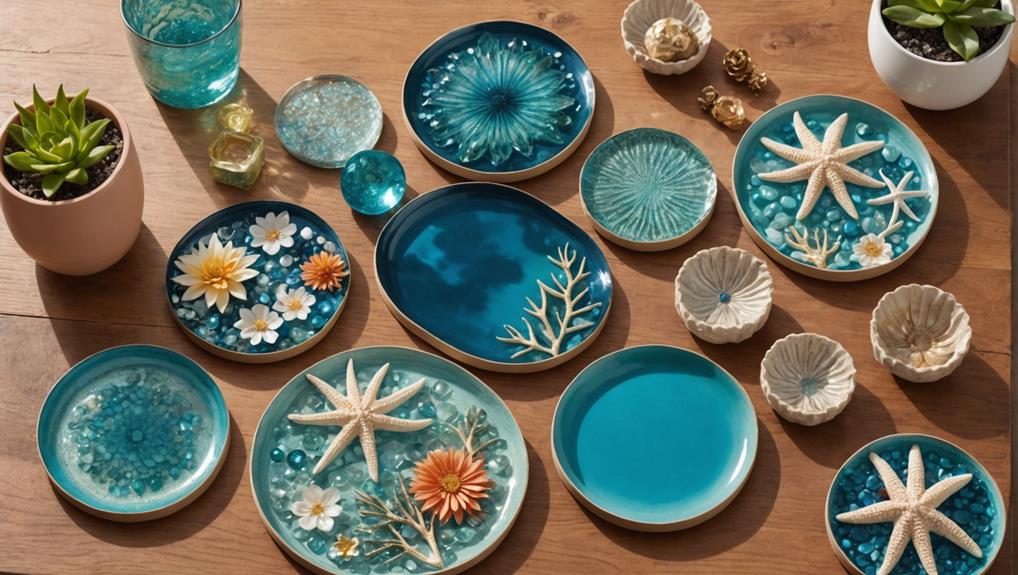
Incorporating resin into decorative accents offers a versatile and creative way to enhance various elements within your home or garden. By experimenting with resin color combinations and creative embedding techniques, you can achieve stunning effects that boost your decor.
Imagine creating vibrant suncatchers that mimic sea glass. These beautiful pieces can hang in sunny windows, reflecting light and adding a splash of color to any room.
Or, how about crafting seasonal ornaments? Pour resin into festive molds and embed little decorations like glitter or dried flowers. These ornaments are perfect for holiday decor and make your space feel extra special.
Here are three ideas to get you started:
- Garden Stones: Use resin and stone molds to create decorative garden stones. You can embed pebbles, flowers, or even personalized messages for a unique touch.
- Whimsical Mobiles: Design fun mobiles or hanging decorations using various resin colors and shapes. These playful accents can brighten up any space.
- Custom Picture Frames: Create custom picture frames with artistic resin finishes. Incorporate unique shapes and colors to match your interior design theme.
With resin, the possibilities for decorative accents are endless and endlessly fun!
Tabletop Decor
Designing resin tabletop decor offers a sophisticated way to introduce both functionality and artistic flair to your living spaces. Imagine walking into a room and seeing a stunning resin tray or bowl that catches everyone’s eye.
With resin color mixing, you can experiment with vibrant pigments and dazzling additives like glitter or metallics to create pieces that truly pop. Picture a deep blue tray with swirling gold accents—it’s like having a piece of the ocean right on your table.
Incorporating natural elements like wood, stones, or dried flowers can add a visually striking, textured look to your resin pieces. Imagine a clear resin bowl with delicate dried flowers suspended inside, creating a beautiful and unique centerpiece. Texture techniques, such as embedding different materials, bring an extra layer of depth and interest to your creations.
Using silicone molds guarantees that your items have consistent shapes and sizes, which is perfect if you want to make a matching set of bowls or trays. And don’t forget the importance of proper curing time. It’s crucial for achieving that glossy, durable finish that will make your decor last for years.
Resin Buttons

Resin buttons are an exciting way to add a personal flair to your crafts!
By mixing epoxy resin with colorful acrylic paints and adding fun embellishments like glitter or dried flowers, you can create buttons that are as unique as you are.
Once you’ve let them harden, these custom buttons can be drilled for sewing or used as decorative accents, making them both beautiful and practical.
Unique Button Designs
Creating unique button designs with epoxy resin opens up a world of customization, allowing for vibrant colors, intricate patterns, and personalized embellishments that enhance ordinary buttons into standout accessories.
Utilizing various resin color combinations can transform simple buttons into stunning pieces of art. Imagine mixing blues and greens to achieve a mesmerizing ocean effect or combining pinks and purples for a dreamy, whimsical look. The possibilities are endless, and following button design trends can keep your creations fresh and fashionable.
Adding embellishments like glitter, dried flowers, or beads within the resin not only enhances the visual appeal but also provides a tactile experience that sets these buttons apart.
Here’s a quick guide to get you started:
- Choose your mold: Button-shaped molds come in various sizes and designs, allowing you to create buttons that perfectly suit your needs.
- Mix your resin and colors: Experiment with different resin color combinations to achieve your desired look. Don’t forget to mix thoroughly to avoid bubbles!
- Add embellishments: Personalize your buttons with glitter, dried flowers, or tiny beads to make them truly unique.
Once cured, these buttons can be used in clothing, bags, and home decor, adding a personal and artistic touch to any project.
Crafting With Resin
Utilizing button-shaped molds and epoxy resin, crafting resin buttons offers a versatile and creative way to produce vibrant and personalized accessories.
It’s like making tiny pieces of art that you can wear or use to jazz up your favorite items. By experimenting with resin color mixing, you can create a rainbow of buttons that match any project or outfit. Acrylic paint is perfect for adding color, letting you mix and match shades to your heart’s content.
To make your resin buttons truly unique, try embedding small decorative items, like glitter or tiny charms, within the resin before it cures. This adds a touch of sparkle or whimsy to your designs. Use different resin texture techniques to give your buttons a special finish—whether it’s smooth and glossy or has a more textured look.
The curing process for resin buttons usually takes about 24 to 48 hours, depending on the resin’s brand and thickness. Make sure you mix the resin thoroughly, usually in a 1:1 ratio, following the manufacturer’s instructions.
Once cured, you can drill small holes in your buttons for sewing onto garments or use them as decorative accents in various crafts.
Happy crafting!
Cube Resin Craft
Encapsulating small objects within a clear resin cube offers a unique and enchanting way to create personalized display pieces. This craft technique, known as cube resin crafting, allows you to preserve various items, such as artificial foliage or decorative elements, in a stunning and lasting form.
First, let’s talk about color experimentation and object encapsulation. By playing with different colors and textures, you can create visually striking pieces that reflect your personal style.
Here are three tips to enhance your cube resin projects:
- Warm the Resin: Before pouring, warm the resin slightly to eliminate bubbles, ensuring a crystal-clear finish.
- Choose the Right Mold: Silicone molds are ideal for creating cube shapes because they allow for easy release of the cured resin.
- Patience in Curing: Allow the resin to cure completely for 24 hours before demolding to achieve a perfect, hardened cube.
A well-crafted resin cube not only serves as a beautiful home decor item but also makes for a thoughtful and unique gift.
Door Knob Transformations
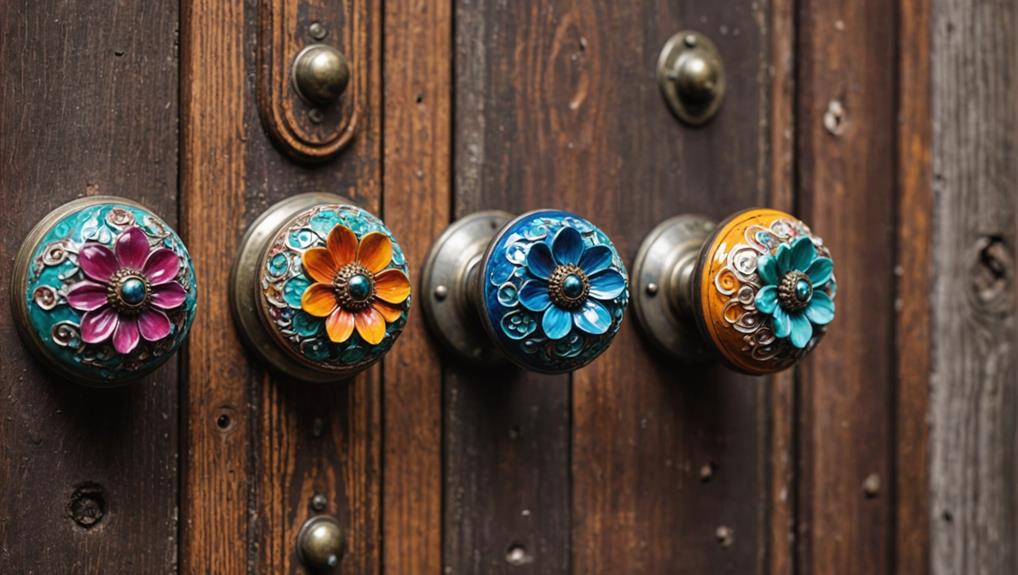
Transforming ordinary door knobs with resin can enhance the aesthetic of your cabinets, imbuing them with personalized designs and vibrant colors. Imagine opening a drawer with a knob that sparkles or shows off your favorite pattern—pretty cool, right?
To achieve these stunning knob aesthetics, start by making certain your knob is clean and dry. This step is vital to avoid any imperfections in your final product.
Next, get creative! You can adhere scrapbook paper or decorative baubles to the existing knob. This is where you can let your imagination run wild.
Once you’ve got your decorations in place, it’s time to use resin techniques. Carefully pour a layer of epoxy resin over your knob, making sure it covers every detail. This will give it a glossy, durable finish.
But remember, patience is key. Allow the resin to cure completely according to the manufacturer’s instructions, typically 24-48 hours. This waiting period guarantees that your knobs are not only beautiful but also long-lasting.
Experiment with different colors, patterns, and embellishments to create one-of-a-kind door knobs that will make your cabinets truly stand out.
Frequently Asked Questions
What Resin Art Sells the Most?
Resin coasters and jewelry, particularly pendants and earrings, dominate resin art sales. These items align with current resin art trends and popular resin techniques, offering both aesthetic appeal and practical use, thereby driving their market success.
Can You Make Good Money Selling Resin Art?
Yes, you can make good money selling resin art. Effective marketing strategies and appropriate resin art pricing are essential. Unique, customizable pieces sold via platforms like Etsy or local markets can yield significant profits, ranging from $10 to over $100.
Is the Resin Art Business Profitable?
The resin art business is indeed profitable. Current resin art trends and high market demand for unique, customizable pieces enable artists to earn substantial income, particularly through online platforms and local markets, where personalized, handmade goods command premium prices.
What Is the Best Resin Art?
The best resin art combines advanced resin techniques with thoughtful color combinations, creating visually stunning pieces. Techniques such as layering and embedding, paired with vibrant hues, result in mesmerizing designs like ocean-inspired art, geode patterns, and galaxy-themed creations.
Conclusion
In conclusion, resin art offers a plethora of creative possibilities, from glossy finishes and wave effects to intricate doodles and functional decor like tabletops and door knobs.
Each project allows for unique expression and practical application, making resin crafts a versatile medium.
The diverse techniques and outcomes guarantee that enthusiasts, whether beginners or seasoned crafters, can find inspiration and satisfaction in their work.
Embracing resin art can transform ordinary objects into stunning, personalized masterpieces.


Leave a Reply