")
Ready to get crafty this Easter? These 33 creative ideas will spark your imagination and help you whip up some fun decorations. From quick projects for the kids to unique touches for your holiday celebrations, you’ll find a variety of ways to brighten up your home. Grab your supplies, gather your family, and let’s get crafting!
Easter Basket Crafting from Recycled Materials
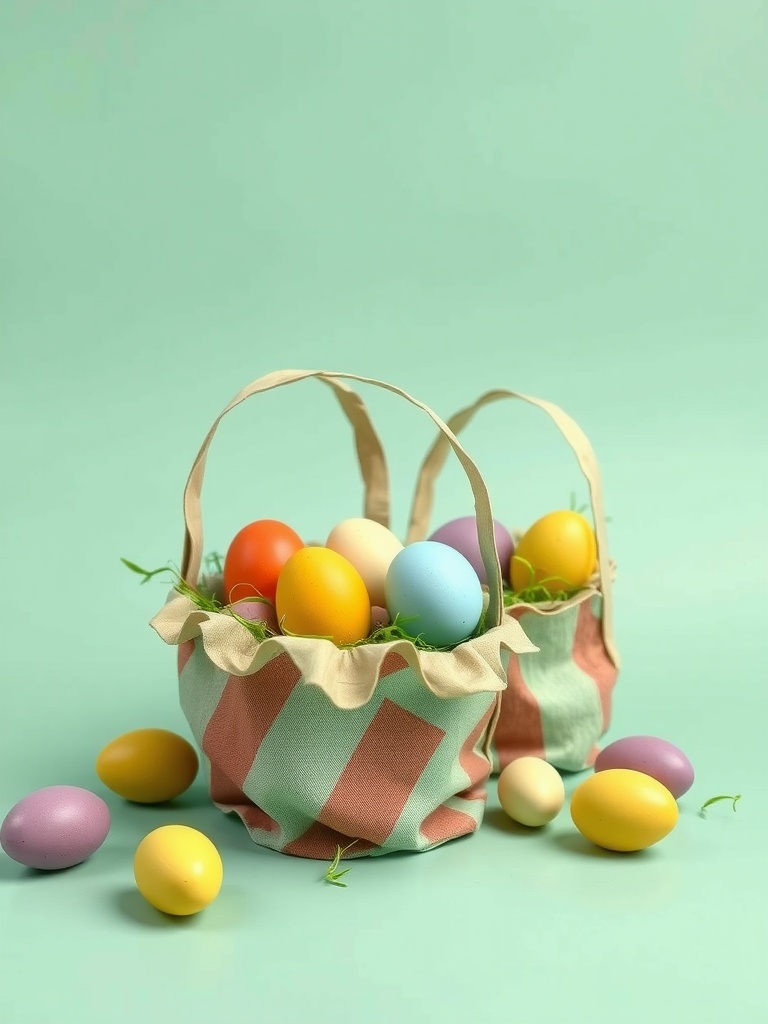
Creating Easter baskets from recycled materials is fun and eco-friendly. The image shows two colorful baskets filled with pastel-colored eggs. These baskets are perfect for the Easter egg hunt and can be made using items you already have at home.
To start, gather materials like old fabric, cardboard, and any embellishments you can find. Cut your fabric into strips and glue them together to form a basket shape. Use cardboard for the base for added strength. Once your basket is formed, decorate it with paint or markers to give it a festive look.
For filling, consider using shredded paper or grass. This adds a nice touch and makes the baskets look fuller. You can also personalize each basket with the names of family members or cute little messages.
Don’t forget to fill the baskets with colorful eggs! You can use plastic eggs or even paint real ones for a classic touch. This craft is not just a way to celebrate Easter; it’s also a great opportunity to teach kids about recycling and creativity.
Flower Seed Bombs for Spring
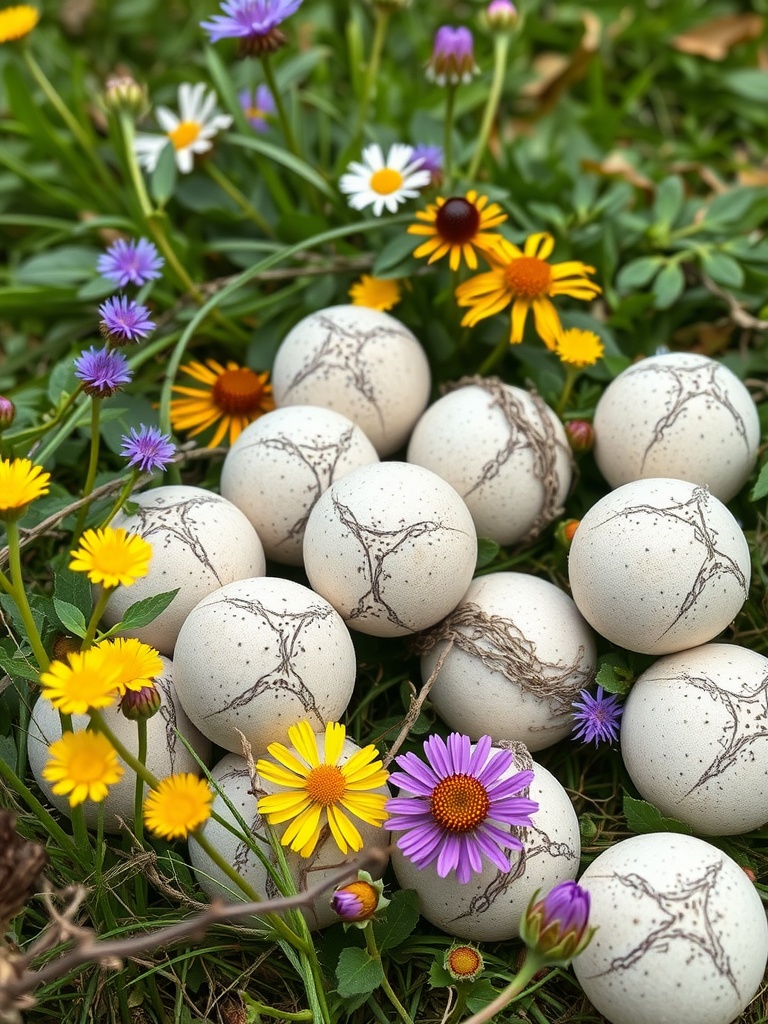
Spring is the perfect time to bring a little joy to your garden and the environment. Flower seed bombs are a fun and creative way to spread beauty and support local pollinators. The image showcases a delightful assortment of seed bombs nestled among vibrant flowers, creating a lively scene that invites anyone to join in on the fun.
Making flower seed bombs is easy and requires just a few materials: flower seeds, clay, and compost. Start by mixing equal parts of compost and clay in a bowl. Then, sprinkle in your chosen flower seeds. Add a bit of water to create a moldable mixture. Roll the mixture into small balls and let them dry for a day or two.
Once dried, these seed bombs can be tossed in your garden or in areas that need a pop of color. They’ll break down naturally, allowing the seeds to sprout and bloom into beautiful flowers. This craft not only brings beauty but also helps the environment by supporting bees and butterflies.
Pom-Pom Bunny Decorations

Pom-pom bunny decorations are a fun and charming way to brighten your Easter celebrations. These cute bunnies are made from fluffy pom-poms, giving them an adorable, cuddly appearance. You can create them in various colors, like soft pink or classic white, to match your Easter theme.
To start making your pom-pom bunnies, you’ll need some yarn, scissors, and a pom-pom maker. First, choose your yarn colors. Wrap the yarn around the pom-pom maker several times to create a nice, full pom-pom. After securing it with a knot, cut the loops and fluff up the pom-pom.
Next, shape your bunny’s body by combining two pom-poms: one for the body and a smaller one for the head. Use a hot glue gun to attach them securely. For the ears, cut out two pieces of felt and glue them on top of the head. You can add small beads or buttons for eyes and a little felt nose to complete the look.
These bunnies can be placed on your dining table, used as centerpieces, or even given as gifts. They are sure to bring smiles and add a festive touch to your Easter gathering!
DIY Easter Egg Dyeing Techniques
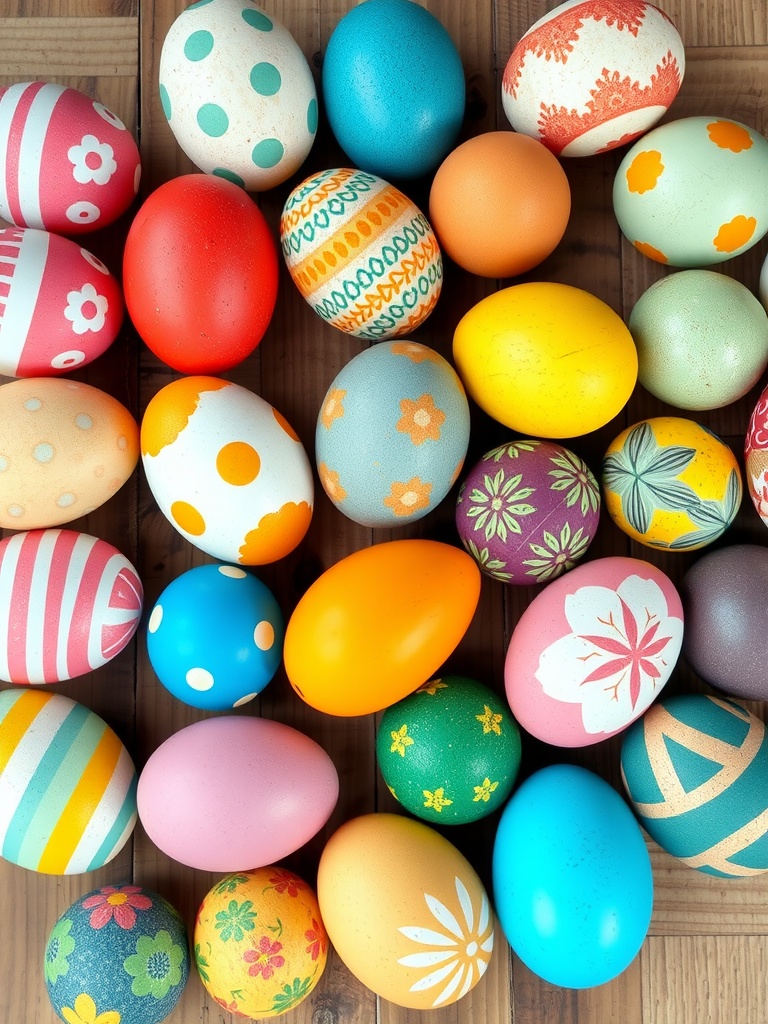
Get ready to embrace a rainbow of colors with your Easter eggs! This image showcases a vibrant collection of beautifully dyed eggs, each one a unique work of art. From bold patterns to soft pastels, these eggs are sure to inspire your own creative designs.
To get started, gather your supplies. You’ll need hard-boiled eggs, food coloring, vinegar, and water. You can also include markers, stickers, or paint for extra flair. Mix one cup of warm water with a tablespoon of vinegar and a few drops of your favorite food coloring in a bowl.
For a fun twist, try different techniques! Use a sponge for a dabbing effect, or wrap rubber bands around eggs before dyeing to create stripes. You can even use a dropper to apply color precisely where you want it. Let the eggs dry on a wire rack or in an egg carton for the best results.
Don’t forget to let your imagination run wild! Incorporate nature by using leaves to create prints, or try out tie-dye patterns for a fun surprise. The possibilities are endless, so grab some friends or family and have a blast decorating your eggs together!
Marbled Easter Eggs with Shaving Cream
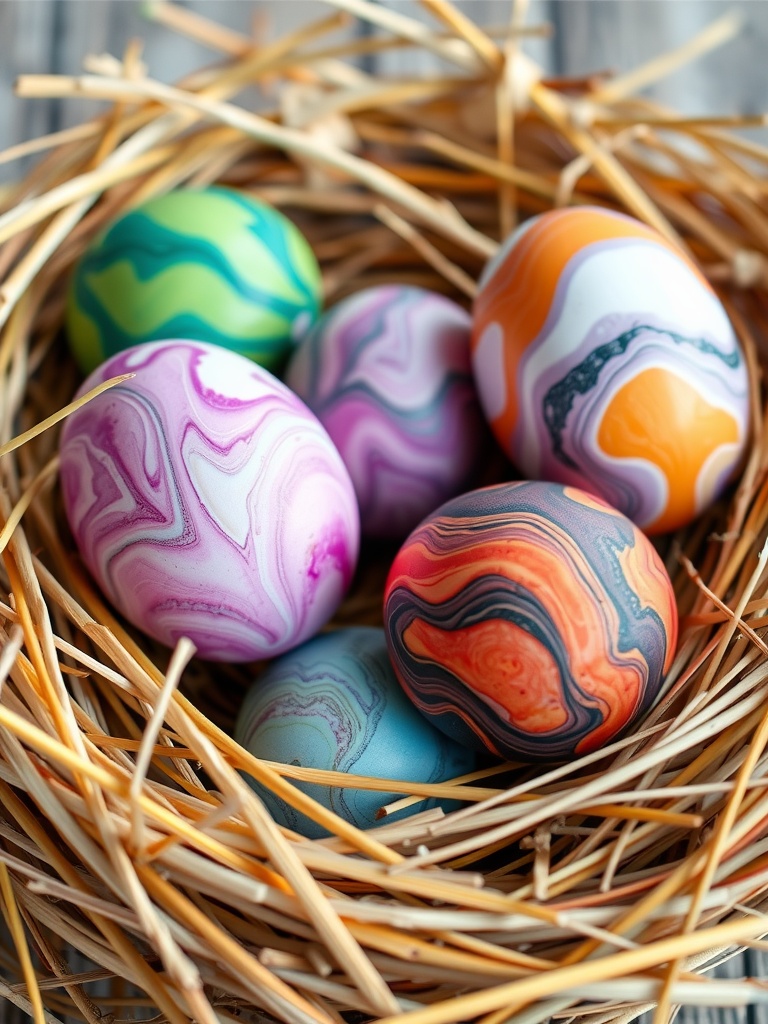
Get ready for a fun and colorful project with marbled Easter eggs! These eggs look stunning with their swirled patterns, and they are surprisingly easy to make. Using shaving cream and food coloring, you can create unique designs that stand out in any Easter display.
To get started, gather your materials. You will need hard-boiled eggs, shaving cream, food coloring, a toothpick or skewer, and a baking sheet. Spread a layer of shaving cream on the baking sheet, then add drops of food coloring on top. Use the toothpick to swirl the colors together, creating beautiful marbled patterns.
Next, roll your hard-boiled eggs in the shaving cream mixture. Make sure to coat them well, then let them sit for about 10-15 minutes. This allows the colors to penetrate and create that lovely marbled effect. After the time is up, rinse the eggs under cold water to remove the shaving cream, revealing the vibrant designs.
Once dry, your marbled Easter eggs will be ready to display. These make a great centerpiece or can be used in an egg hunt. Enjoy this creative project with family and friends, and don’t forget to take lots of pictures!
Eggshell Planters for Succulents
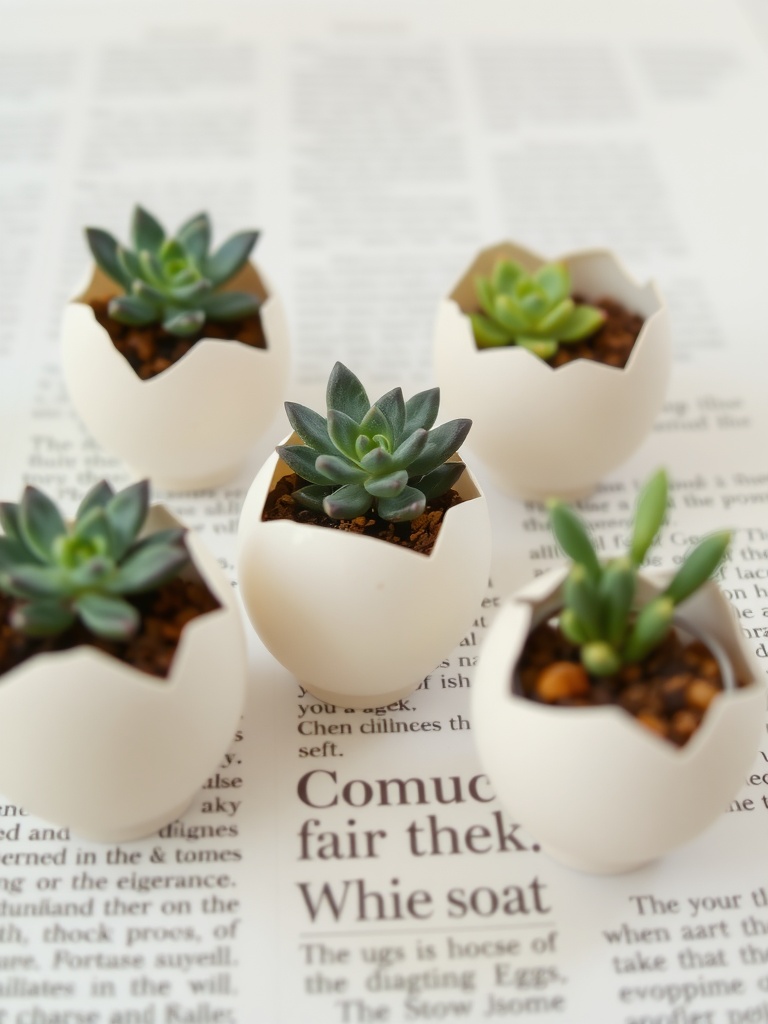
Eggshell planters are a fun and eco-friendly way to show off your succulents. These charming little pots are made from empty eggshells, making them perfect for celebrating Easter while adding a touch of nature to your home.
To create these delightful planters, start by carefully cracking open some eggs, leaving the bottom intact. Rinse out the inside and let them dry. Once your eggshells are ready, fill them with soil suitable for succulents. Choose small succulent plants to fit inside, as they look adorable peeking out of their new homes.
For a bright display, arrange the eggshell planters on a decorative tray or in a sunny window. You can also personalize them with paint or natural dyes to match your Easter decor. These tiny gardens not only look great but are also an engaging project for kids and adults alike!
Easter-Themed Wreaths
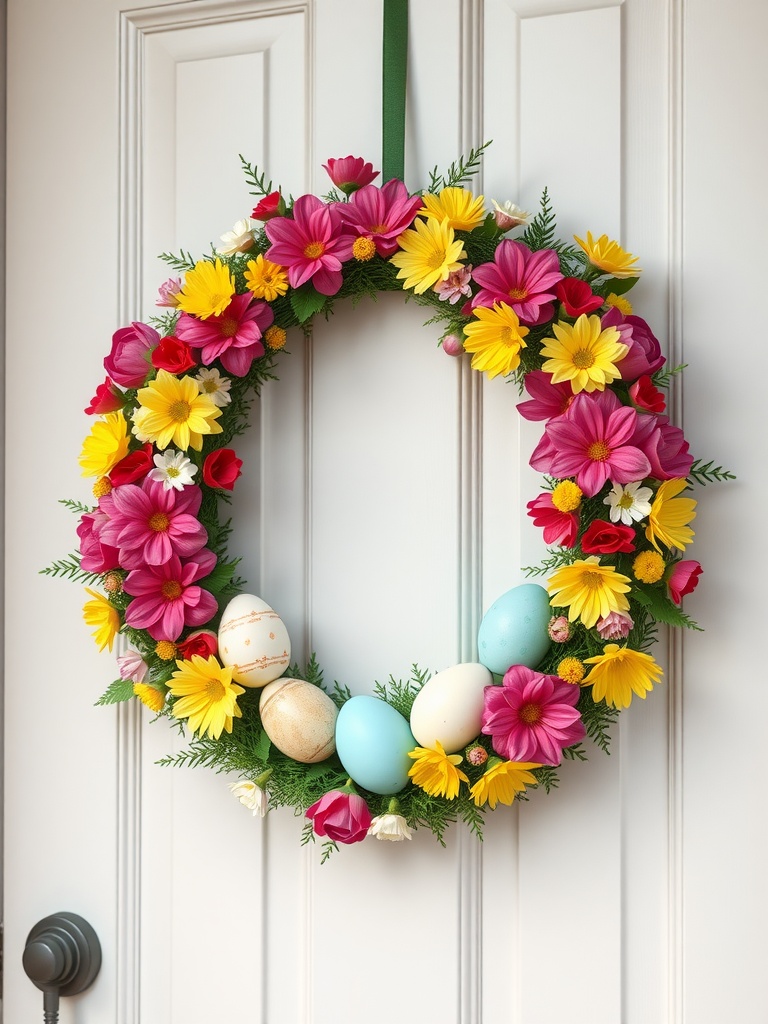
Creating an Easter-themed wreath is a fantastic way to welcome the season. The wreath in the image is a perfect blend of vibrant flowers and colorful eggs, showcasing the joy of Easter. You can easily make one like this at home to brighten up your front door.
Start by gathering your materials. You’ll need a wreath base (foam or twigs work well), faux flowers in bright shades like pink, yellow, and red, and some decorated eggs. Don’t forget floral wire, hot glue, and a sturdy ribbon for hanging.
Begin by attaching the greenery to the base, securing it with the floral wire. Next, arrange your flowers, mixing sizes and colors for a lively look. Once you’re happy with the arrangement, glue the flowers in place. Finally, add the eggs, placing them strategically among the blooms.
For the finishing touch, use a ribbon to hang your wreath. This cheerful decoration will not only brighten your door but also spread Easter cheer to everyone who passes by!
Cute Bunny Ear Headbands
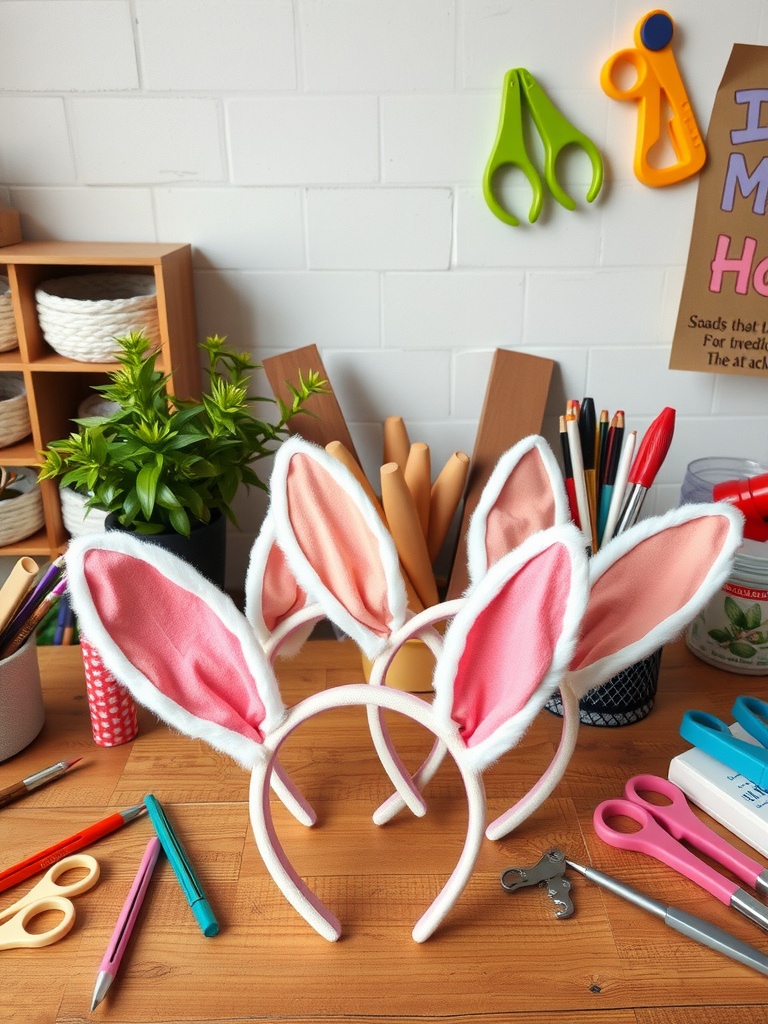
Get ready for some fun this Easter with adorable bunny ear headbands! These cute accessories are perfect for kids and adults alike, adding a playful touch to your holiday celebrations. Imagine wearing these fluffy ears while hunting for eggs or taking selfies with friends and family.
Making bunny ear headbands is simple and enjoyable. Start by gathering your materials: headbands, felt or fabric in pastel colors, scissors, and a hot glue gun. Cut out ear shapes from the fabric, making sure to include a cute inner ear detail.
Next, glue the ear shapes onto the headband, leaving enough space between them for comfort. For extra flair, you can add embellishments like ribbons or sequins. These headbands not only make a delightful accessory but also serve as a fun craft project to enjoy with loved ones!
Fabric Easter Egg Stuffed Toys
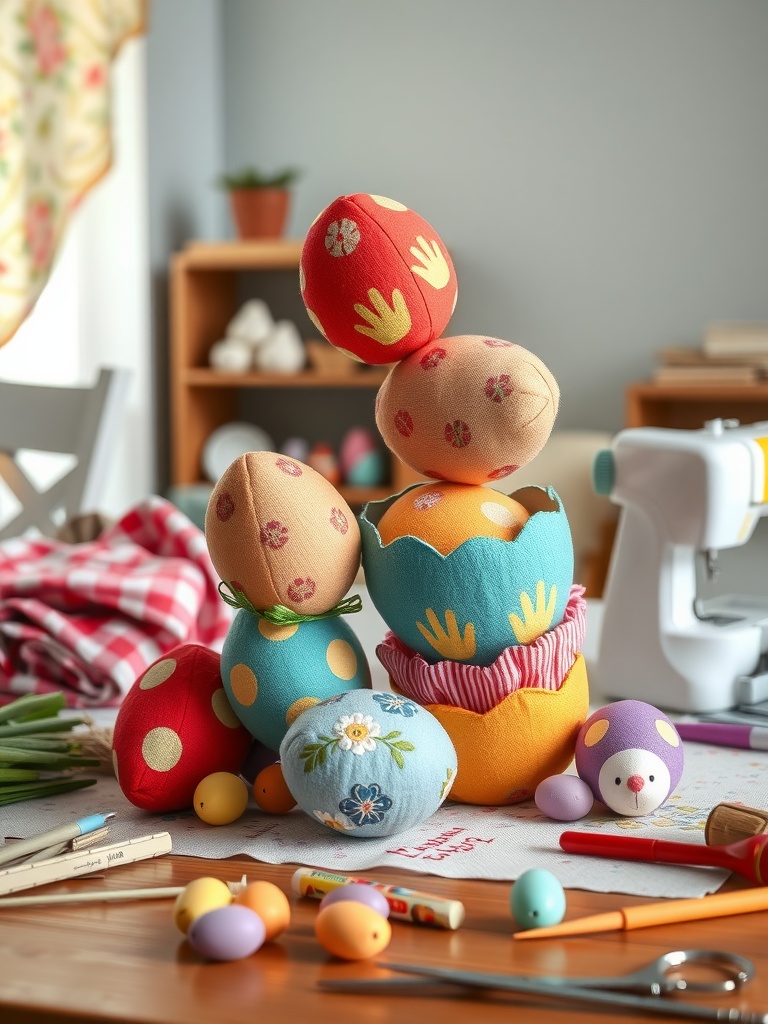
These fabric Easter egg stuffed toys bring a cheerful vibe to any space. They are soft, colorful, and perfect for kids and adults alike. The playful patterns and bright colors make them a delightful addition to Easter decorations or as gifts.
Creating your own fabric Easter eggs is not only fun but also a great way to use up leftover fabric scraps. Start by gathering materials like cotton fabric, stuffing, scissors, and a sewing machine or needle and thread. You can use various patterns to make each egg unique.
To make these toys, cut egg shapes from your fabric. Sew them together, leaving a small opening to fill them with stuffing. Once full, stitch the opening closed, and add any embellishments like buttons or embroidery. This hands-on activity is perfect for all ages, and kids will love personalizing their eggs with their favorite colors!
DIY Easter Garland with Eggs and Flowers
Brighten up your home this Easter with a lovely DIY garland made of colorful eggs and beautiful flowers. This cheerful decoration is perfect for draping over mantels, doorways, or even as a table centerpiece.
The garland in the image showcases a delightful mix of pastel-colored eggs interspersed with vibrant flowers. The combination of roses, daisies, and foliage creates a fresh, spring-like feel that is sure to uplift any space.
To create your own garland, gather supplies like faux eggs, artificial flowers, green leaves, and a sturdy string or twine. Start by arranging your flowers and eggs on a flat surface to decide on the layout. Once you’re happy with it, use a hot glue gun to secure each piece to the string.
For added charm, consider attaching some paper leaves for a pop of color. This simple touch can really enhance the overall look. After everything is secured and dried, your garland is ready to display! Hang it wherever you want to add a touch of Easter joy.
Easter Bunny Footprint Art
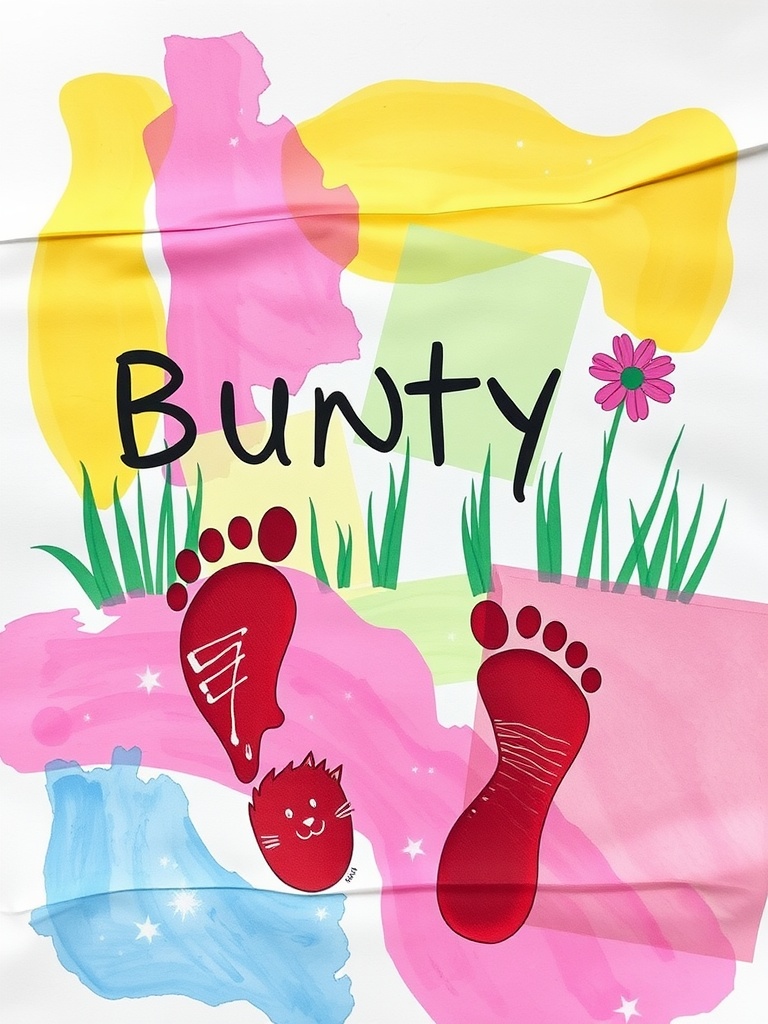
Create a fun and colorful Easter Bunny footprint art piece to celebrate the holiday! This craft features vibrant colors and playful designs that are perfect for kids and families. The footprints symbolize the Easter Bunny’s visit, making it a heartwarming activity to do together.
To start, gather materials like non-toxic paint, a canvas or large piece of paper, and some brushes. You can choose any colors you like, but pastels often work well for a spring theme. Once you have everything ready, have your child dip their feet in the paint and step onto the canvas. This creates the bunny’s footprint.
After the footprints dry, you can add details! Use brushes to paint bunny ears at the top of the footprints and a cute little face below. You might also want to add grass, flowers, or other decorations around the footprints to make the artwork pop. Don’t forget to write the child’s name and the year on it for a lovely keepsake!
Handmade Paper Flowers for Easter
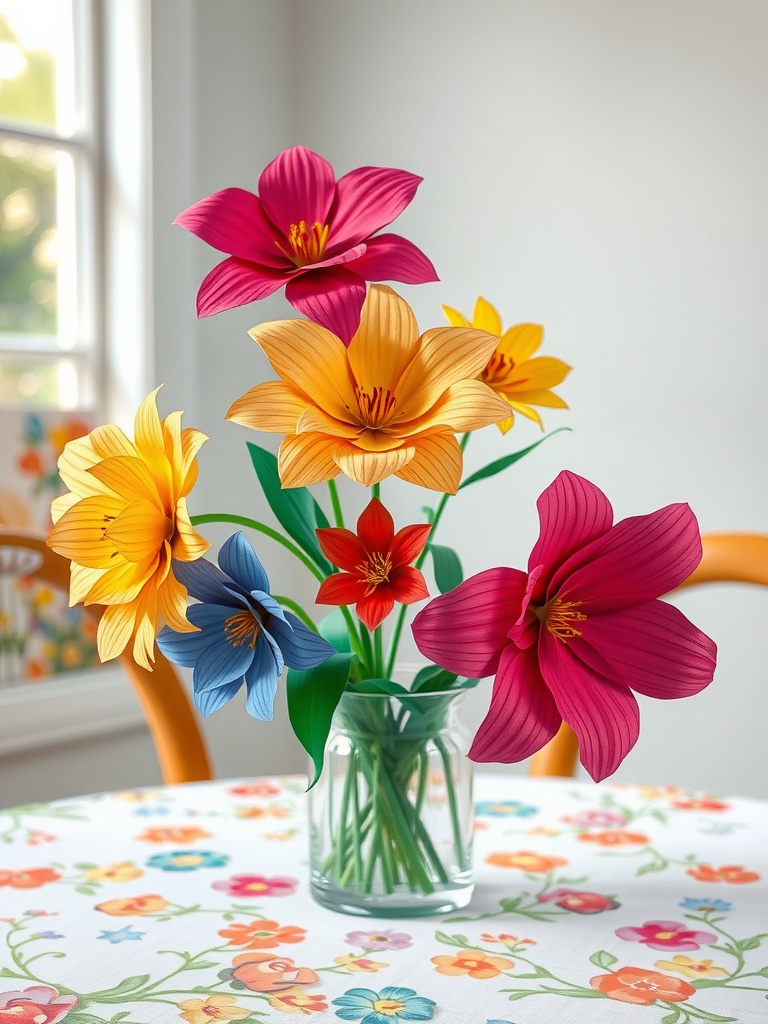
Handmade paper flowers are a cheerful addition to your Easter decorations. They bring a burst of color and creativity into your home, making them perfect for this festive occasion.
In the image, you can see a stunning bouquet of paper flowers in vibrant shades of pink, yellow, and blue. These flowers are beautifully crafted and arranged in a clear vase, showcasing their unique shapes and colors. Having such a bouquet on your table can instantly brighten up the space.
Creating your own paper flowers is not only fun but also a fantastic way to spend time with family or friends. You can use colorful paper, scissors, and a bit of glue to bring your floral creations to life. Choose your favorite flower designs, cut them out, and glue them together for a personalized touch.
Decorative Easter Egg Tree
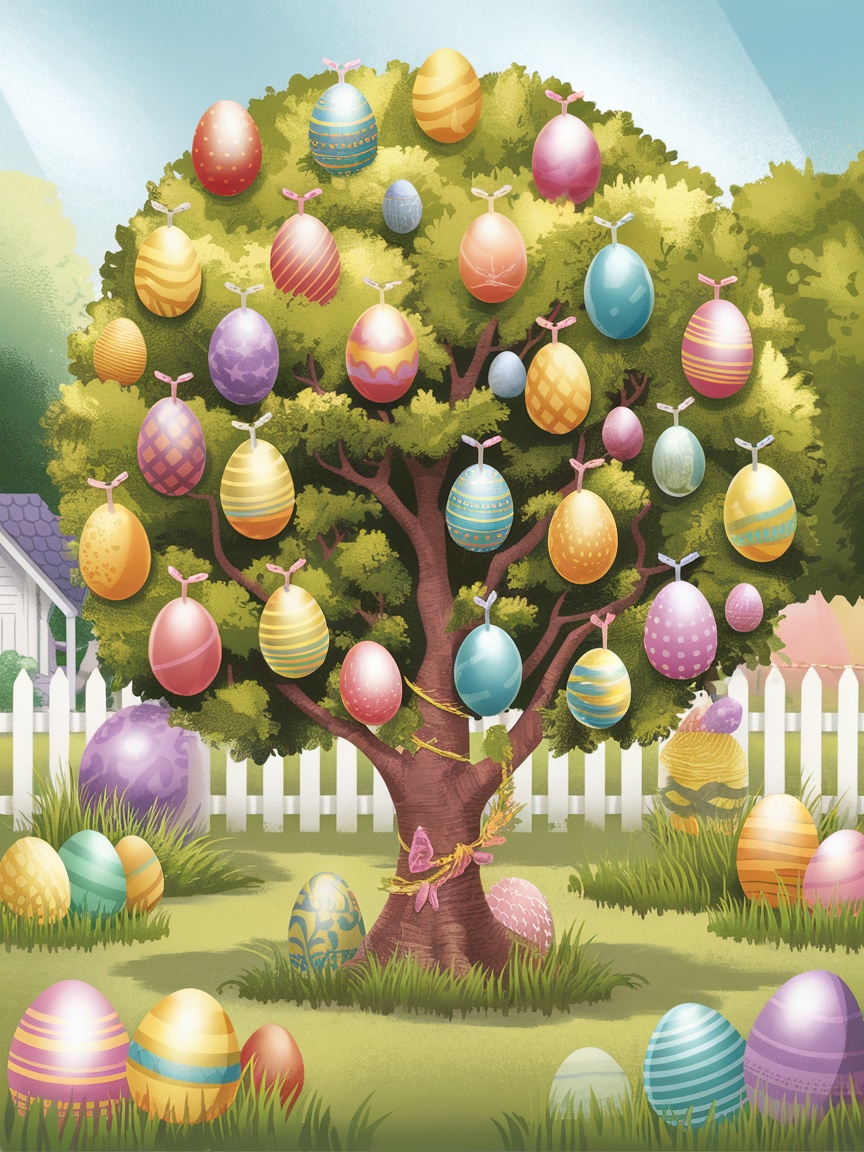
Decorating for Easter can be a fun way to bring the holiday spirit into your home or garden. One delightful idea is creating a decorative Easter egg tree. This charming project adds a whimsical touch to your spring celebrations.
In the image, we see a beautifully crafted tree adorned with colorful Easter eggs. The eggs come in various pastel colors and designs, creating a cheerful atmosphere. Surrounding the base of the tree are more eggs, adding to the festive look. The tree itself is sturdy, with lush green leaves that contrast wonderfully with the vibrant eggs. This scene captures the essence of Easter joy.
To create your own Easter egg tree, start by gathering materials. You will need a branch or a small tree, plastic or real eggs, and some string or ribbon for hanging. If you want to add more flair, consider using paint or markers to decorate the eggs. You can also use stickers or washi tape for quick designs.
Once you have your supplies, it’s time to get crafting! Begin by painting or decorating the eggs. Allow them to dry completely. Next, tie the string or ribbon to each egg, making it easy to hang them on your tree. Arrange the eggs in a pleasing manner on the branches. Finally, place the tree in a spot where it can be admired, whether that’s indoors or out.
Bunny-Print Tea Towels

Brighten up your kitchen this Easter with charming bunny-print tea towels. These delightful towels not only add a festive touch but also make practical and fun decor. Imagine hosting a brunch, and your guests are greeted by these adorable bunny designs!
To create your own bunny-print tea towels, start with plain cotton or linen towels. You can use fabric paint or markers to draw or stamp cute bunny faces. For an extra touch, consider adding grass designs at the bottom to complete the look.
When decorating, it’s best to lay the towels flat on a surface covered with newspaper to prevent any paint from seeping through. Make sure to let the paint dry completely to ensure the designs last through many washes.
These towels also make excellent gifts! Roll them up and tie with a ribbon for a lovely presentation. Whether for a friend or as a treat for yourself, these bunny-print towels will surely bring smiles this season.
Easter Egg Hunt Signs
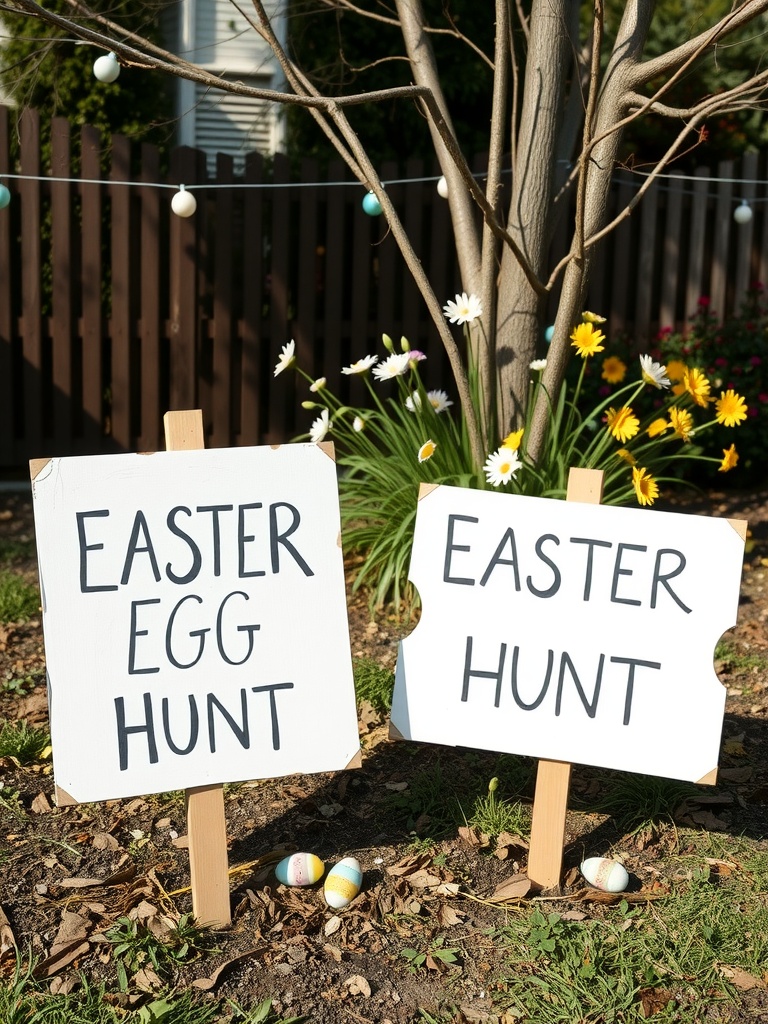
Easter egg hunts are a highlight for many families during the holiday. To make yours even more fun, consider adding some vibrant signs to guide the little ones. The image shows two playful signs marking a designated hunt area. One reads ‘EASTER EGG HUNT’ while the other simply says ‘EASTER HUNT’. These signs are not just functional but can also be a delightful decoration for your yard.
Creating your own Easter hunt signs is easy and enjoyable. Grab some sturdy wood or thick cardboard and paint them white. Use bold, black letters for visibility. You can even add some colorful decorations or drawings to make them pop! Once your signs are ready, place them around the yard to create a welcoming atmosphere.
For a personal touch, consider letting the kids help with the decorating. They can contribute their artistic flair, making the signs unique to your family. This not only gets them involved but also builds excitement for the hunt ahead. So gather your materials, and let’s get crafting!
Egg Carton Chicks

Egg carton chicks are a fun and easy craft that brings a splash of color and joy to your Easter celebrations. Using simple materials, you can create adorable little chicks that can serve as decorations or gifts.
To make these cute chicks, start with a clean egg carton. Cut out the individual sections to form the body of your chick. Paint them bright yellow or any color you prefer. Once dry, add googly eyes and a small orange triangle for the beak.
Next, use colorful feathers or paper to create wings and a fluffy tail. For added charm, you can tie a tiny bow around the neck using ribbon. The kids will love helping out with this part!
These little chicks can be placed around your home or used in an Easter basket. They make great table centerpieces too. Enjoy crafting and let your creativity shine!
Easter Story Stones
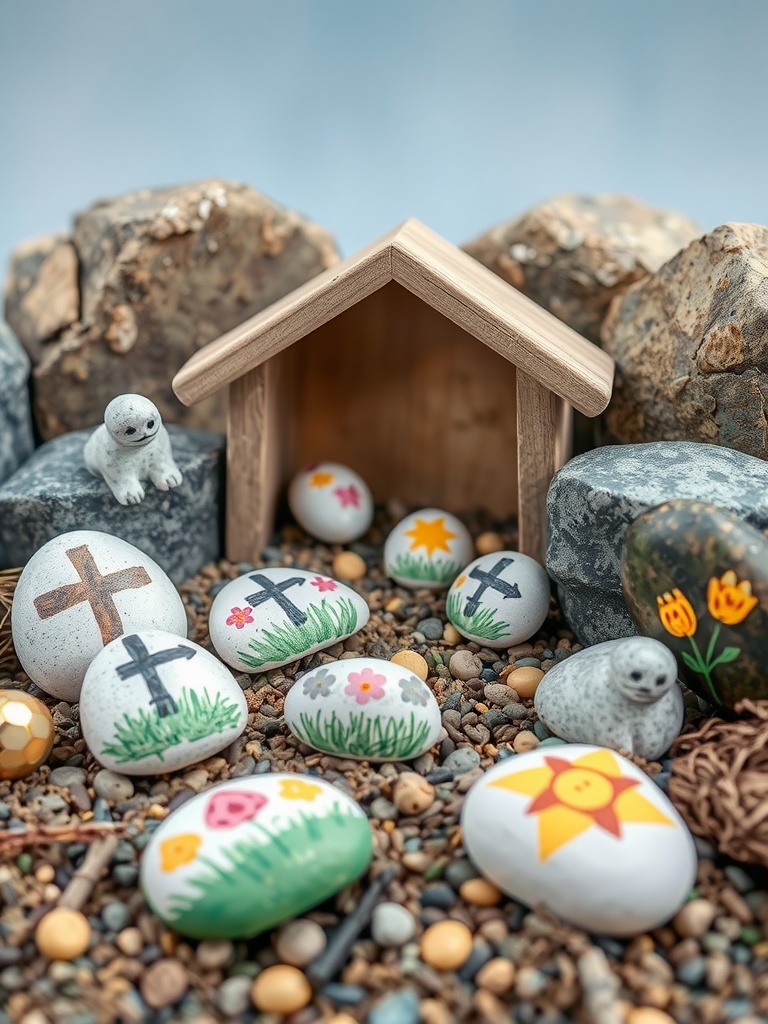
Easter Story Stones are a creative way to share the Easter story and engage kids in a fun, hands-on activity. The image showcases beautifully painted stones, each depicting different elements of the Easter narrative, from flowers and crosses to eggs and the sun.
To get started, gather some smooth stones, acrylic paints, and a paintbrush. You can use a fine brush for details and larger brushes for backgrounds. Let your imagination run wild! Consider what scenes or symbols are significant to you and your family during Easter.
Once your stones are painted, set up a storytelling session with your kids. Arrange the stones in a way that tells the story, perhaps starting with the crosses and ending with the bright sun. This not only sparks creativity but also encourages meaningful conversations about Easter.
For a fun twist, you can even hide the stones around your yard or house and have a mini Easter egg hunt, where kids find the stones and then gather to tell the story based on what they discovered. It’s a delightful way to blend play and learning!
Spring-Themed Painted Rocks
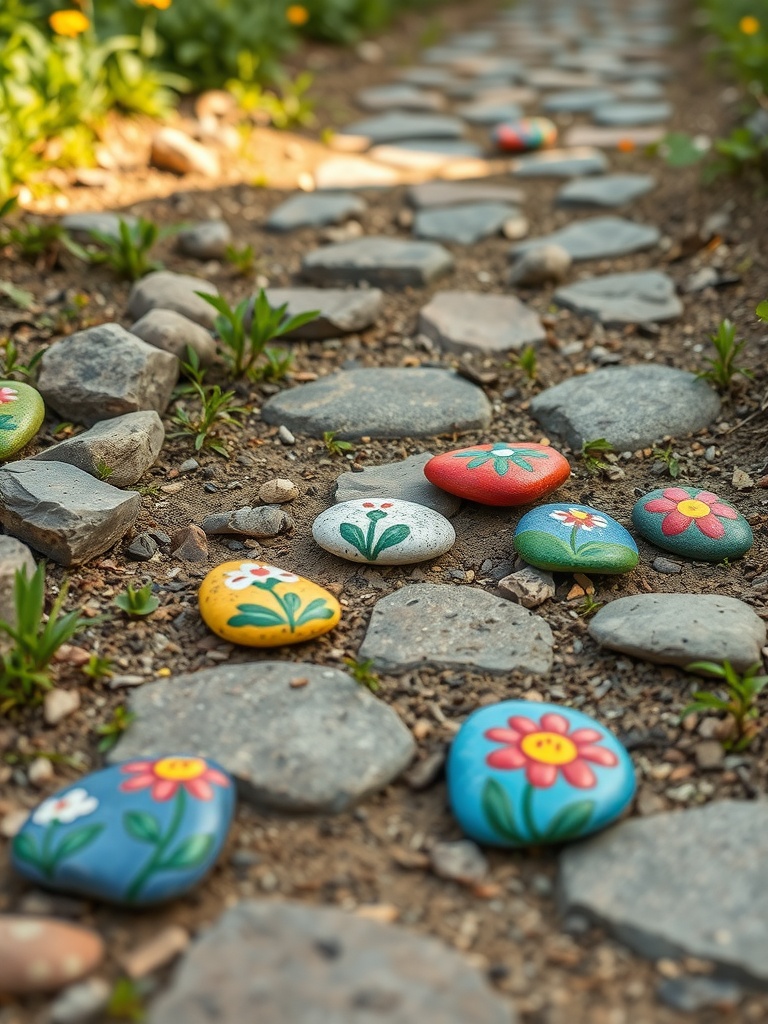
Spring-themed painted rocks are a fun and easy way to bring some color and joy to your garden or walkways. The image shows a lovely array of painted stones nestled among a path of flat stones. Each rock features cheerful designs, like flowers and vibrant colors, making it an inviting sight.
To create your own spring-themed painted rocks, start by gathering some smooth stones. Clean them well and let them dry. Choose bright acrylic paints for your designs. You can use brushes or sponges to apply the paint, depending on the look you want.
Once your painted rocks are dry, finish them with a clear sealer to protect them from the elements. Place them along a garden path, in flower beds, or even as cheerful decor on your porch. These painted rocks not only brighten your outdoor space but also make a great project for kids and adults alike.
Felt Easter Egg Hunt Bags
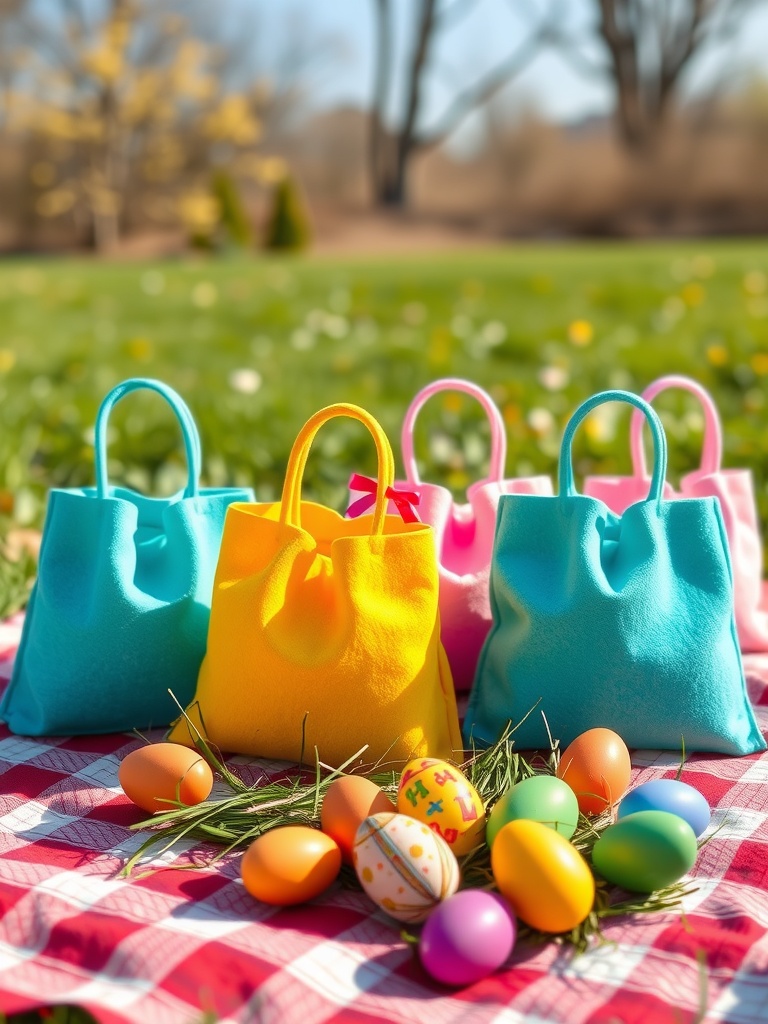
If you’re looking for a fun way to collect Easter eggs, these felt bags are perfect! They come in bright colors like blue, yellow, and pink, making them eye-catching and cheerful. Set against a lovely green background, these bags are not just cute; they are also practical for kids during an egg hunt.
The design is simple yet effective. Each bag has sturdy handles, making it easy for little hands to carry around. Plus, the soft felt material is lightweight but durable enough to hold all the treasures found during the hunt.
To make your own felt Easter egg hunt bags, gather some felt sheets, scissors, and a sewing kit. Cut out the bag shapes and sew or glue the edges together. Don’t forget to add some handles! Let the kids decorate them with stickers or fabric markers for a personal touch. This activity not only enhances the Easter experience but also gives kids a fun project to work on.
Bunny Mask Crafts for Kids
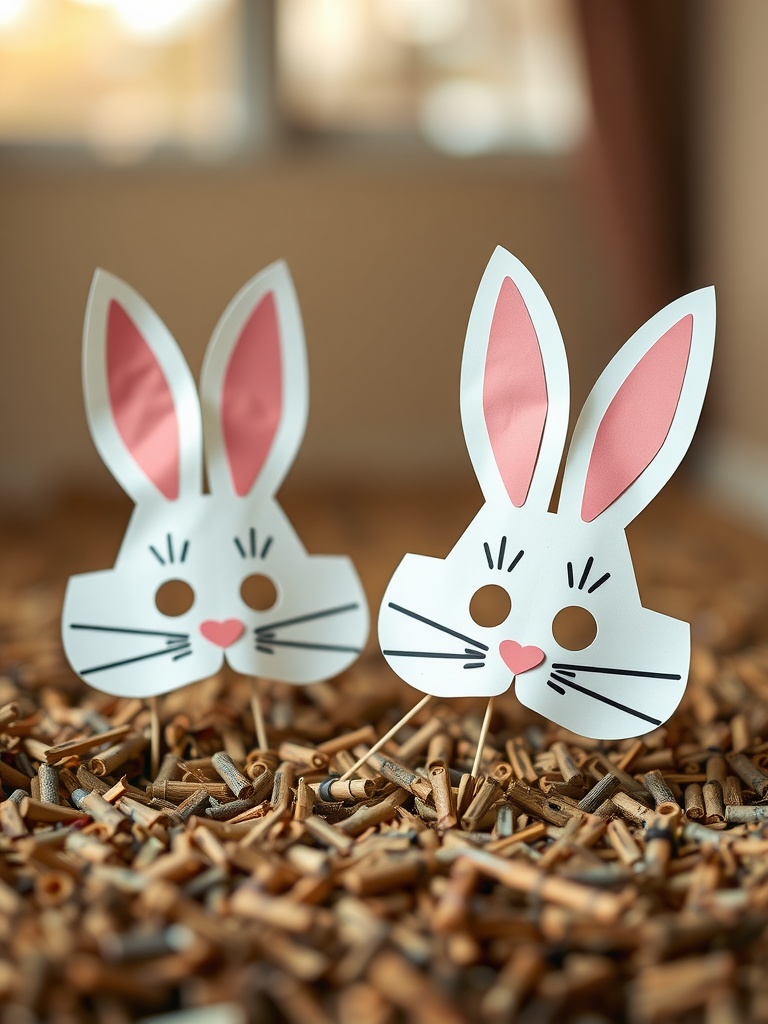
Bunny masks are a fun and simple craft idea for kids, especially around Easter! The image shows adorable bunny masks with big ears and cute faces, perfect for little ones to wear during holiday celebrations.
Creating these masks is easy and requires minimal supplies. You will need white cardstock, pink paper, scissors, glue, and a craft stick or string. First, cut out the mask shape from the cardstock. Include eye holes so kids can see while wearing it. Then, cut out ears from the white cardstock and pink paper to give them a pop of color.
Once your pieces are ready, glue the pink paper onto the ears and attach them to the top of the mask. Add a little nose and whiskers with a marker for extra personality. Finally, secure a craft stick at the bottom or attach string to wear it hands-free. Kids will love decorating these masks, and they can even personalize them with stickers or glitter!
Easter Egg Window Clings
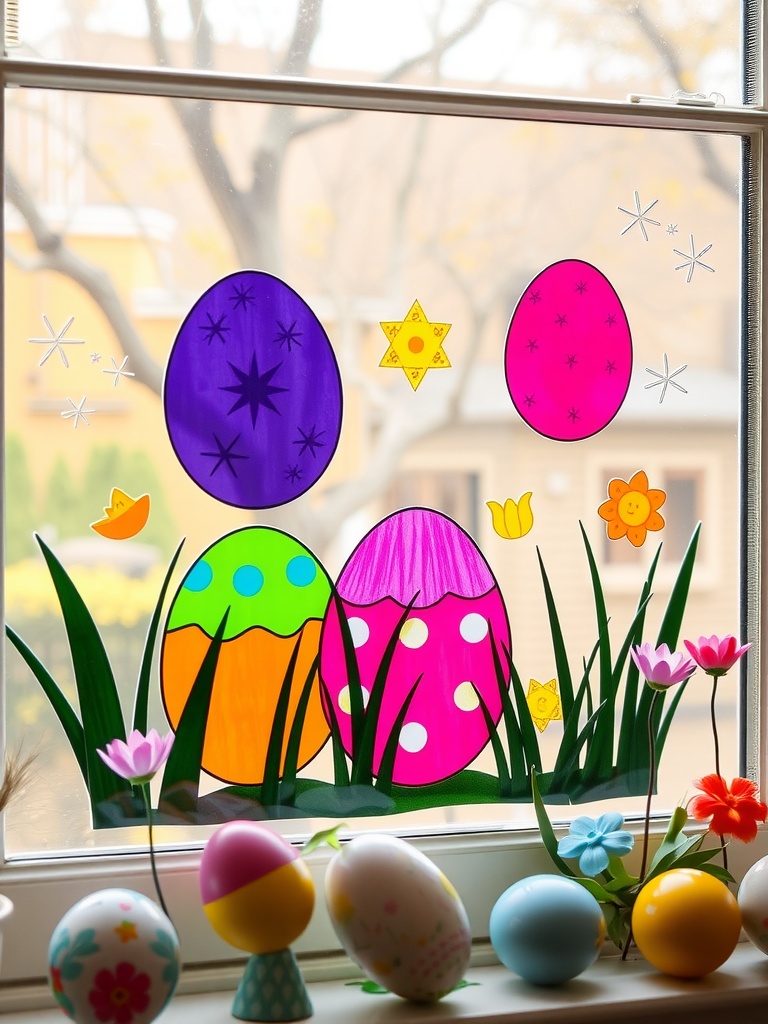
Brightening up your home for Easter can be fun and easy with window clings. These colorful decorations can instantly transform your windows into festive displays. The image shows a playful design featuring the words ‘Eastey Easter’ along with vibrant egg shapes, perfect for the season.
Creating Easter egg window clings is a simple craft that kids and adults alike can enjoy. To make your own, gather some materials like clear plastic sheets, washable markers, or paint. Sketch out your favorite egg designs and colors. Once done, allow them to dry.
After the clings are ready, just peel them off and stick them onto your windows. They are easy to remove and reposition, making decorating a breeze. You can mix and match designs or even add your own sayings to spread some cheer!
These window clings not only add a pop of color but also provide an interactive craft experience. Plus, they are a great way to involve kids in the holiday preparations. Enjoy creating your unique Easter decorations!
DIY Easter Candle Holders
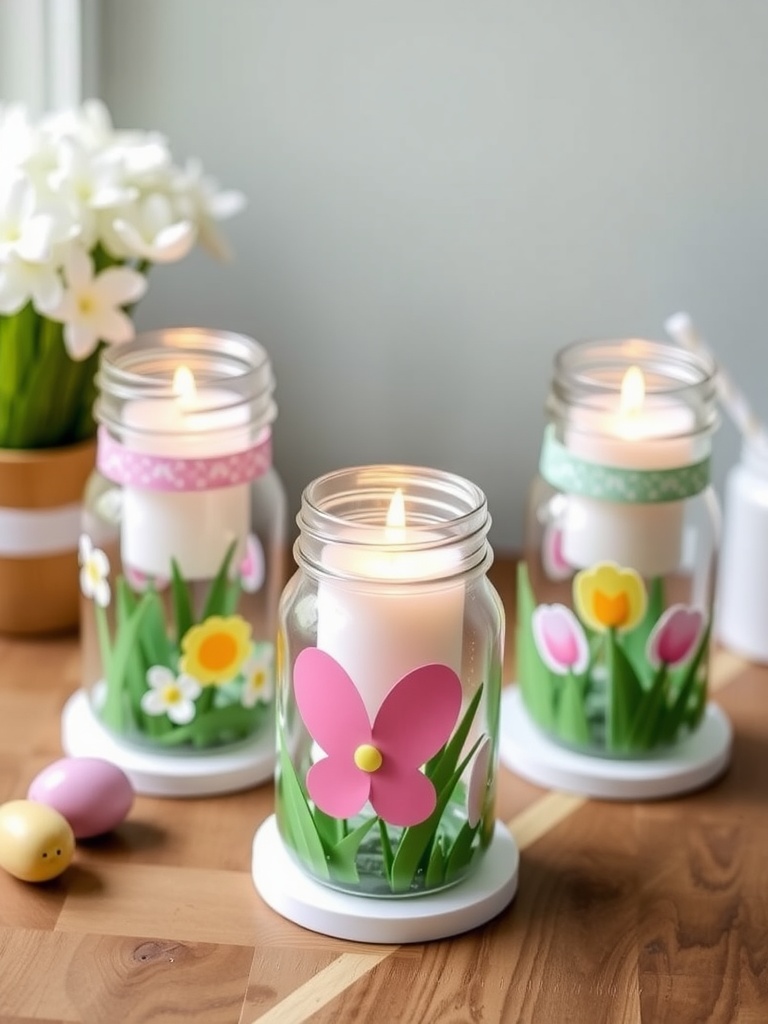
Create a warm and welcoming atmosphere this Easter with homemade candle holders. These candle holders not only brighten up your space but add a festive touch to your decor. Using simple materials, you can craft delightful holders featuring charming bunny motifs and vibrant colors.
To start, gather some clear glass jars, colored paper, and twine. Cut out bunny shapes from the colored paper and glue them to the jars. Fill the bottom with some faux grass for an outdoorsy feel. Insert a candle in each jar, and wrap twine around the jars for an extra rustic look. The glow from the candles will highlight your creative designs.
Don’t forget to add some decorative eggs around the candle holders to enhance the Easter theme. This project is easy and fun, making it perfect for a DIY afternoon with family or friends. You can mix and match colors and designs to suit your style or the vibe of your celebration!
Easter Basket Stuffed with Crafts
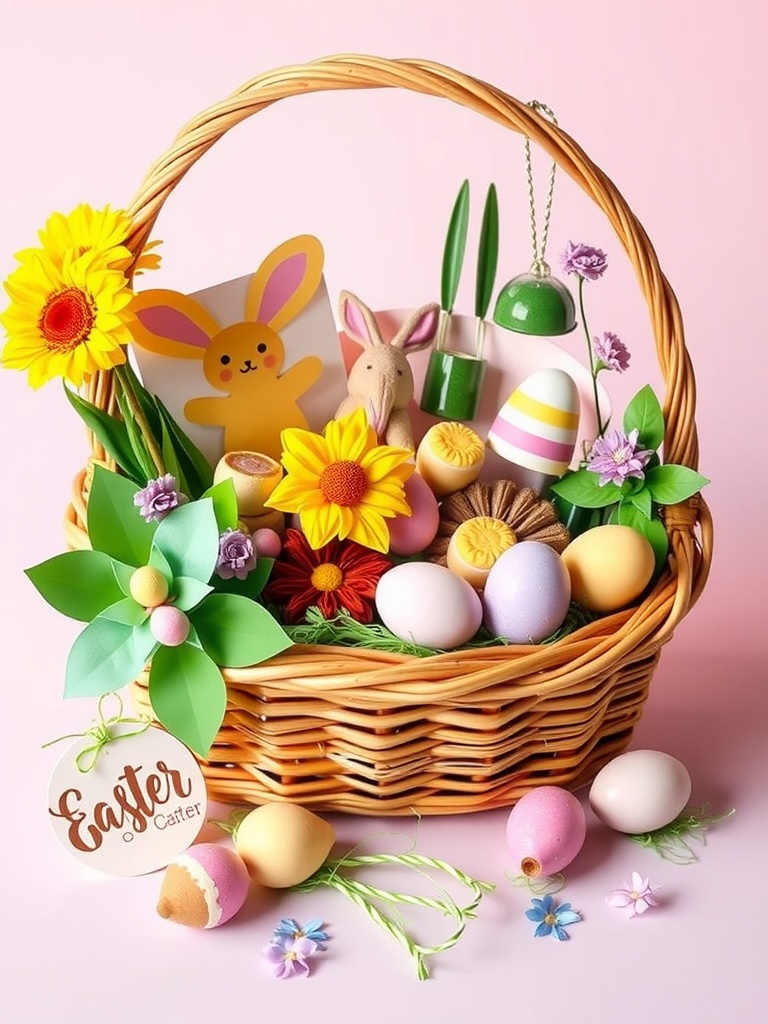
This Easter basket is a delightful mix of fun and creativity. It’s filled with vibrant decorations that inspire craft ideas for the holiday. From colorful eggs to cheerful flowers, it sets a joyful tone for your Easter celebrations.
The basket features a cute bunny cutout that adds a playful touch. It’s perfect for kids and adults alike, encouraging everyone to get involved in holiday projects. The bright colors and different textures make it visually appealing and inviting.
To create your own Easter basket of crafts, start with a sturdy basket and fill it with green grass or shredded paper as a base. Gather supplies like plastic eggs, artificial flowers, and cute bunny figures. You can even include paints and brushes for those who want to personalize their decorations.
Consider hosting a craft party with friends and family. Set up a table with all your supplies and let everyone express their creativity. This not only makes for a great bonding experience but also results in unique decorations for your home.
Eggshell Mosaic Art
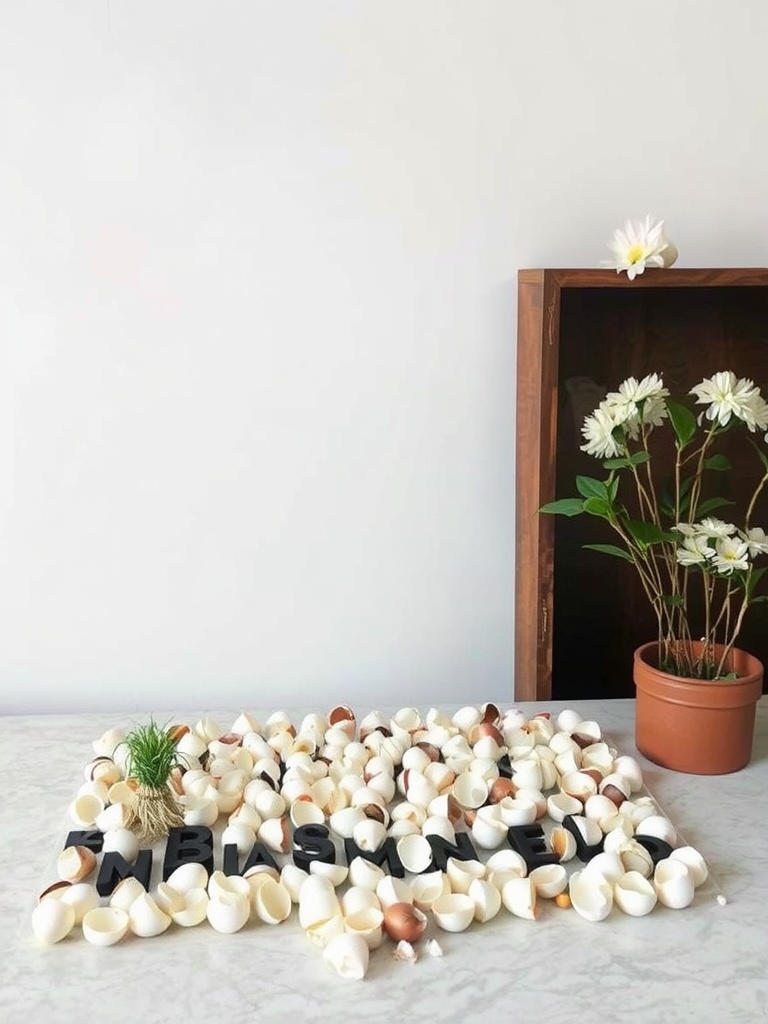
Eggshell mosaic art is a fun and colorful project perfect for Easter. This craft transforms ordinary eggshells into unique decorations. In the image, you can see a beautiful display made from broken eggshells, arranged creatively on a flat surface.
The arrangement features a mix of white and brown eggshells, along with some playful lettering. The letters add a personal touch, making it a great way to express a message or theme. Using small plants and flowers in the background enhances the overall look, giving it a fresh vibe.
To create your own eggshell mosaic, start by saving your eggshells after using the eggs. Rinse them out and let them dry. Once dry, break them into small pieces. You can use glue to attach the eggshell pieces onto a canvas or sturdy paper in any design you like. Add some paint or additional decorations to make it even more special!
Easter-Themed Stamped Cards
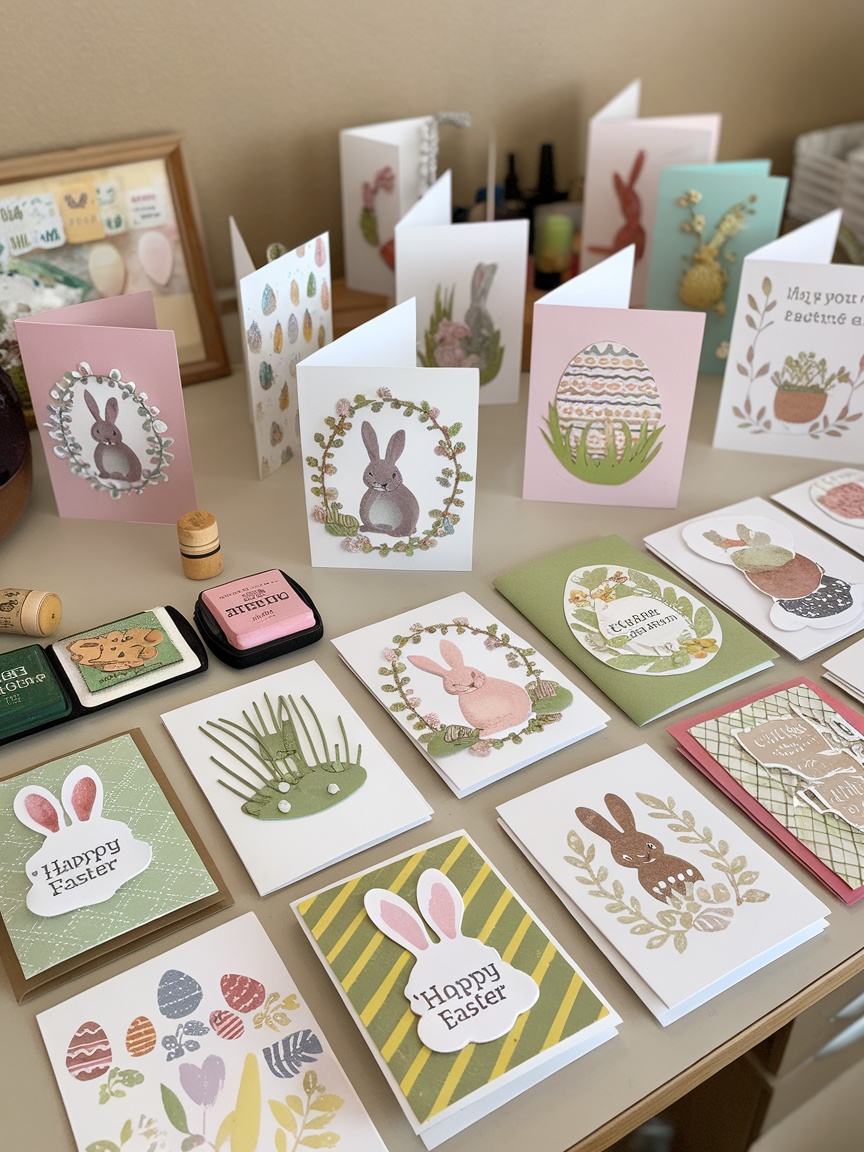
Easter-themed stamped cards are a fun and creative way to spread joy this holiday season. The image shows several beautifully designed cards featuring cute bunnies, colorful eggs, and spring flowers. Each card has a unique message that captures the spirit of Easter.
To make your own stamped cards, gather some blank cards, colorful ink pads, and stamps with fun Easter designs. You can find stamps of bunnies, eggs, and flowers at craft stores or online. Mixing and matching different colors will make your cards pop!
Start by choosing your designs. Use the stamps to create patterns on the front of the cards. Don’t worry about making them perfect; the charm is in their handmade quality!
Once you finish stamping, let the ink dry completely. You can add personal touches, like handwritten messages or even stickers, to make each card special. Don’t forget to include your name and a cheerful note inside!
These stamped cards make great gifts or can be used for mailing to friends and family. They are a lovely way to share the Easter spirit and showcase your creativity.
Bunny Ears Cupcake Toppers

Bunny ears cupcake toppers are a fun and easy decoration that can bring a festive touch to your Easter treats. These adorable toppers add a playful vibe and are sure to impress your guests.
To make these toppers, start with some simple ingredients. You’ll need white fondant for the ears and pink food coloring or edible paint for the inner part. Roll the fondant into ear shapes, then paint the insides pink once they are formed.
Once your ears are ready, stick them on toothpicks or small skewers. Insert these into your frosted cupcakes, and watch as they transform into charming bunny-themed desserts. Don’t forget to sprinkle some pastel candies on top for an extra festive flair!
This craft is perfect for kids and adults alike, making it a delightful activity leading up to the holiday. Gather your supplies and get creative!
String Art Easter Eggs
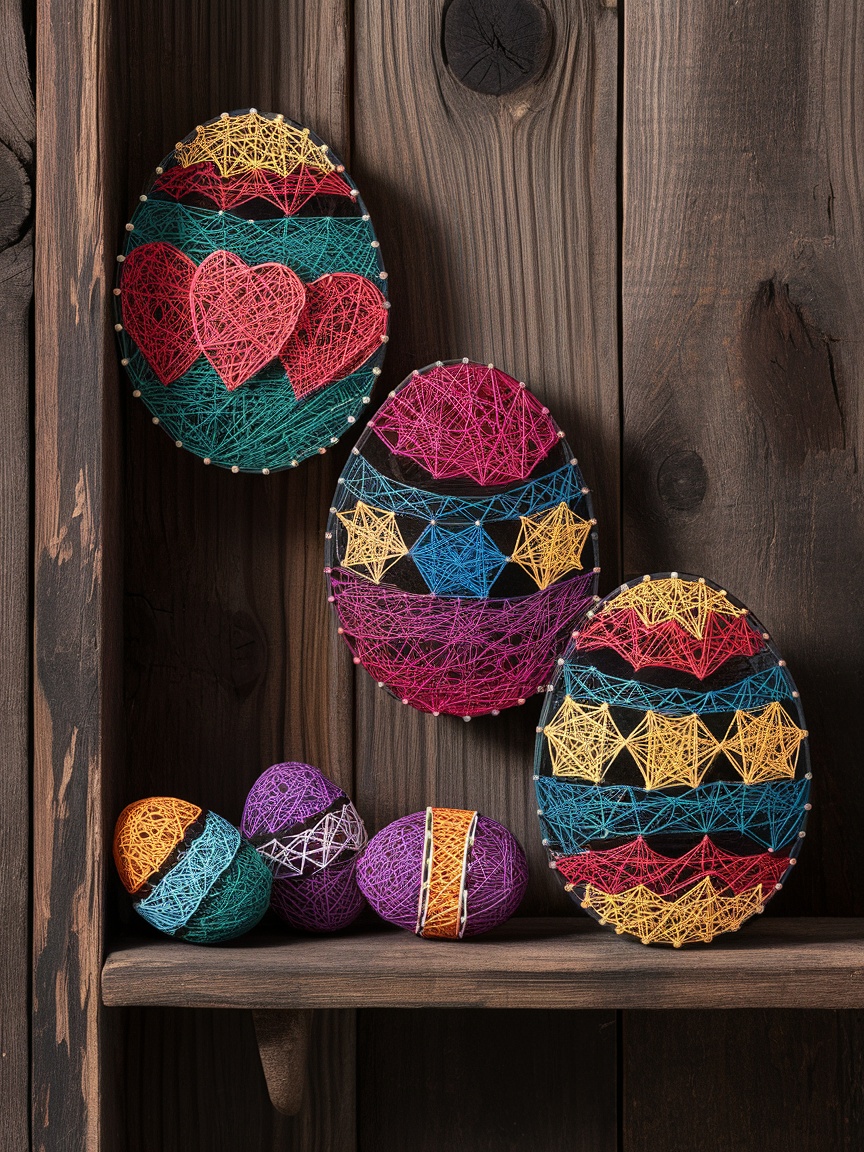
String art Easter eggs are a fun and creative way to celebrate the spring season. The image features vibrant string art eggs on a rustic wooden background, showcasing different colors and designs that are perfect for Easter decorations.
To create your own string art eggs, gather some materials. You’ll need a few wooden boards, colorful strings or yarn, and small nails or pins. Start by sketching an egg shape on the board, then hammer in the nails along the outline. Once you have your nails in place, use the string to wrap around the nails, filling in the space with different patterns. Get creative with your color choices!
For a playful touch, you can also paint some wooden eggs in bright colors. Once they’re dry, use leftover string to wrap around them for added texture. This combination of string art and painted eggs will make for delightful Easter decorations that are sure to impress family and friends.
Flower Crown Craft for Easter

<p ‘easter’=”” a=”” adorned=”” and=”” artificial=”” bringing=”” celebrate=”” cheerful=”” colorful=”” creating=”” crown=”” decoration=”” easter.=”” festivities.=”” flower=”” flowers,=”” for=”” front,=”” fun=”” gatherings.<=”” holiday=”” in=”” is=”” it=”” letters=”” making=”” p=”” perfect=”” proudly=”” simple=”” sit=”” spelling=”” spring=”” the=”” to=”” touch=”” vibrant=”” way=”” with=”” your=””>
To get started, gather your supplies. You’ll need a floral wire base, artificial flowers in various colors, floral tape, and scissors. Choose flowers that appeal to you and mix different types for a fuller look.
Begin by measuring the floral wire around your head to create a comfortable circle. Cut the wire and secure the ends together. Next, take your artificial flowers and cut the stems to about 2 inches. Start attaching them to the wire using floral tape, spacing them evenly. Use a mix of colors to create depth and interest.
Once all flowers are attached, give your crown a little fluff to ensure it looks full and lively. It’s now ready to wear! Whether for an Easter egg hunt or a family dinner, this flower crown will be a delightful addition to your spring celebrations.
Easter Bunny Toilet Paper Roll Craft
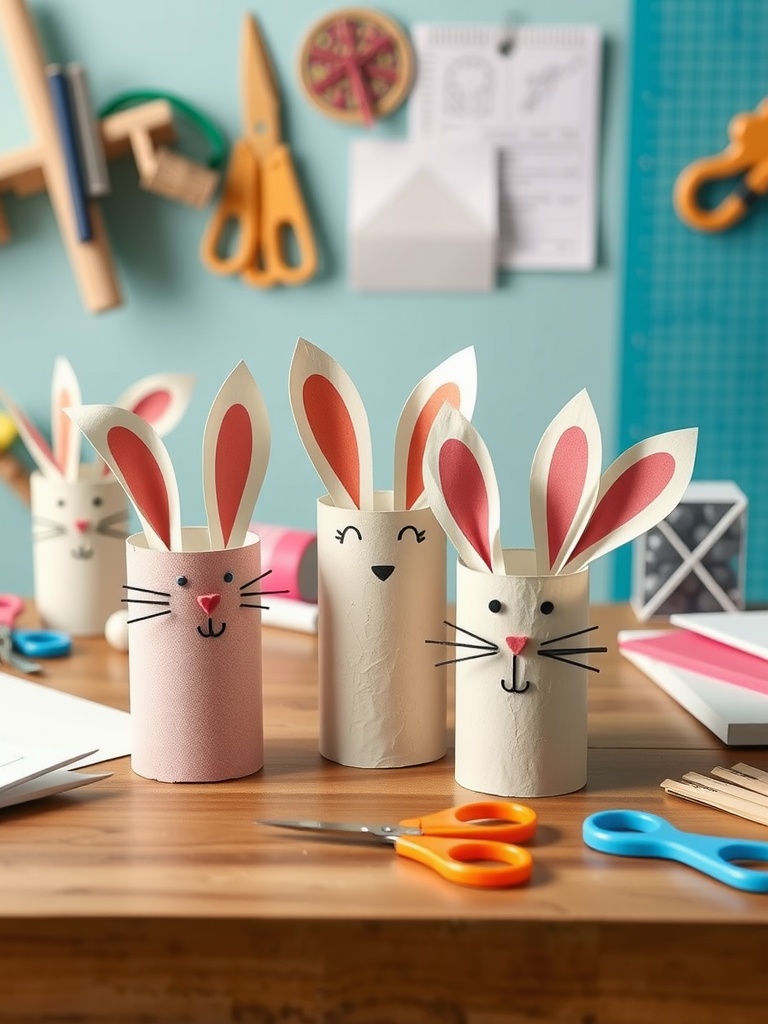
When it comes to Easter crafts, the Easter Bunny Toilet Paper Roll craft is a fun and easy project for everyone. You can create adorable bunny figures using items you already have at home. This craft brings a touch of cheer to your Easter decorations and is a great way to recycle those empty toilet paper rolls!
To get started, gather your materials. You’ll need empty toilet paper rolls, colored paper, scissors, glue, and markers. Cut out bunny ears from the colored paper, using pink for the inner part and white for the outer. Glue them to the top of your roll. Then, draw on a cute bunny face with markers. You can make each bunny unique by experimenting with different colors and facial expressions!
These little bunnies can be used as table decorations, gifts, or even as part of an Easter egg hunt. Kids will love creating their versions, making this a perfect family activity. Let your creativity shine as you customize each bunny to your liking. Enjoy making these charming Easter buddies!
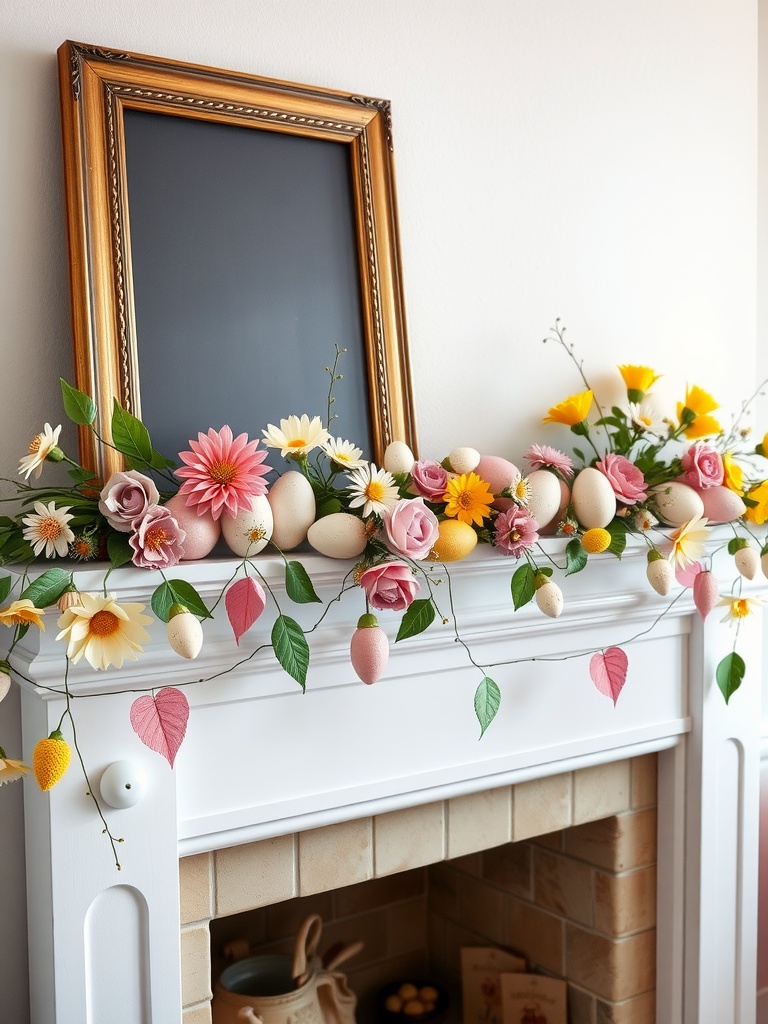
Chalkboard Easter Signs
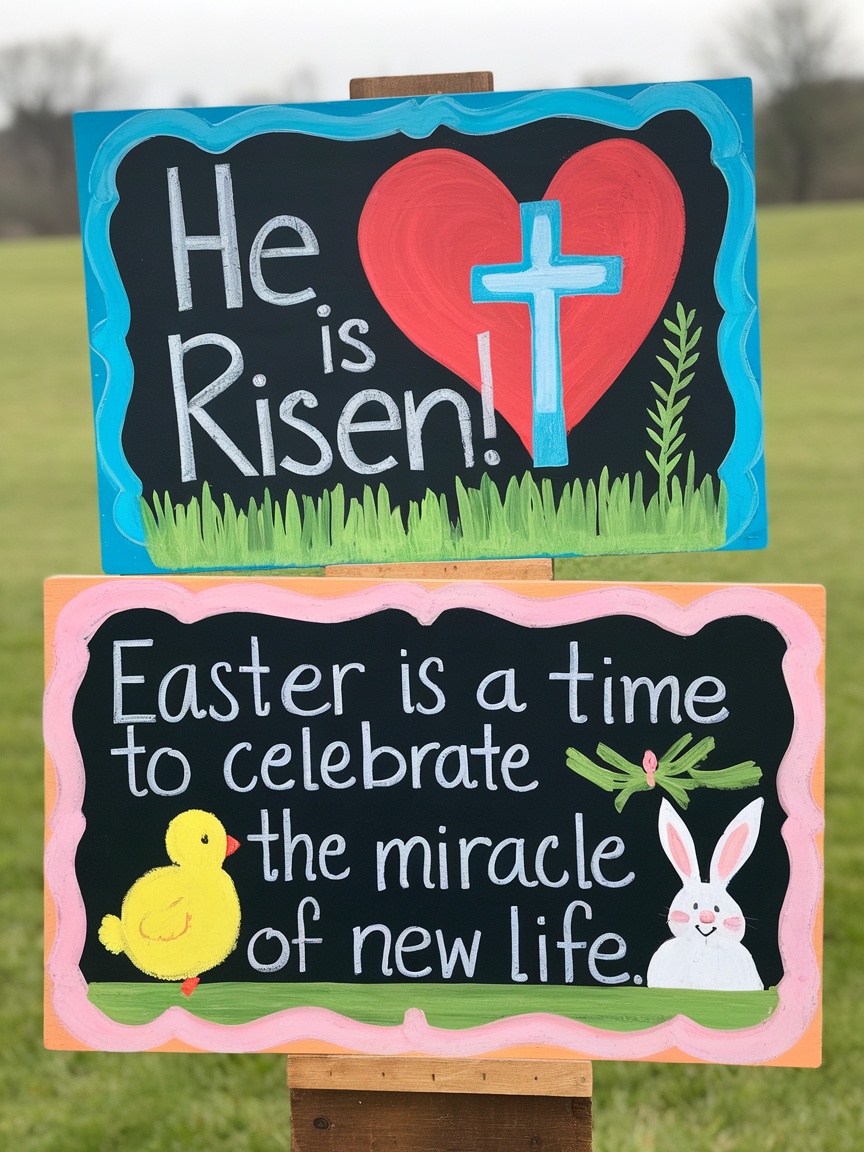
Chalkboard Easter signs are a fun and festive addition to your holiday decor. They can be personalized with your own messages, making them perfect for welcoming guests or sharing seasonal greetings.
In the image, the sign features a cheerful message, surrounded by colorful Easter eggs and a cute bunny. The bright colors and playful design bring a joyful vibe to any setting. It’s a great way to brighten up your yard or home.
To create your own chalkboard sign, start with a chalkboard surface and a frame. Use chalk markers for vibrant, long-lasting colors. Write a fun Easter message or quote, and don’t forget to add some decorative elements like drawn grass or Easter-themed designs.
For an extra touch, place the sign amongst decorative eggs and flowers for a complete Easter display. This not only enhances your decor but also sets a festive mood for family and friends.
Experiment with different colors and designs to make your sign truly unique. Whether you choose a simple greeting or a more elaborate design, your chalkboard sign will surely bring smiles this Easter.
Easter Egg Hunt Invitation Craft
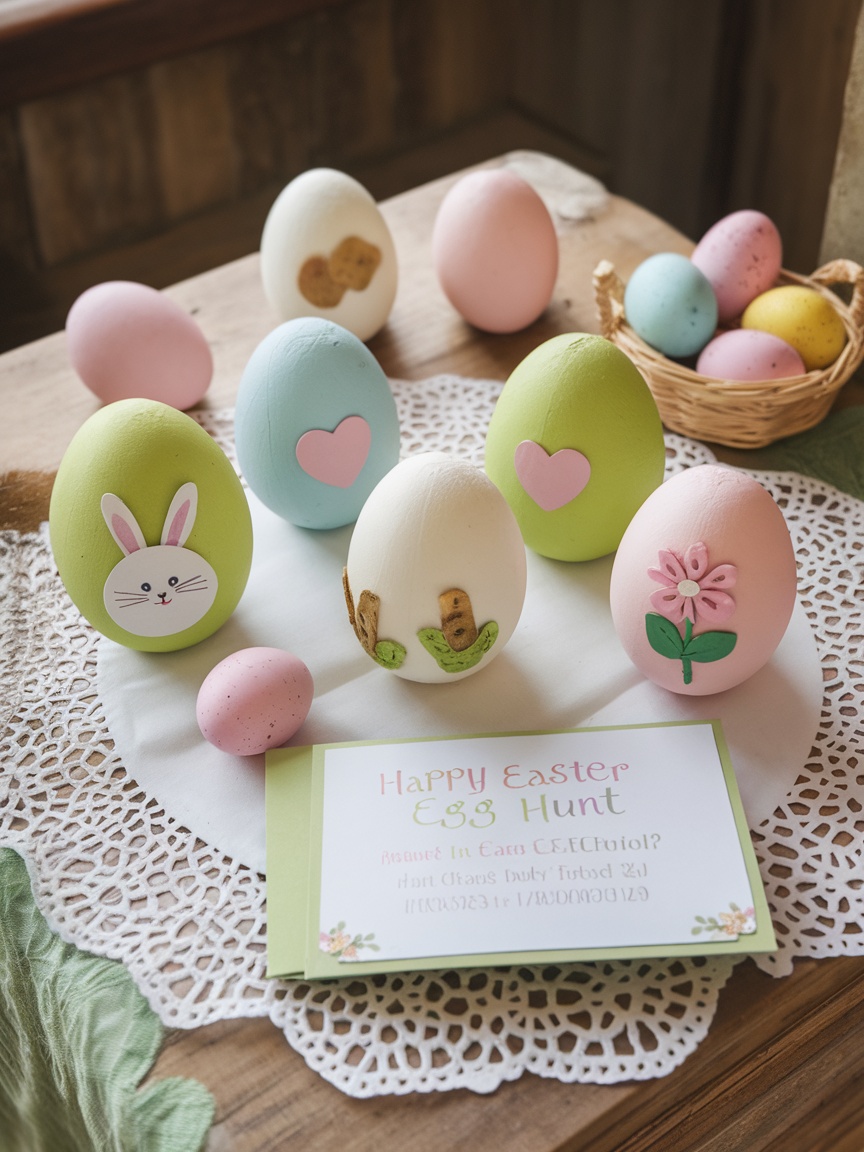
Creating a colorful invitation for your Easter egg hunt is a fun way to get everyone excited for the event. The image shows a delightful setup with invitations laid out on a table, surrounded by playful decorations like pastel-colored eggs and green grass. This cheerful display sets the perfect mood for your gathering.
To start, choose some cheerful cardstock or colorful paper for your invitations. You can use templates available online or create your own design. Include important details like the date, time, location, and any special instructions for the kids.
Next, personalize each invitation with drawings or stickers. This adds a special touch that will make your guests feel even more excited. Consider having your children help with this part; it’s a great way to get them involved!
Don’t forget to include fun elements like little rhymes or drawing hints about where the eggs will be hidden. Once your invitations are ready, either mail them out or hand them directly to your guests. This simple yet creative craft will surely kick off your Easter celebrations!
Easter-Themed Coloring Pages
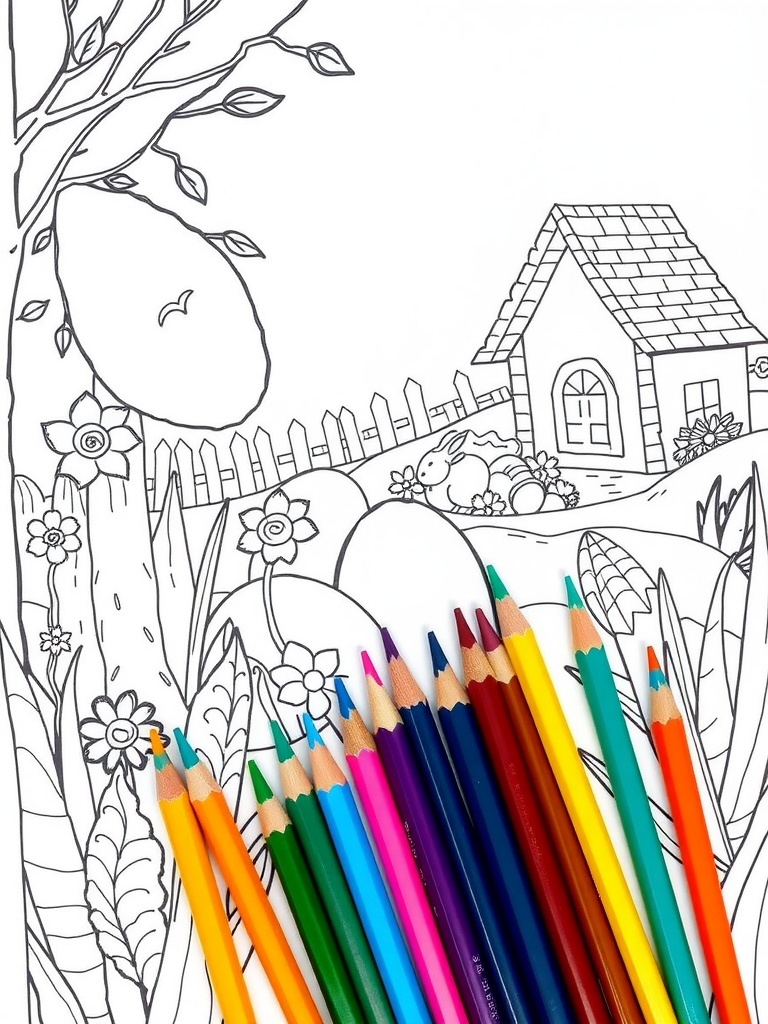
Easter-themed coloring pages are a fun and relaxing way to celebrate the holiday. The image shows a beautifully outlined scene featuring a cozy cottage, flowers, and Easter eggs waiting to be colored. This encourages creativity and can be a delightful activity for kids and adults alike.
Coloring is not only entertaining but also a great stress reliever. Gather your colored pencils, crayons, or markers. You can choose bright colors for the flowers and pastel shades for the eggs, bringing the scene to life. This activity is perfect for family gatherings or quiet afternoons at home.
To prepare, print out your favorite Easter-themed coloring pages. Set up a cozy space with all your coloring supplies. You could even play some cheerful music to enhance the atmosphere. Encourage everyone to unleash their imagination and share their completed artwork!
Hand-Painted Wooden Easter Ornaments

Hand-painted wooden Easter ornaments can add a personal touch to your spring decorations. The image showcases beautifully crafted ornaments, each adorned with delicate floral designs. These ornaments hang gracefully from a branch, bringing a touch of nature indoors.
Creating your own hand-painted ornaments is a fun and easy project. Start with some plain wooden eggs or round shapes from your local craft store. Gather acrylic paints, brushes, and a sealant for finishing. You can choose any color palette that suits your style.
Begin by painting a base coat on your ornaments. Once dry, use a finer brush to add details like flowers or patterns. Don’t rush; enjoy the process! After painting, let them dry completely and apply a sealant to protect your artwork. Finally, attach ribbons for easy hanging.
These ornaments are perfect for decorating your home or for gifting to friends and family. They truly capture the essence of Easter and springtime!
Leave a Reply