")
Looking for some fun and simple Easter activities for kids? This list of 33 easy Easter crafts is perfect for sparking creativity and keeping little hands busy. Each project comes with straightforward tips and instructions to guide you and the kids through the making process. From colorful decorations to adorable gifts, there’s something here for everyone to enjoy!
Foam Easter Egg Decorations
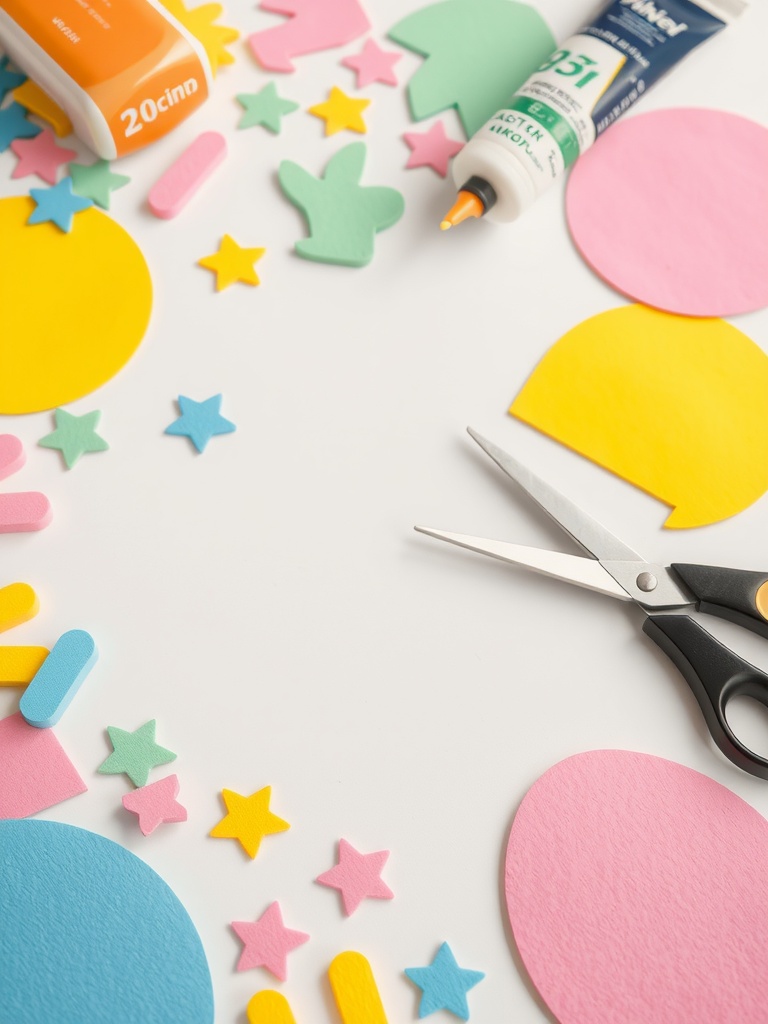
Creating foam Easter egg decorations is a fun activity for kids of all ages. The bright colors and easy-to-handle materials make this project enjoyable and perfect for sparking creativity.
To get started, gather your supplies. You will need foam sheets in various colors, scissors, glue, and any additional embellishments like stickers or glitter. The image showcases a colorful array of foam pieces, making it easy to visualize how your decorations will come together.
First, cut the foam sheets into egg shapes. This can be done by making a simple oval or getting creative with different designs. Next, let the kids decorate their eggs! They can glue on stars, flowers, or any other fun shapes to personalize each one.
Once they are satisfied with their designs, display the eggs around the house or use them as a centerpiece for your Easter festivities. This activity not only keeps kids engaged but also helps develop their fine motor skills.
Egg Carton Chicks
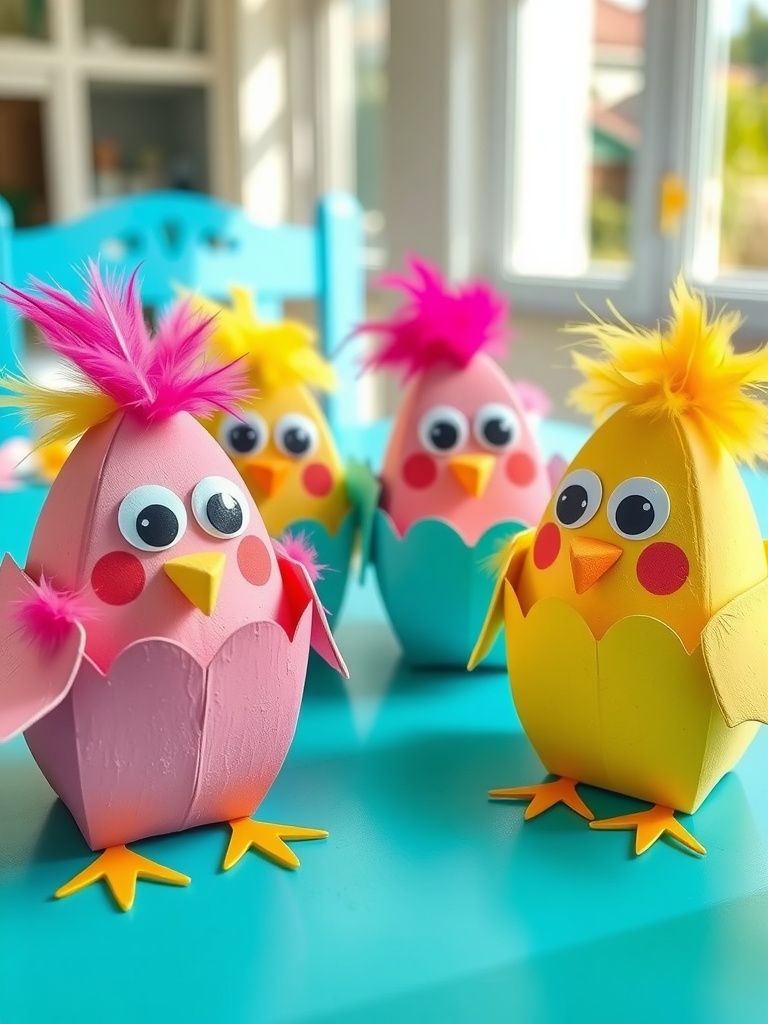
Egg carton chicks are a fun and colorful craft that kids can easily make. They bring a burst of joy and creativity to Easter celebrations. With some simple materials, you can turn a regular egg carton into adorable little chicks that are perfect for decoration.
To get started, gather materials like an empty egg carton, craft paint, googly eyes, and feathers. Cut the carton into individual cups to form the body of each chick. A little paint will go a long way! Choose bright colors like yellow, pink, or blue to bring your chicks to life.
Next, let your kids paint the carton cups and allow them to dry. Once dry, glue on googly eyes and small pieces of paper for beaks and wings. For an extra touch, add fluffy feathers on top to create a cute hairstyle. Kids will love customizing their chicks with different colors and accessories!
These egg carton chicks not only make for a delightful craft activity but can also serve as cheerful decorations for your Easter table. Encourage your little ones to get creative and have fun with this simple project!
Paper Plate Easter Bunny
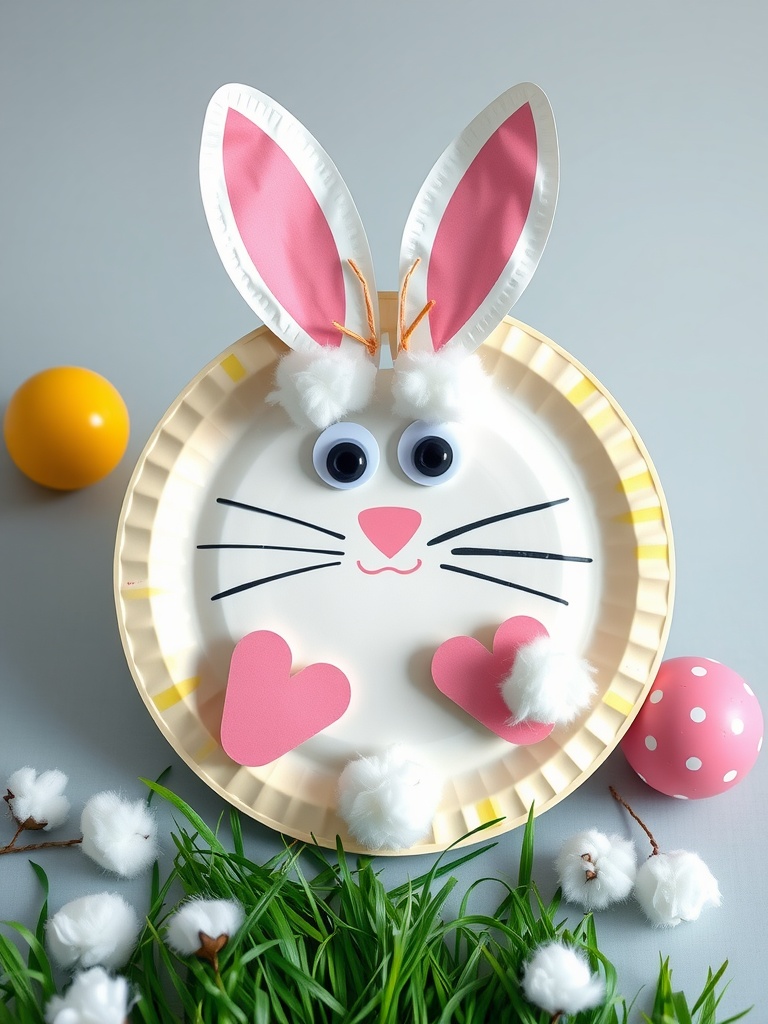
Creating a paper plate Easter bunny is a fun and easy craft that kids will love. This project uses simple materials to make an adorable bunny face that can brighten up any room for the holiday.
To get started, gather your supplies: a paper plate, cotton balls, googly eyes, pink paper, scissors, and glue. The bunny’s ears can be made from pink paper or construction paper, attached to the back of the plate.
First, cut out ear shapes from the pink paper and glue them to the top of the plate. Next, use the glue to attach googly eyes and cotton balls for the bunny’s nose and cheeks. Draw whiskers with a black marker for added detail. For a personal touch, kids can create heart shapes out of pink paper for the bunny’s paws.
Place this cheerful bunny on a table or hang it up to celebrate Easter. It’s a great way to engage kids in holiday festivities while boosting their creativity!
DIY Easter Egg Garland
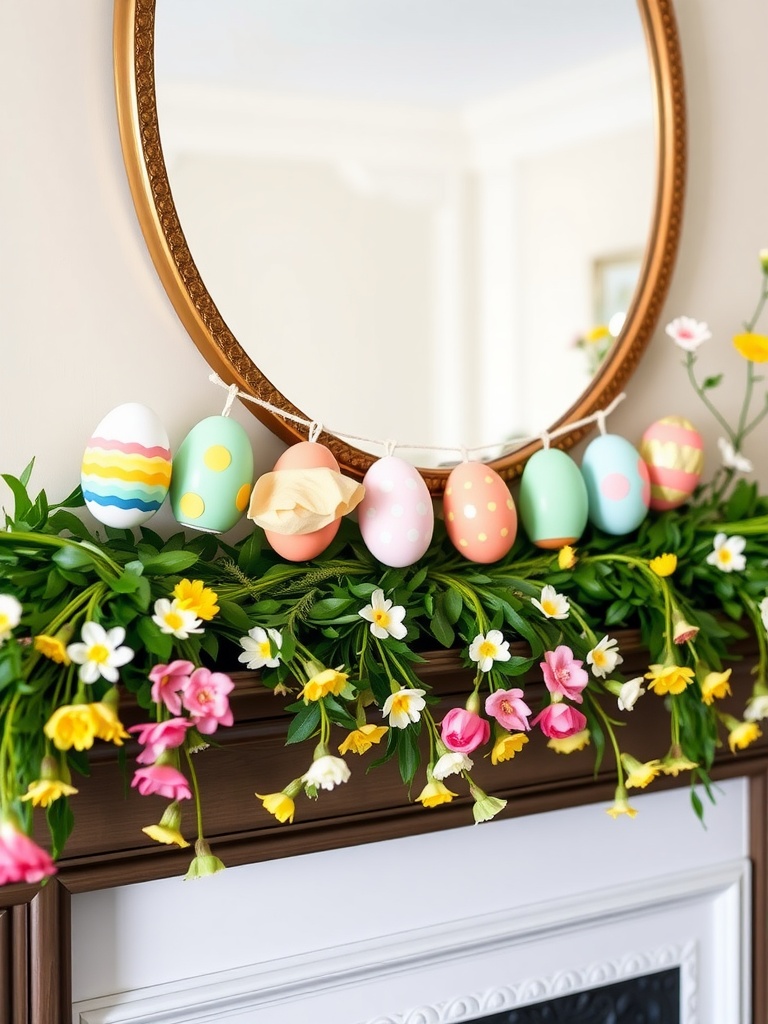
Creating a DIY Easter egg garland is a fun way to celebrate the season. It adds a cheerful touch to your home and can be made with kids. The image shows a beautiful garland strung across a mantel. Colorful eggs and flowers give it a bright, festive look.
To make your own garland, gather plastic eggs, string or twine, and some faux flowers. Start by decorating the eggs with paint or markers. This is where kids can get creative! Use pastel colors or vibrant shades to match your décor.
Next, cut the string to your desired length. Thread the eggs onto the string, spacing them out evenly. You can also add flowers between the eggs for extra flair. Secure the ends of the string to hang the garland. It looks lovely draped over a mantel or even on a door!
Easter Egg Hunt Basket

An Easter egg hunt is a classic way to celebrate the holiday. Having a cute basket makes it even more fun! In the image, you see a delightful woven basket filled with colorful plastic eggs. The soft pastel colors like pink, yellow, and blue are perfect for spring. The basket is adorned with a charming pink bow, adding a festive touch.
Creating your own Easter basket is a simple and enjoyable project for kids. You can use a plain basket or even make one from paper or fabric. Start by gathering materials like a basket or container, colorful plastic eggs, and some faux grass to line the bottom. Don’t forget to add a ribbon for decoration!
To fill the eggs, consider using treats like candies or small toys. Kids will love the surprise when they open each egg during the hunt. Place the eggs around your yard or home for an exciting activity. This not only makes for a fun day but also encourages creativity and teamwork.
Salt Dough Easter Ornaments
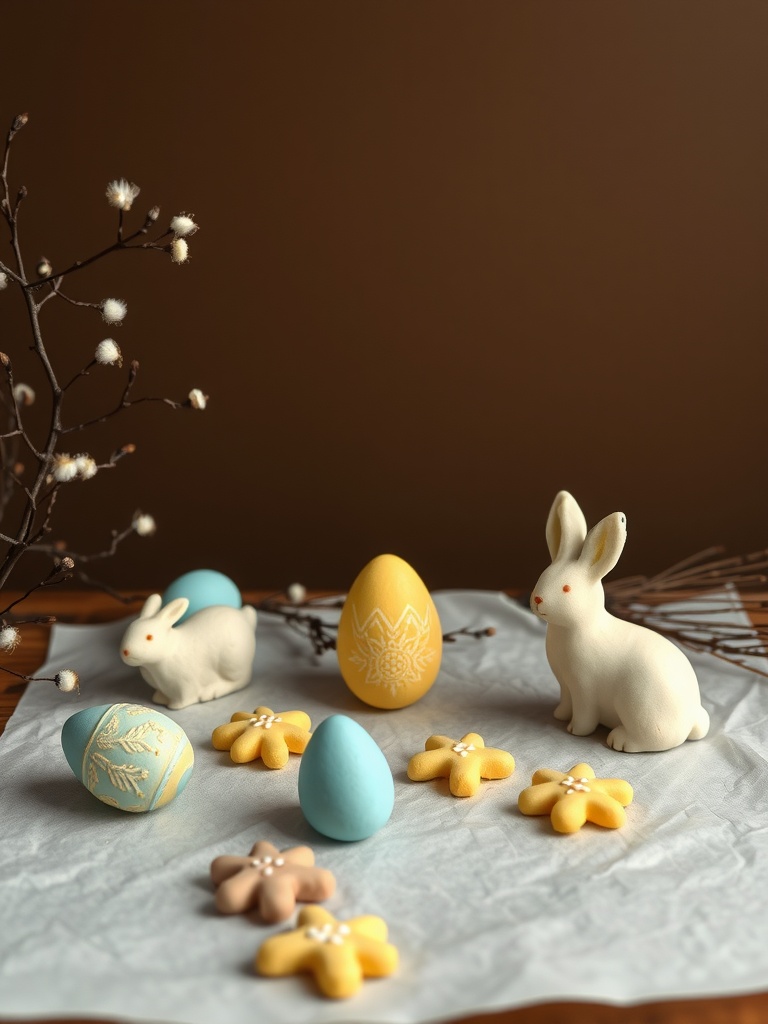
Salt dough Easter ornaments are a fun and simple way to celebrate the holiday with your little ones. The image showcases charming ornaments in the shape of eggs, bunnies, and flowers, all beautifully painted in pastel colors. These DIY decorations not only brighten up your home but also create lasting memories as you craft together.
First, let’s talk about how to make the salt dough. You will need just three ingredients: flour, salt, and water. Combine two cups of flour with one cup of salt and gradually add water until you achieve a dough-like consistency. Knead it for a few minutes until smooth.
Once your dough is ready, roll it out and use cookie cutters to create different shapes. Don’t forget to make a small hole at the top of each ornament for hanging later. After cutting out the shapes, let them dry overnight. You can also bake them at a low temperature for a quicker option!
After they are completely dry, it’s time to paint. Use non-toxic acrylic paints to decorate your ornaments in festive colors. Let your kids express their creativity! Once the paint is dry, you can add a layer of sealant to protect the designs.
To finish, thread some string or ribbon through the holes and hang your delightful ornaments around the house or on an Easter tree. This activity is not only easy but also perfect for children of all ages!
Easter Bunny Mask
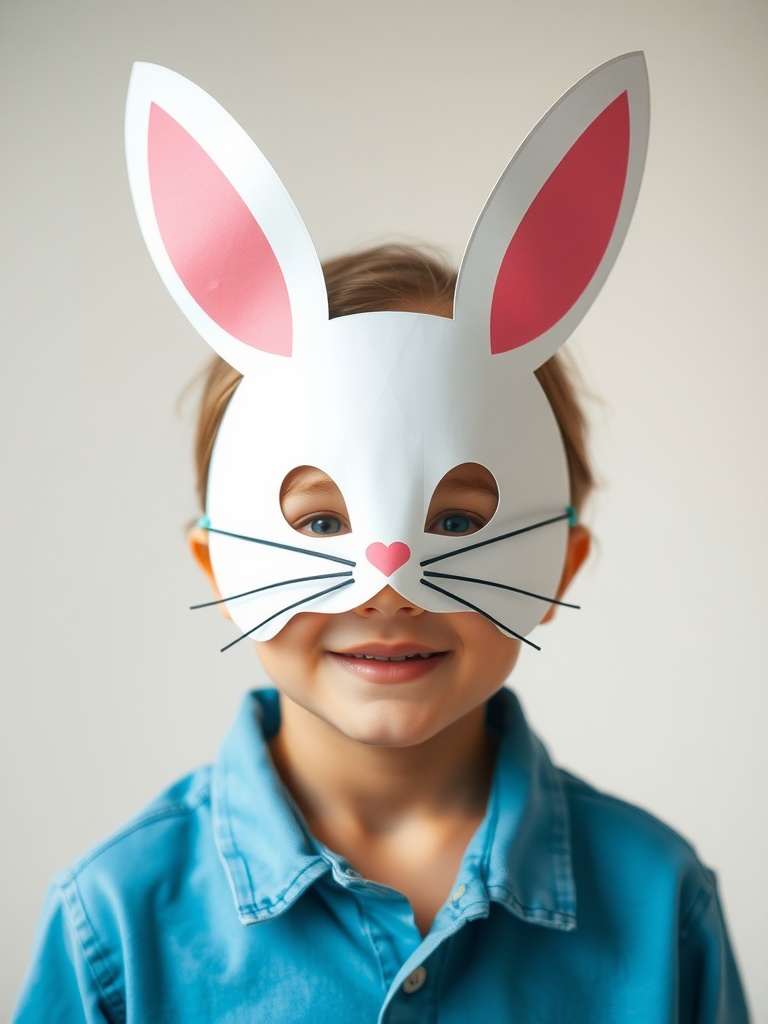
To create your own Easter Bunny mask, gather some basic materials. You will need white paper, pink paper for the ears, scissors, glue, and string or elastic to hold the mask in place. Start by cutting out the shape of the mask and the bunny ears. Then, decorate the mask with whiskers, a cute nose, and any other fun details you like. Use pink paper for the inner ears to add that special touch.
Once your mask is ready, punch holes on each side and attach the string or elastic. This will help the mask stay on your child’s face during all the Easter fun! Making this mask can be a delightful group activity, encouraging teamwork and creativity among kids. It’s a fantastic way to celebrate Easter with a personal touch.
Pasta Necklace Eggs
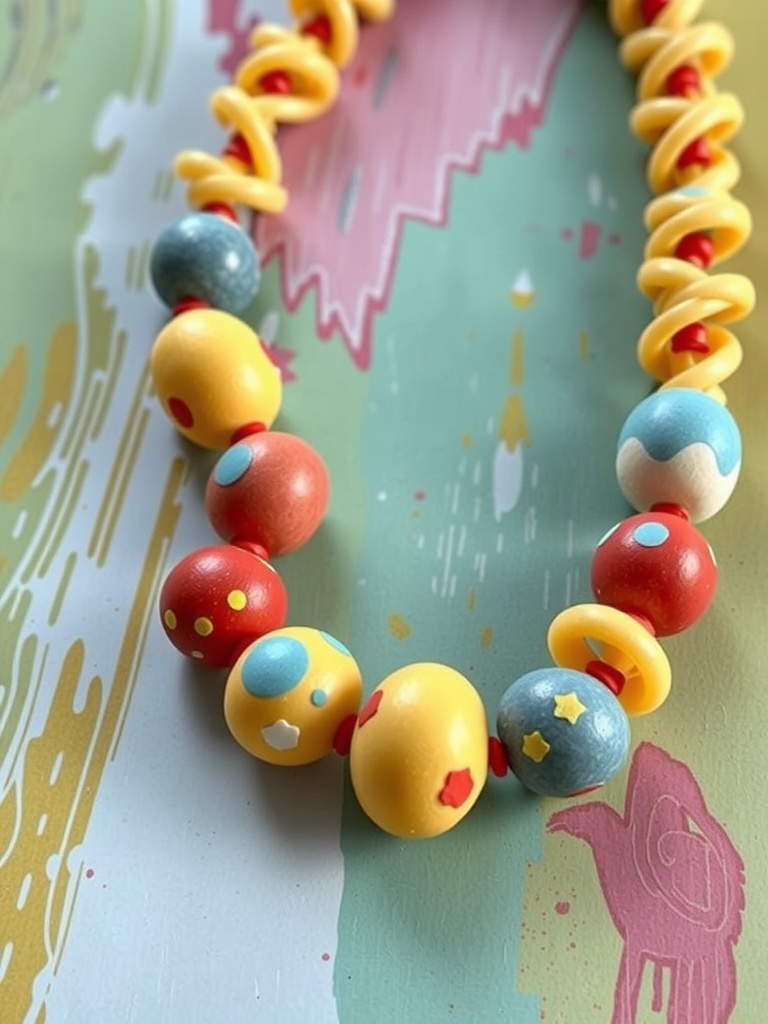
Pasta necklaces are a fun and creative way to celebrate Easter with kids. They can make colorful, festive jewelry that doubles as an art project.
The image shows a vibrant necklace made from painted pasta. The bright colors and playful patterns really stand out, making it a perfect spring accessory. Kids can enjoy showing off their creations during Easter celebrations.
To start this craft, gather some pasta shapes like macaroni or penne. You’ll also need non-toxic paint, string, and scissors. First, let the kids paint the pasta in different colors. Once it’s dry, cut a length of string. Help them thread the pasta onto the string, alternating colors for a fun design.
Here’s a tip: Tie a knot at each end of the string to keep the pasta from slipping off. This project not only boosts creativity but also helps with fine motor skills as they thread the pasta. Enjoy making these lovely necklaces together!
Handprint Flower Cards
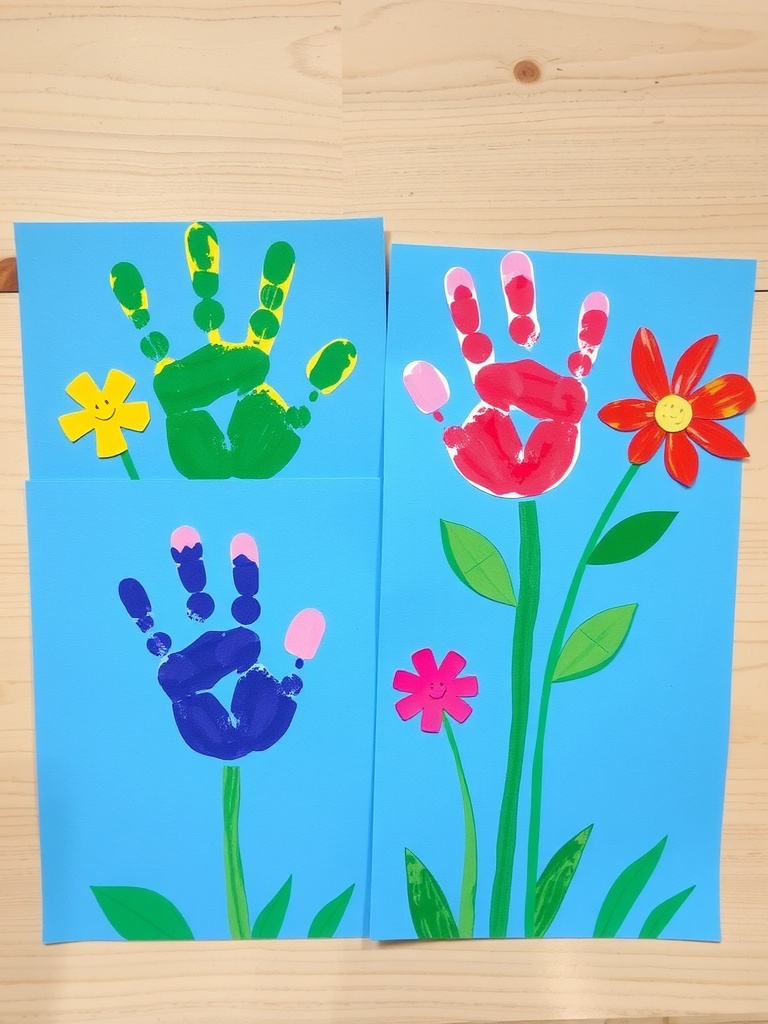
Handprint flower cards are a fun and simple way for kids to express their creativity while making something special. The image shows colorful cards decorated with handprints that resemble flowers. Each card features vibrant colors and cheerful designs that are perfect for Easter.
To get started, gather some bright construction paper, washable paints, and markers. You’ll also need some scissors and glue. Encourage the kids to dip their hands in paint and press them onto the paper to create the flowers. Each handprint can represent a different flower, allowing for a variety of designs.
After the handprints dry, kids can add stems and leaves using markers or additional paper cutouts. Adding a smiley face in the center of each flower can bring extra joy to the cards. These personalized cards make great Easter greetings for family and friends!
Tips for a smooth crafting experience: use an old tablecloth to protect surfaces, have wipes handy for quick clean-ups, and most importantly, let kids enjoy the process. Their unique creations will surely brighten anyone’s day!
Eggshell Planters
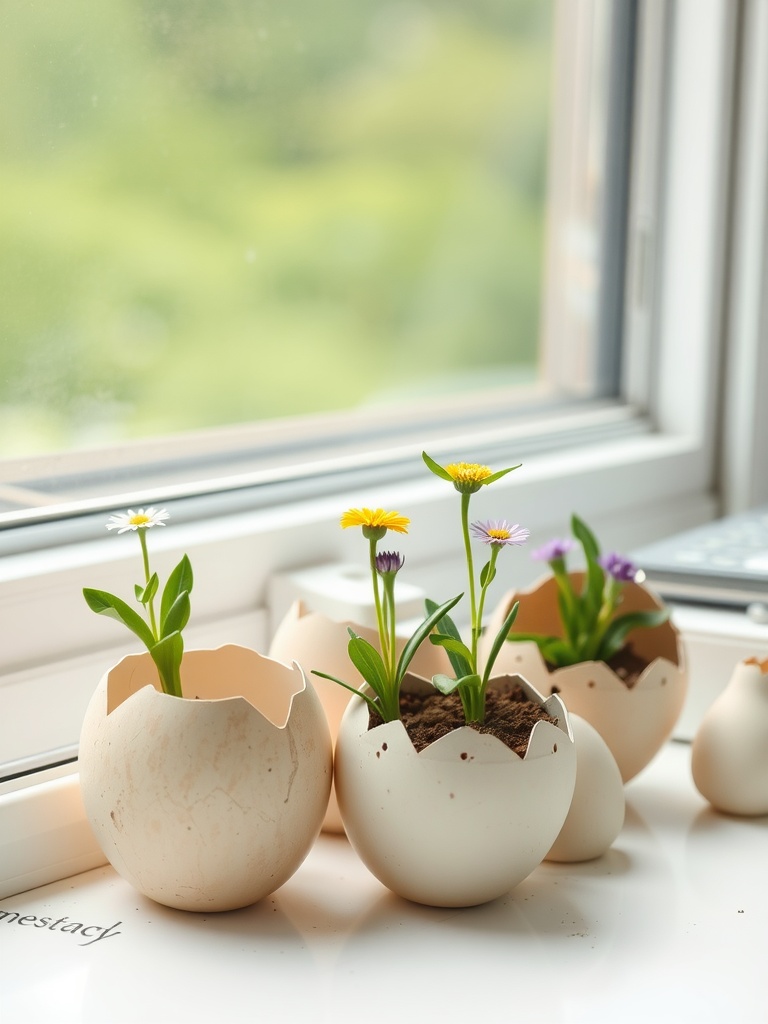
Eggshell planters are a fun and eco-friendly way to celebrate Easter while getting creative. These charming little pots are made from real eggshells, making them perfect for planting small flowers or herbs. The cracked edges give them a whimsical look that kids will love.
To make your own eggshell planters, start by carefully cracking the tops off some empty eggshells. Be gentle so that the shells stay mostly intact. Rinse the inside to remove any residue. Next, fill them with soil, leaving a little space at the top for planting.
Now comes the fun part! Choose some small flowers or herb seeds, and plant them in the soil. Make sure to water them lightly. Place your new planters on a sunny windowsill where they can soak up the light. Kids will enjoy watching their plants grow and thrive.
For a little extra fun, you can decorate the outside of the eggshells with markers or stickers. This adds a personal touch to each planter. It’s a great way to use those leftover eggs after your Easter festivities!
Bunny Tail Pom-Poms
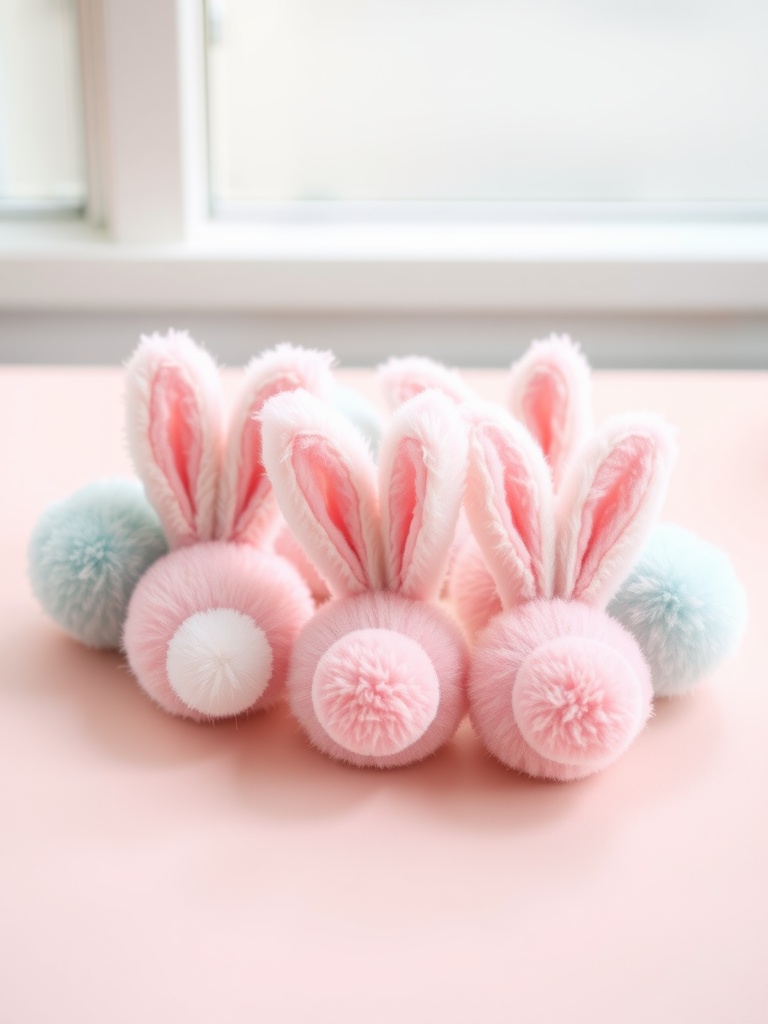
Bunny Tail Pom-Poms are a fun and adorable Easter craft that kids will love making. These fluffy little bunnies bring a touch of whimsy to any spring decor. Using simple materials, children can create cute bunny tails that can be used as decorations or even gifts.
To get started, you will need some pom-poms in various sizes, soft fabric or felt for the ears, and glue. The main colors are typically pink, white, and pastel shades, which are perfect for Easter. If you have some googly eyes, they can add an extra touch of character to your bunny tails!
Begin by taking a large pom-pom as the bunny’s body. Next, cut out two ear shapes from your fabric or felt and attach them to the top of the pom-pom with glue. For the tail, use a smaller pom-pom and glue it to the back, creating a fluffy appearance. You can add googly eyes to give your bunny some personality. Let everything dry, and soon you’ll have a bunch of charming bunny tails!
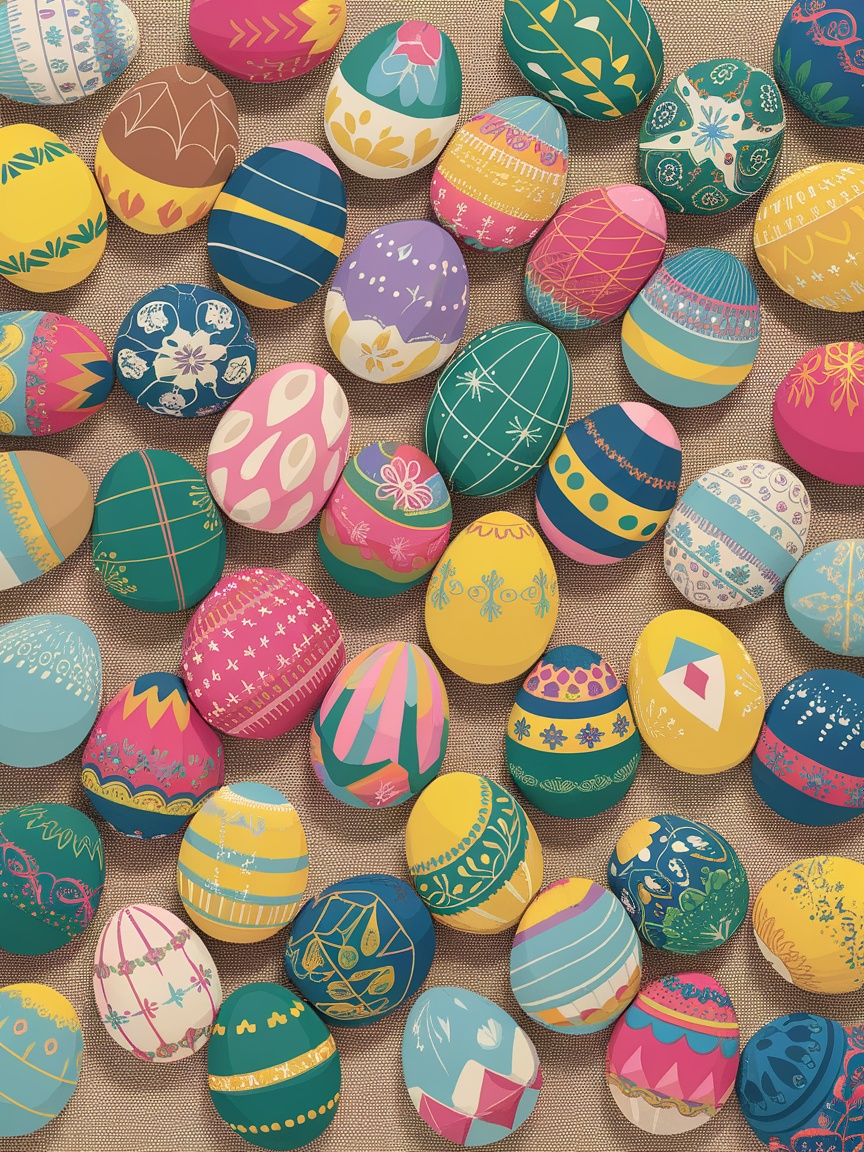
Easter Egg Painting
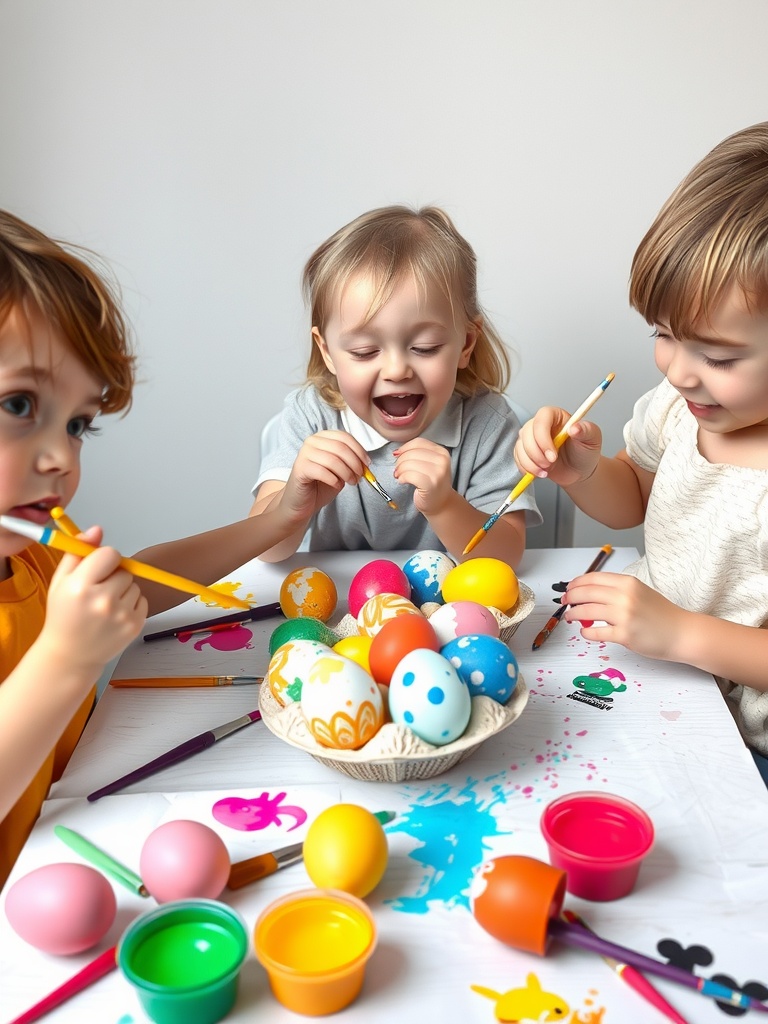
Easter egg painting is a fun and colorful activity that kids love. In the image, you can see three children happily engaged in decorating their eggs. They’re using various paintbrushes and bright colors, showing that creativity has no limits.
This activity not only brings joy but also helps kids develop their fine motor skills. Each child is focused and excited, making it a perfect bonding activity for families.
To start, gather some supplies. You’ll need hard-boiled eggs or plastic eggs, non-toxic paint, brushes, and a space covered with newspaper or plastic. This setup makes cleanup easier.
Encourage kids to paint their eggs however they like. They can create patterns, use stickers, or even add glitter! After they’re done, let the eggs dry completely before displaying them or hiding them for an Easter egg hunt.
Remember to supervise young children, especially when using paints, to ensure they don’t put any supplies in their mouths. Overall, Easter egg painting is a delightful way to celebrate the holiday while sparking creativity!
Cotton Ball Lamb
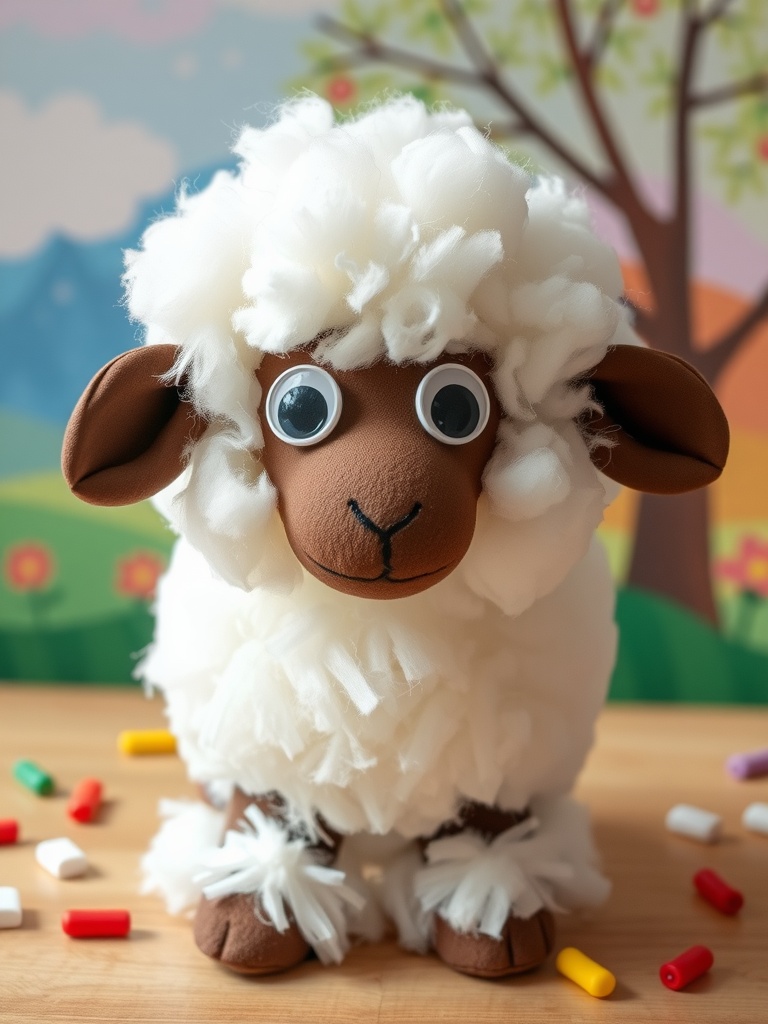
This cute Cotton Ball Lamb is a fun and simple craft to make with kids. It’s perfect for Easter and brings a bit of springtime cheer into your home.
To create this fluffy friend, you will need some cotton balls, glue, construction paper, and googly eyes. Start by shaping a base for the lamb using brown construction paper for the face and feet.
Next, glue the cotton balls onto the brown base, making sure to overlap them to create that fluffy look. Don’t forget to add the googly eyes and a little black nose to give your lamb character!
For added fun, let kids decorate the background. They can use crayons or markers to draw grass, flowers, or even other animals. This not only sparks creativity but also makes the crafting experience enjoyable.
Easter Egg Hunt Map

This colorful Easter Egg Hunt map is perfect for guiding kids during the hunt. It features a fun layout with drawn houses, paths, and decorated Easter eggs scattered throughout.
The bright colors and playful drawings will excite children, making the hunt feel like a special event. Each location on the map, like ‘Creetc’ and ‘Mark,’ is marked with cute symbols, inviting kids to explore and discover hidden treasures.
To create your own Easter Egg Hunt map, start by sketching a simple layout of your yard or park. Add playful elements like trees, pathways, and houses. Use markers to color it in, making it vibrant and eye-catching.
Once your map is ready, think about where to hide eggs. Mark these spots on the map for the kids. You could even include fun clues or riddles for each location to make the hunt more exciting. This will encourage teamwork as kids work together to follow the map and find all the eggs!
Spring-Themed Rock Painting
Spring-themed rock painting is a fun and creative way to celebrate the season. This craft is simple and allows kids to express their artistic side while enjoying the great outdoors. In the image, we see beautifully painted rocks featuring cheerful designs like flowers and cute bunnies. These stones add a splash of color and whimsy to any garden or play area.
To get started, gather smooth, clean rocks and acrylic paints in various spring colors. You can also use paint markers for finer details. Begin by sketching your design lightly with a pencil. Once you’re happy with it, paint over the pencil marks, allowing each layer to dry before adding more details. A clear sealant will protect your artwork from the elements.
Don’t forget to let the kids use their imagination! They can create animals, flowers, or even abstract patterns. Once finished, these painted rocks can be used for decoration, as garden markers, or even as gifts.
Jelly Bean Art
Jelly Bean Art is a fun and colorful way for kids to celebrate Easter. It combines creativity and tasty treats, making it a perfect craft for the holiday. In the image, you can see the word “EASTER” formed with jelly beans, surrounded by a vibrant mix of these delicious candies.
To start this craft, gather some jelly beans in various colors, a piece of cardstock or thick paper, and a glue stick. Kids can spell out fun holiday words or create simple shapes. Encourage them to use their imagination!
For an easy setup, lay out the jelly beans on the paper before gluing. This way, kids can arrange and rearrange their designs until they’re happy with the look. Once they’re satisfied, have them glue the beans down. This craft is not only enjoyable but also helps with fine motor skills.
To add a special touch, consider using green paper or faux grass underneath to mimic a springtime scene. Once complete, these colorful artworks can be displayed as cheerful decorations for the season!
Easter Egg Stamps
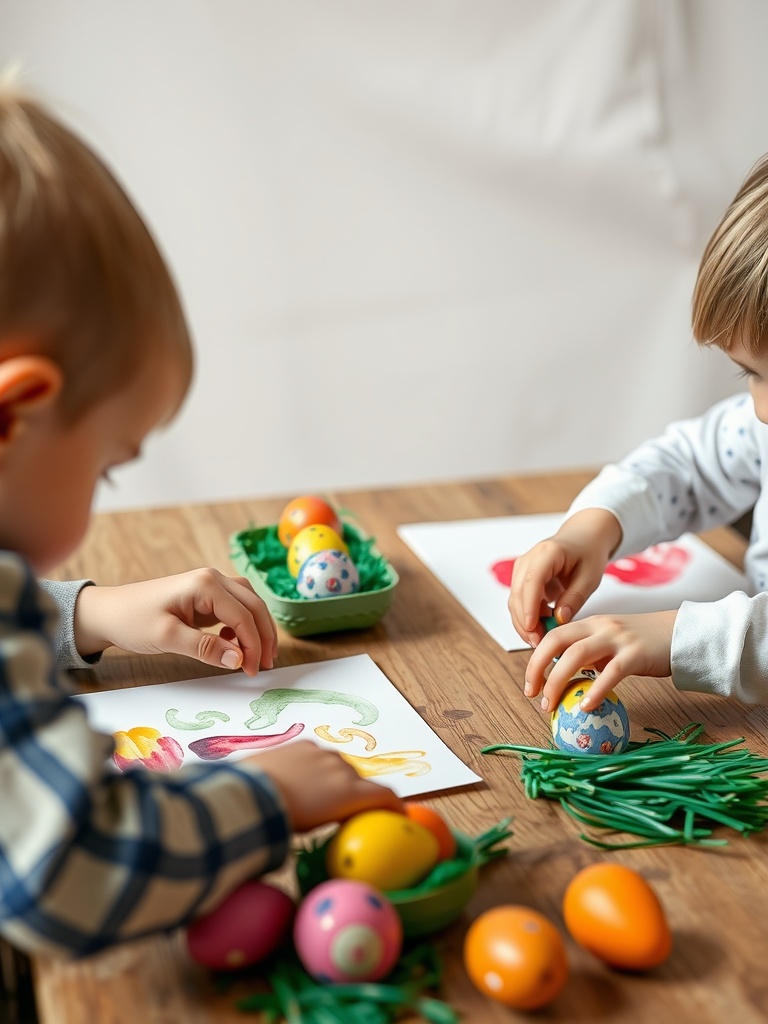
Easter Egg Stamps are a fun and creative way for kids to get into the holiday spirit. This craft involves using decorated eggs as stamps to make vibrant designs on paper. The image shows two little ones fully engaged in their stamping project, surrounded by colorful eggs and cheerful green grass. Their concentration is a testament to how enjoyable this craft can be!
To create your own Easter Egg Stamps, you will need a few simple materials. Gather some clean, hard-boiled or plastic eggs, paint, and paper. You can use a variety of paints—washable ones are great for easy cleanup.
Start by letting the kids decorate the eggs with paint or markers. This step allows for personal expression and creativity. Once the eggs are dry, dip them into paint and press them onto sheets of paper. Experiment with different colors and patterns. Kids can create their masterpieces or even make cards to share with family and friends.
For an extra touch, consider adding some grass or Easter stickers to the finished artwork. This craft not only promotes creativity but also fine motor skills as kids learn to control the stamping process. It’s a wonderful way to make lasting memories during the Easter season!
Chick Puppet Craft
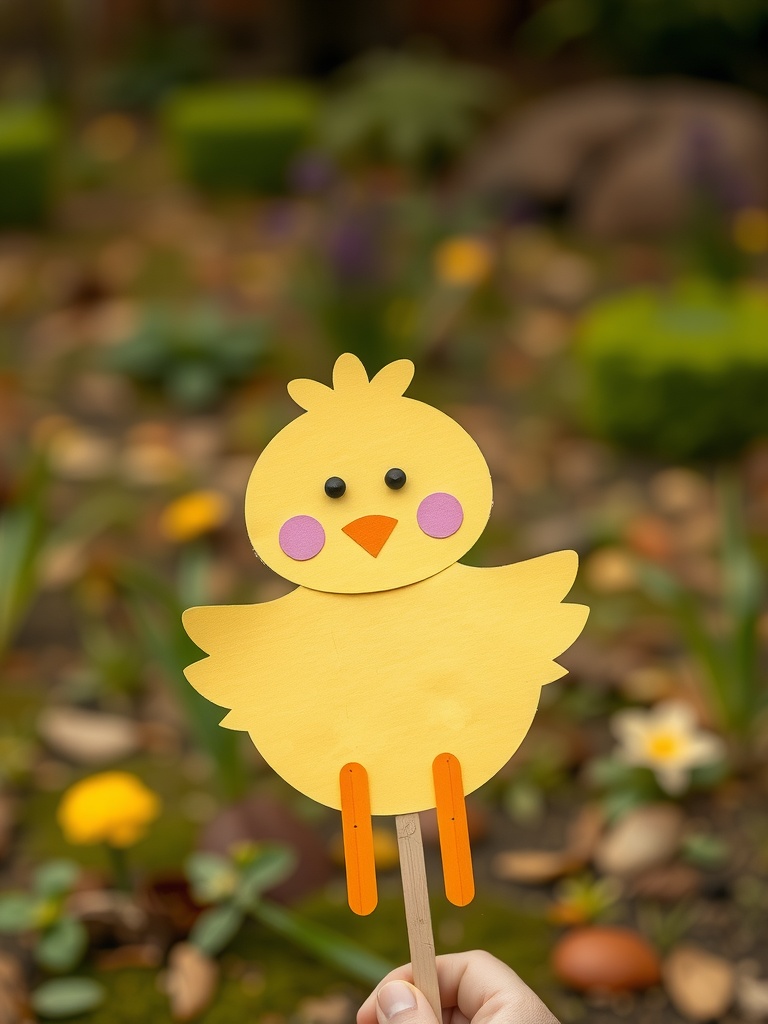
To make your own chick puppet, gather some supplies. You will need yellow construction paper, a wooden stick, scissors, glue, and some markers or stickers for decoration. Cut out a chick shape from the yellow paper. Get creative with the features! Use black dots for eyes, a small triangle for the beak, and pink circles for cheeks. Finally, glue the chick onto the wooden stick.
This puppet can be used for storytelling or a fun puppet show. Encourage kids to use their imagination and create stories featuring their new puppet friend. It can be a great way to engage them in play and learning about Easter themes.
Bunny Ears Headband
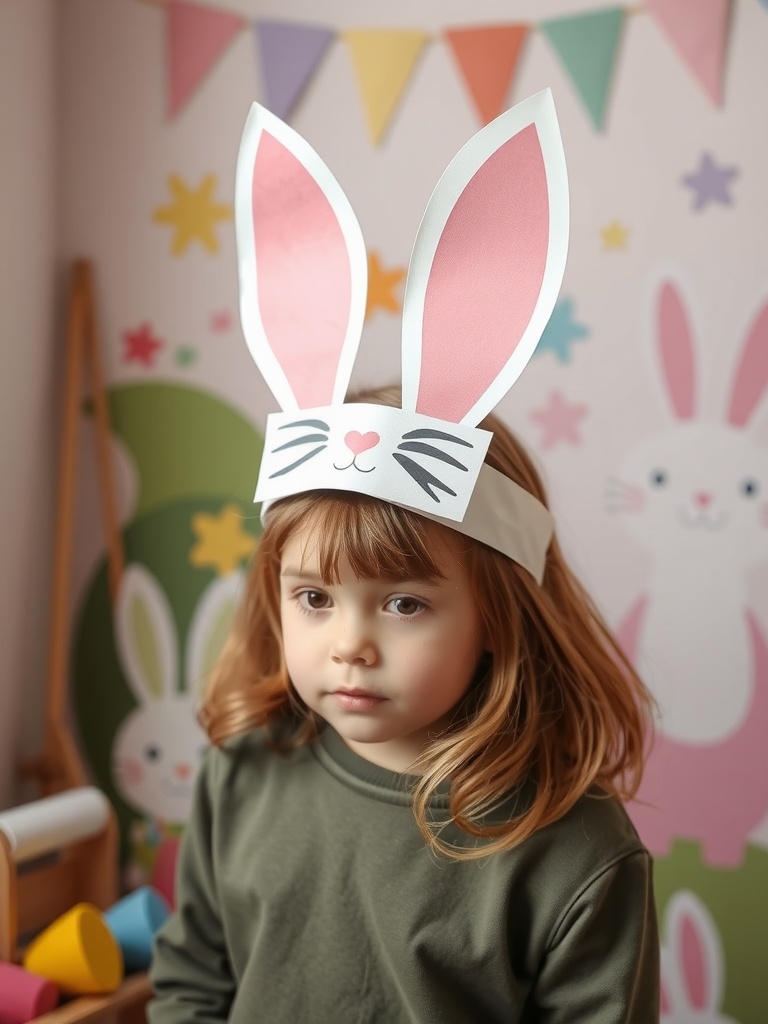
Create a fun Bunny Ears Headband to celebrate Easter! This project is easy and perfect for kids to express their creativity.
The headband features playful pink ears that stand tall, giving the wearer a charming bunny look. The background shows a colorful and cheerful setting, making it even more festive.
To make this headband, gather materials like construction paper, scissors, glue, and a plain headband. Start by cutting out two large bunny ears from the paper, coloring the insides pink. Then, attach the ears to the headband using glue. For a finishing touch, add a cute bunny nose and whiskers with marker or paper cutouts. It’s a simple yet delightful craft that will bring smiles!
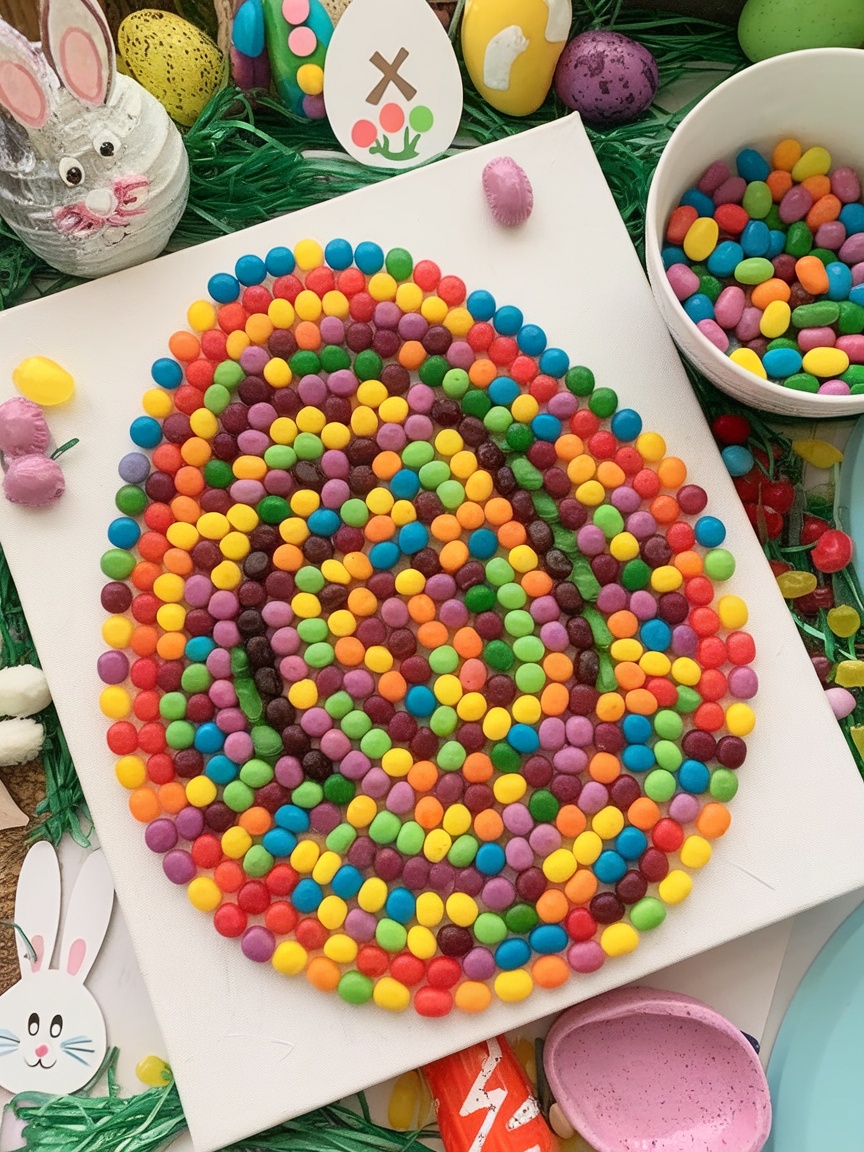
Easter Egg Mosaic
The Easter Egg Mosaic is a fun and colorful project that kids can enjoy during the holiday. In the image, you can see a vibrant layout of decorated eggs, playful letters, and other cheerful decorations. The mix of colors and patterns brings a festive energy to the scene, making it perfect for Easter.
To create your own Easter Egg Mosaic, start by gathering some recycled materials like old magazines or wrapping paper. Cut them into small pieces. You can also use colorful construction paper or stickers for added flair. Next, find a sturdy base, like a piece of cardboard or a canvas, to build your mosaic on.
Arrange the pieces of your chosen materials in a pattern that you like. You can create shapes like eggs, bunnies, or flowers. Once you’re happy with the design, glue everything down. For added fun, let the kids use glitter or markers to decorate around the mosaic. This project not only enhances creativity but also promotes fine motor skills.
Don’t forget to display the finished mosaic around the house! It’s a simple yet delightful way to celebrate Easter while creating beautiful memories.
Marshmallow Bunny Pops
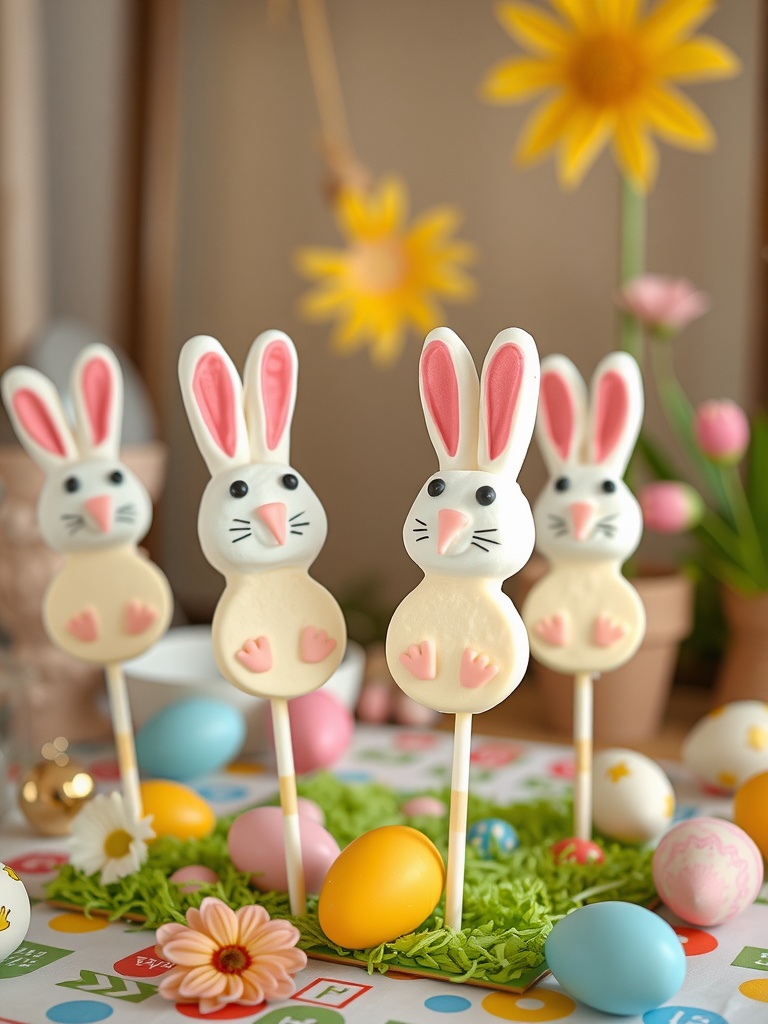
Spring is here, and what better way to celebrate than with some fun Marshmallow Bunny Pops? These adorable treats are perfect for Easter festivities and are sure to bring smiles to kids and adults alike.
To make these cute bunny pops, you will need large marshmallows, white chocolate, pink candy melts, and lollipop sticks. Start by melting the white chocolate and dipping each marshmallow in it. Allow it to cool slightly on parchment paper.
Next, use the pink candy melts to create the bunny ears and nose. A little bit of black icing can add a cute face. Once everything is set, stick the marshmallows on the lollipop sticks, and you’re ready to wow your guests!
These bunny pops are fun to make and delicious to eat. Kids will love helping out, so get them involved in the process. Don’t forget to add colorful decorations around the pops, like plastic eggs and flowers, to make your display pop!
Pinecone Bunny Craft
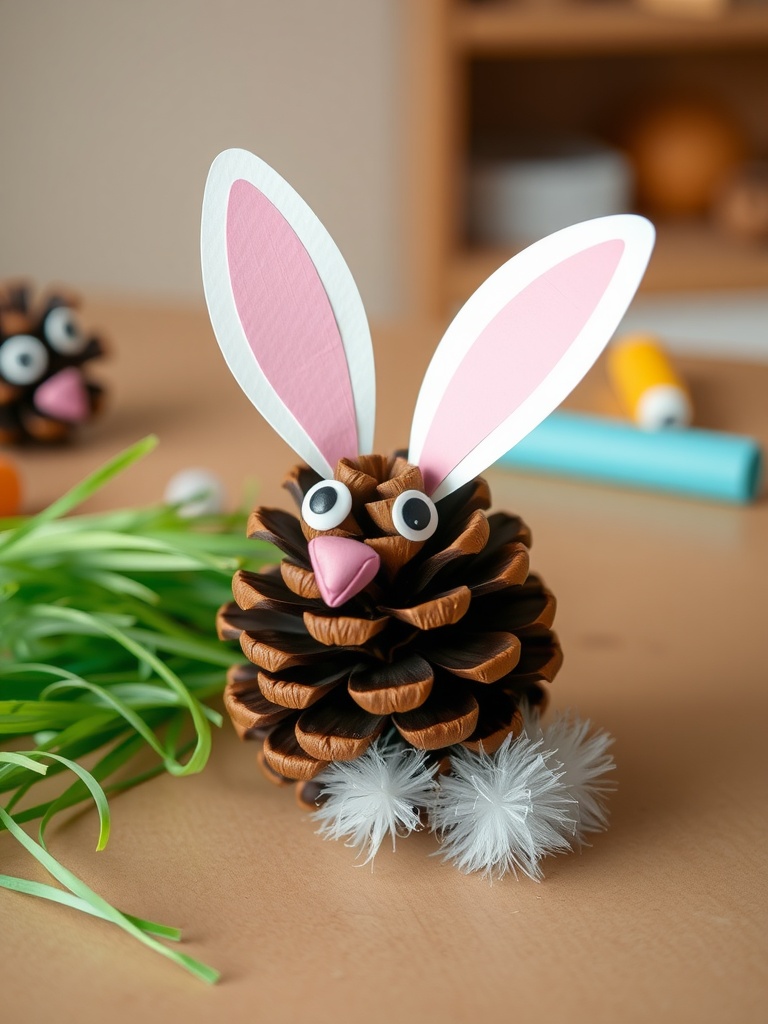
This Pinecone Bunny craft is a delightful way for kids to celebrate Easter! Using simple materials, children can create their own adorable bunnies to decorate for the holiday. The main material, a pinecone, serves as the body of the bunny, making this project both fun and eco-friendly.
To make your own Pinecone Bunny, gather some basic supplies. You will need a pinecone, construction paper (pink and white), googly eyes, a pom-pom for the nose, and some fluffy pom-poms for the tail. Start by cutting out large bunny ears from the construction paper and attaching them to the top of the pinecone using glue. The pink inner ears will add a nice touch!
Next, glue on the googly eyes and the pom-pom nose, giving your bunny a friendly face. For the finishing touch, add two small white pom-poms at the base of the pinecone to represent the bunny’s fluffy tail. Feel free to use markers or crayons to add extra details, like whiskers or a smile!
This project encourages creativity and can be done with minimal supervision. It’s also a great opportunity to talk about nature as kids learn about the different textures and shapes of pinecones. Happy crafting!
Felt Easter Eggs
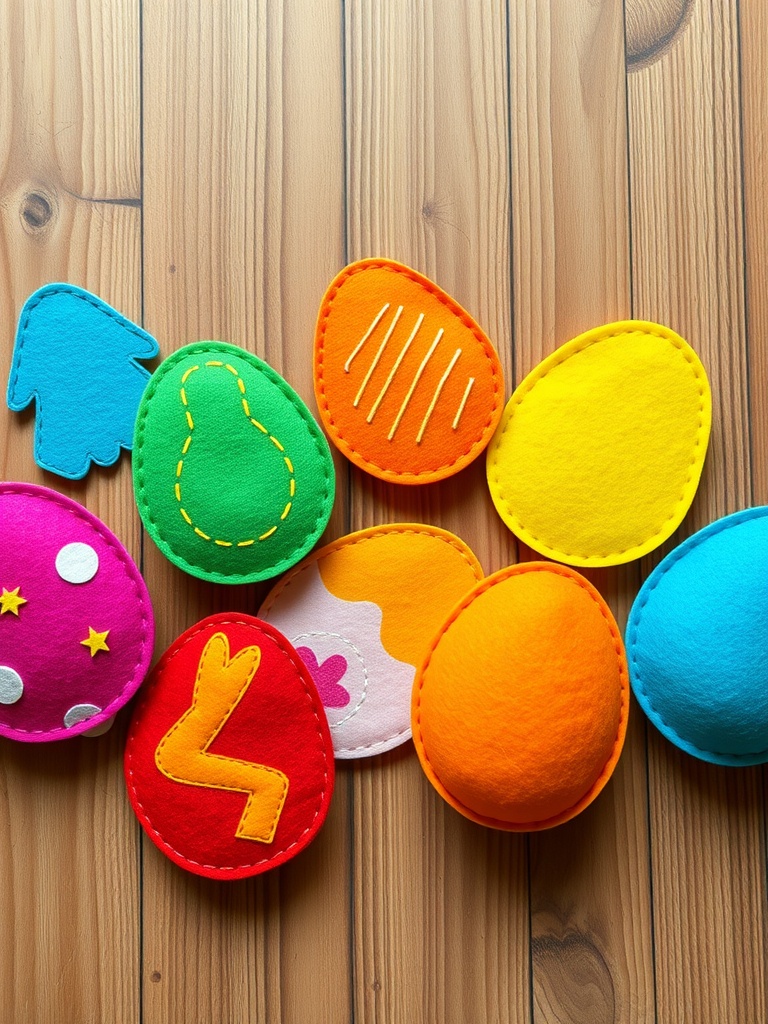
Felt Easter eggs are a fun and easy way to celebrate the holiday with kids. These colorful creations add a festive touch to any space. They’re soft, safe, and perfect for little hands to handle. Plus, making them can be a fun group activity!
To get started, gather your materials. You’ll need different colors of felt, scissors, fabric glue or a needle and thread, and some embellishments like buttons or markers. Cut out egg shapes from the felt to make the base. You can also create fun designs or patterns to glue or sew onto each egg.
Encourage kids to express their creativity. They can choose colors, shapes, and decorations. Let them glue on stars, stripes, or even flowers. If you’re feeling adventurous, you can add some stitching to give the eggs a unique look.
Once everything is assembled, let the eggs dry if you used glue. These felt eggs can be used for decoration, as a game, or even as a keepsake. They are durable and can be stored for future Easters!
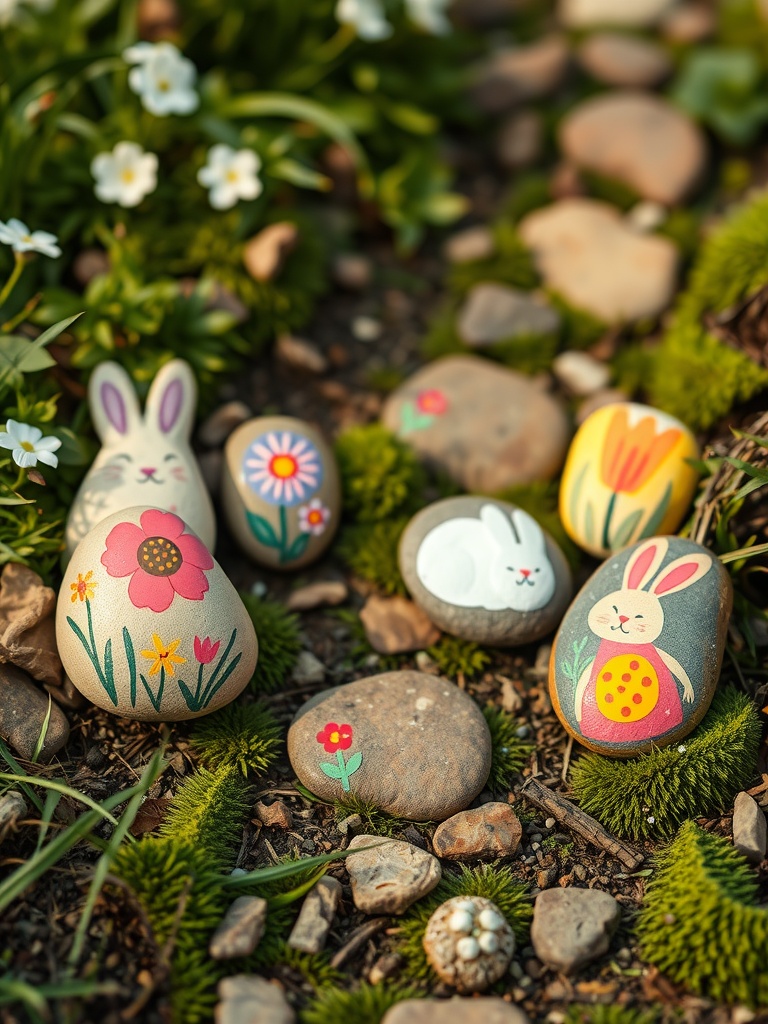
Easter Story Stones
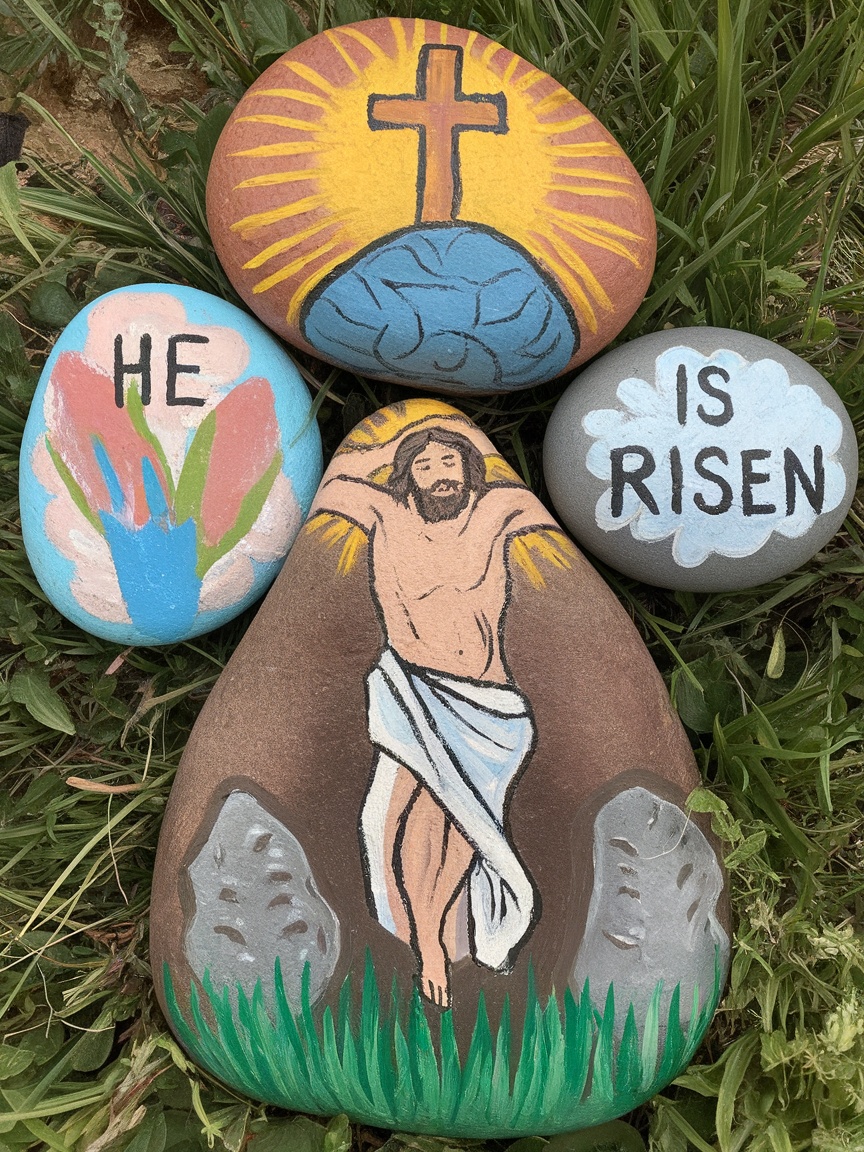
Easter Story Stones are a fun and creative way for kids to learn about the Easter story. These decorated stones can help bring the narrative to life, making it engaging for young minds. You’ll see stones featuring colorful illustrations of characters and symbols related to Easter.
The image shows a variety of stones, each telling part of the story. There are flowers, a cross, and even a cute bunny, all painted with bright colors. This variety makes it visually appealing and easy for kids to remember different elements of the story.
Creating your own Easter Story Stones is simple. Start by gathering some smooth, flat stones. Then, using acrylic paints or permanent markers, let the kids decorate the stones with images or words that represent parts of the Easter story. Think of symbols like the cross, flowers, or characters like Mary and Jesus.
Once the stones are painted, you can use them to tell the Easter story together. You can lay them out in order or let the kids choose stones randomly and create their own version. This activity encourages creativity, storytelling, and learning!
Easter Candle Holders

Easter candle holders are a fun and creative way to brighten up your holiday decor. In the image, you can see two charming glass jars adorned with lovely Easter-themed stickers, featuring cute bunnies and butterflies. The soft glow from the candles inside adds warmth, making these holders perfect for any festive gathering.
To make your own Easter candle holders, start by collecting some empty glass jars. Clean them thoroughly and remove any labels. Next, gather some colorful stickers or decorative paper featuring Easter symbols like eggs, bunnies, or flowers. Let the kids pick their favorites!
Once you have your decorations ready, apply the stickers to the outside of the jars. If you want to add a little more flair, you can wrap twine or ribbon around the tops of the jars. Finally, place a small candle or LED tealight inside each jar. This way, it’s safe for children and will still create a lovely atmosphere.
These candle holders not only look pretty, but they also make great gifts. You can even create a centerpiece for your Easter table by arranging several jars together. Get creative with colors and designs to make them unique. Have fun with this easy craft that brings the joy of Easter into your home!
Egg Carton Wreath
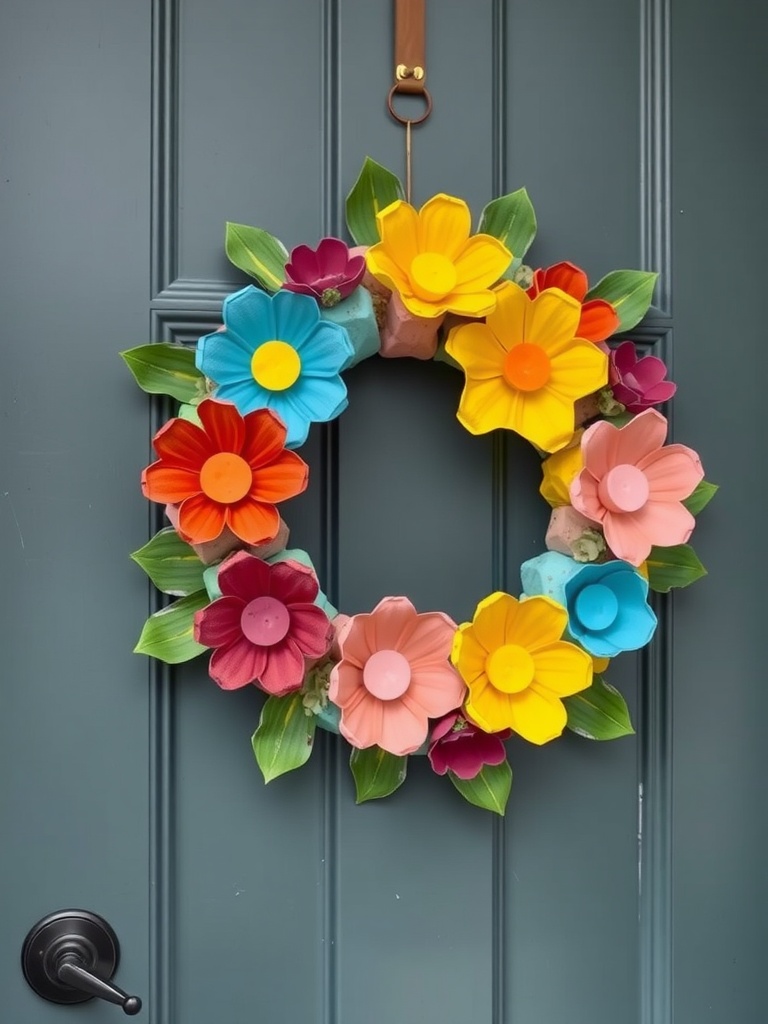
Create a cheerful Egg Carton Wreath for Easter! This craft is simple and fun for kids to make. Using an old egg carton, little ones can transform each section into colorful flowers, perfect for sprucing up any door.
Start by cutting the egg carton into individual cups. Then, let the kids paint them in vibrant colors like pink, yellow, and blue. Once they’re dry, they can add a center using buttons or pom-poms to give the flowers a pop!
Attach the painted cups to a round base using hot glue. You can use a cardboard circle or a sturdy wreath frame. Fill in any gaps with green leaves cut from paper or fabric to mimic foliage.
Finally, hang the wreath on your front door with a ribbon. This cheerful decoration is sure to bring a smile to everyone who sees it!
Egg and Spoon Races
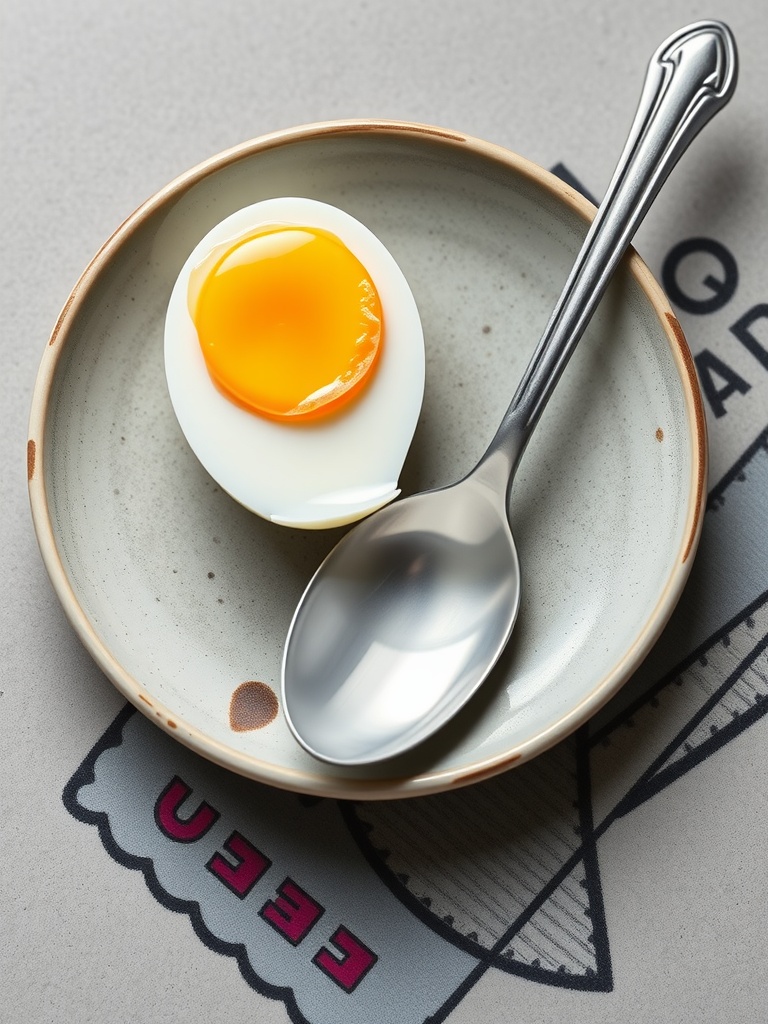
Egg and spoon races are a classic, fun activity perfect for Easter gatherings. The image shows kids excitedly running while balancing colorful eggs on spoons. This lively scene captures the joy and energy of friendly competition.
To set up your own egg and spoon race, gather some spoons and colorful plastic eggs. If you prefer, you can also use hard-boiled eggs for a more traditional touch. Make sure to choose a safe outdoor space where kids can run freely.
Each participant holds a spoon with an egg balanced on top. The objective is to race from one point to another without dropping the egg. You can create a starting line and a finish line, marking them clearly. Encourage kids to run carefully and cheer each other on!
For an extra twist, consider adding obstacles that participants must navigate around. This can make the race more exciting and challenging. Remind everyone to keep their eyes on their eggs, as the slightest bump can cause them to tumble off!
At the end of the race, celebrate all the participants. You can even give out small prizes for the winners to keep the spirit of fun alive. This activity not only promotes teamwork and sportsmanship but also fills the day with laughter and excitement.
Bunny Footprint Art
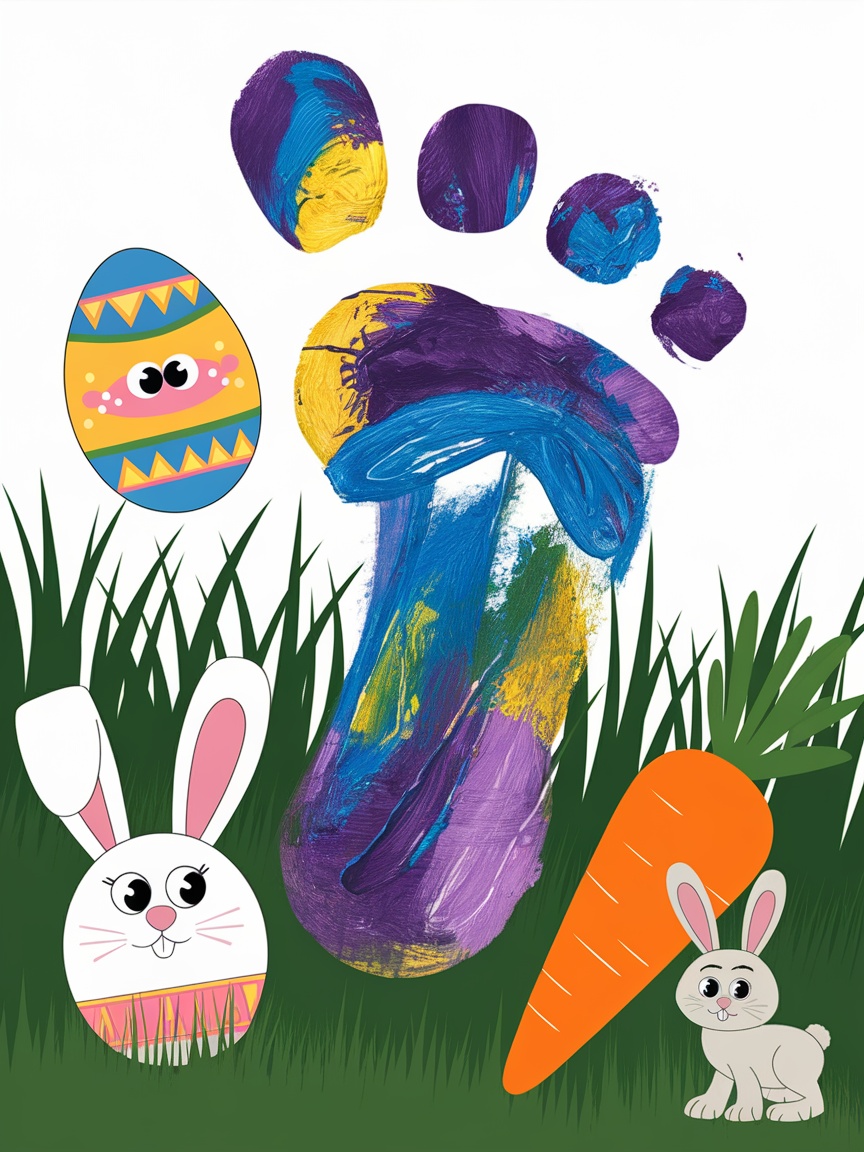
Bunny footprint art is a delightful craft for kids that combines creativity and fun. In this project, little hands make cute bunny shapes using their own footprints. The result is an adorable bunny image decorated with colorful flowers and fun details.
To start, gather your supplies. You need washable paint, paper, and some decorative items like stickers or colored paper for flowers. Use brown or gray paint for the bunny’s body. Have your child step into the paint and then press their foot onto the paper to create the bunny’s shape.
Once the bunny outline is dry, it’s time to add features. Use pink paint for the inner ears and add googly eyes for a playful look. You can also use markers to draw whiskers and a nose. Let your child express their creativity by decorating the background with flowers and other colorful elements.
This craft is perfect for Easter or springtime. It’s a great way to celebrate the season while making a lasting memory. Plus, kids love seeing their footprints transformed into something so cute!
Spring Flower Crowns
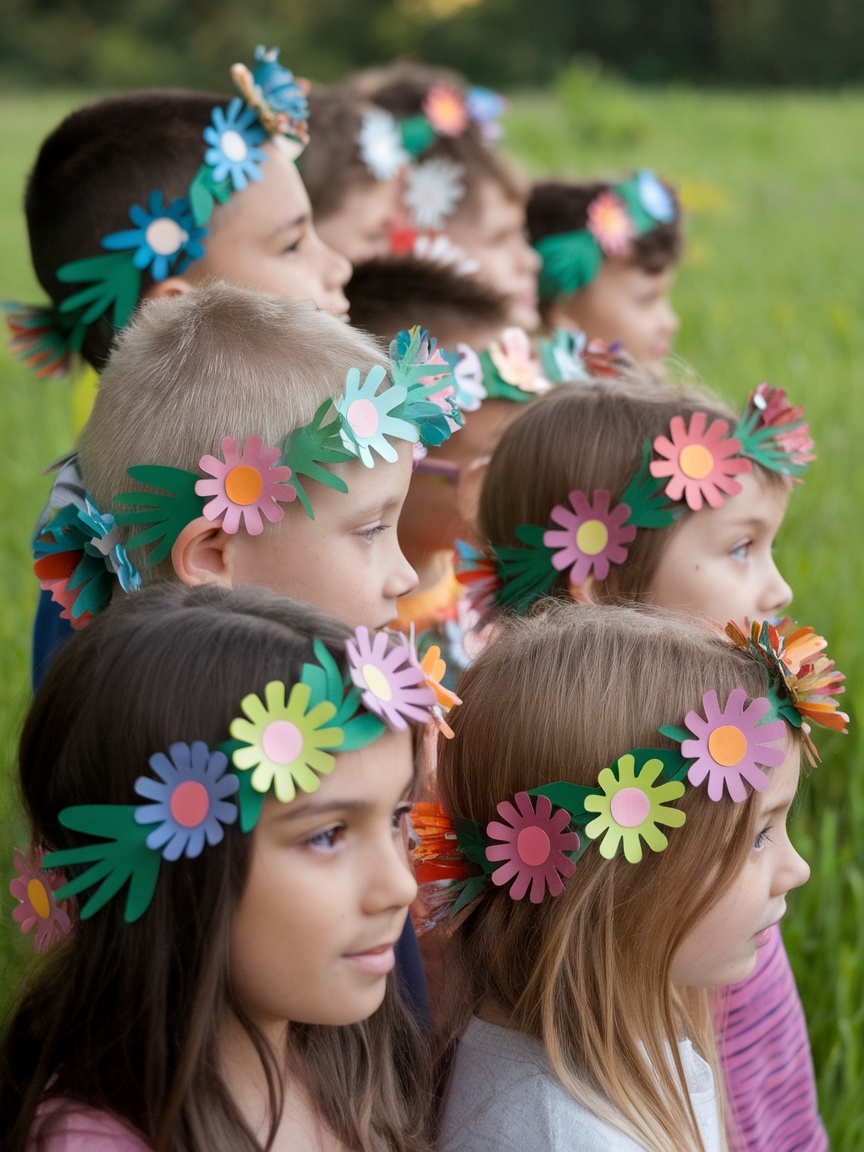
Spring flower crowns are a fun and colorful way for kids to enjoy the season. These crowns brighten up any outfit and let kids embrace their creativity. The image showcases children wearing vibrant flower crowns made from paper, featuring a mix of pink, yellow, and white flowers. The crowns are adorned with lush green leaves, adding to their cheerful appearance.
Making spring flower crowns is easy and can be a delightful project for a sunny afternoon. Start by gathering materials like colored paper, scissors, and glue. Cut out various flower shapes and leaves to create a lovely assortment. Kids can choose their favorite colors and designs, making each crown unique.
Next, measure a strip of paper to fit around the child’s head. Glue or tape the ends together to form a circle. Once the base is ready, attach the flowers and leaves to the strip using glue. Encourage kids to arrange the flowers in a way that they like best. Let the crowns dry before wearing them.
This craft is not just fun; it also helps develop fine motor skills and creativity. Plus, wearing a flower crown adds a touch of magic to any springtime play. Let your kids enjoy their beautiful creations and celebrate the joy of spring!
Easter Egg Photo Booth Props
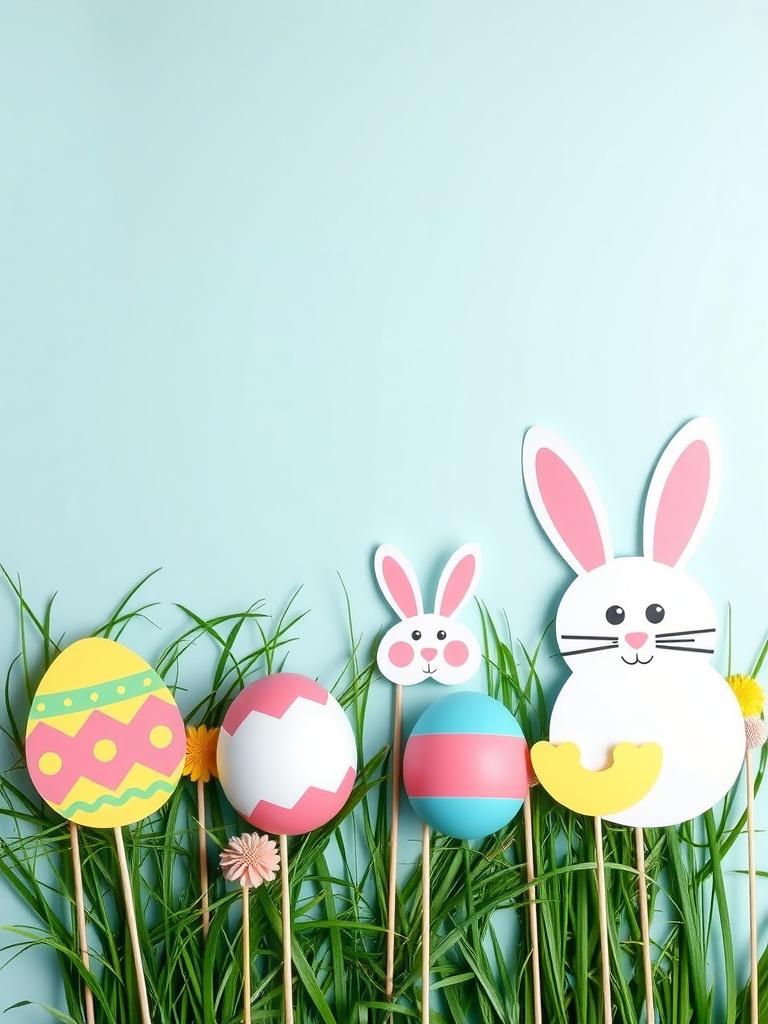
Spring is here, and it’s the perfect time to bring some fun into your Easter celebrations! One way to do this is by creating colorful photo booth props. The image shows a delightful collection of Easter-themed props, including decorated eggs and a cute bunny. These props will surely add charm to any Easter gathering.
Making these props is simple and enjoyable. Start by gathering some sturdy cardstock, scissors, and colorful markers or paints. First, draw and cut out different egg shapes. You can design them with stripes, dots, or zigzags. Let your kids get creative with their own unique designs!
Next, cut out the bunny and decorate it with rosy cheeks and big ears. Attach each prop to a wooden stick or straw for easy handling. You can use glue or tape to secure them. For a finishing touch, consider adding fake flowers or greenery to your photo booth background. This will make your Easter photo sessions even more festive!
Bird Nest Craft
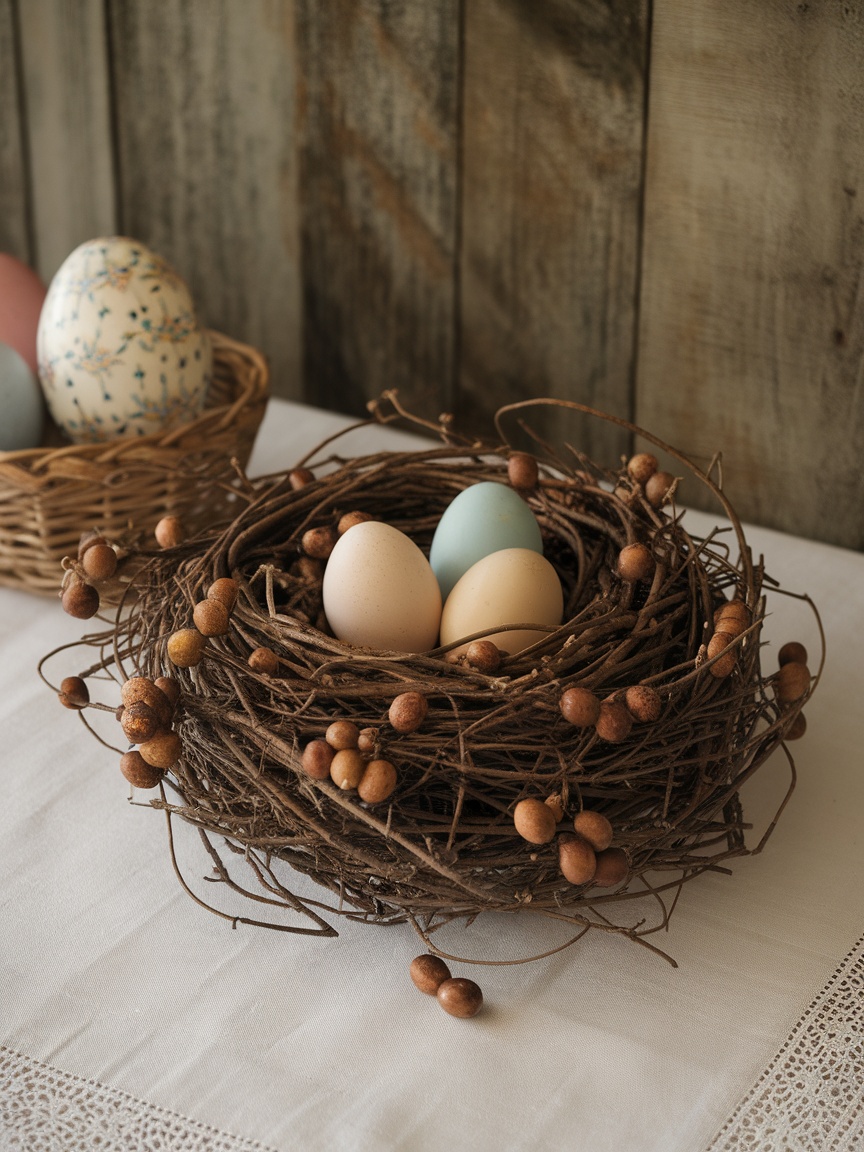
Creating a bird nest craft is a fun and engaging project for kids, especially around Easter. The image showcases a cozy nest filled with charming eggs, perfect for Easter decor. With some simple materials, you can make your own nest at home!
To get started, you will need some twigs, a bowl, and craft eggs. First, gather twigs from your yard or a nearby park. Make sure they are clean and safe for kids to handle. Next, take a bowl and start forming a circular shape with the twigs, mimicking the look of a real nest.
Once the base is ready, place your eggs inside. You can use real eggs, plastic eggs, or even paper-mâché eggs painted in bright colors. Don’t forget to add a personal touch by decorating the eggs with stickers or markers!
For a finishing touch, consider adding small flowers or decorative elements around the nest. This craft not only enhances creativity but also offers a wonderful opportunity to discuss nature and the importance of birds in our ecosystem.
DIY Bunny Treat Bags
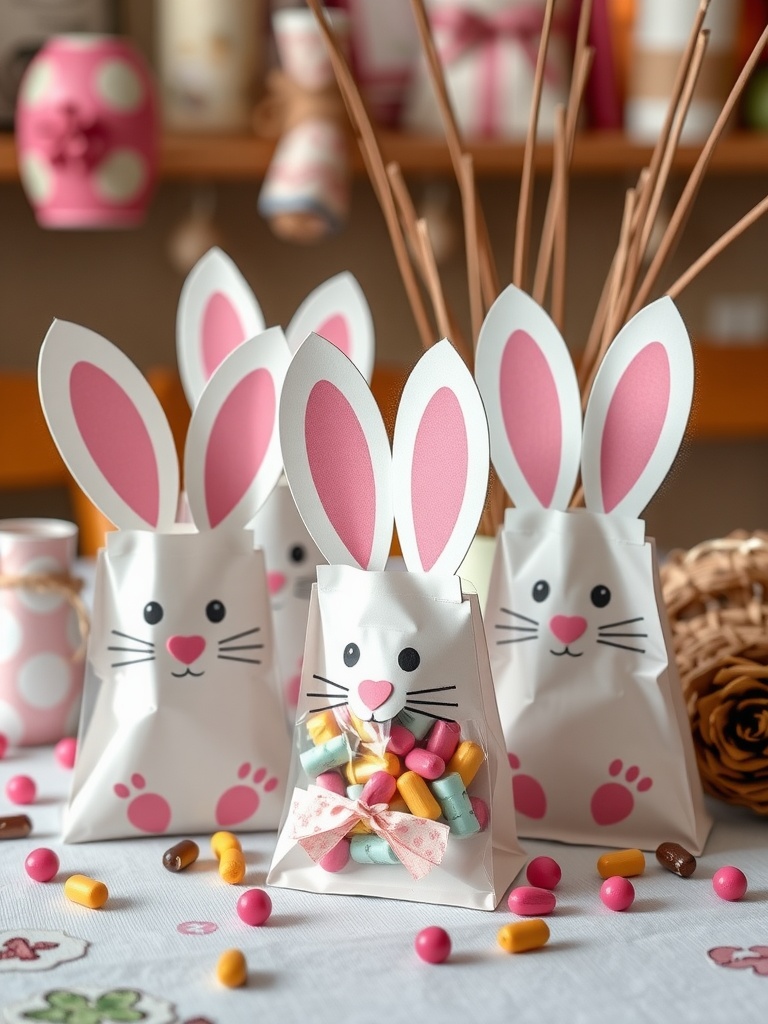
These DIY Bunny Treat Bags are a fun and simple project to get kids excited for Easter! The cute bunny faces and ears make them perfect for holding treats. You can fill them with candies, small toys, or other goodies to share with friends and family.
To make these adorable bags, start by gathering your materials. You will need white paper bags, pink and black markers, scissors, and some colorful candies. Cut out bunny ears from pink cardstock and glue them to the top of the bags. Use the markers to draw on the bunny’s face, complete with whiskers and a cute nose.
After decorating, fill each bag with treats. Tie a little ribbon around the top for that extra touch! These bags not only bring joy but also keep the kids engaged in a fun activity. They’ll love seeing their own creations turn into cute gifts!
Colorful Egg Carton Chicks
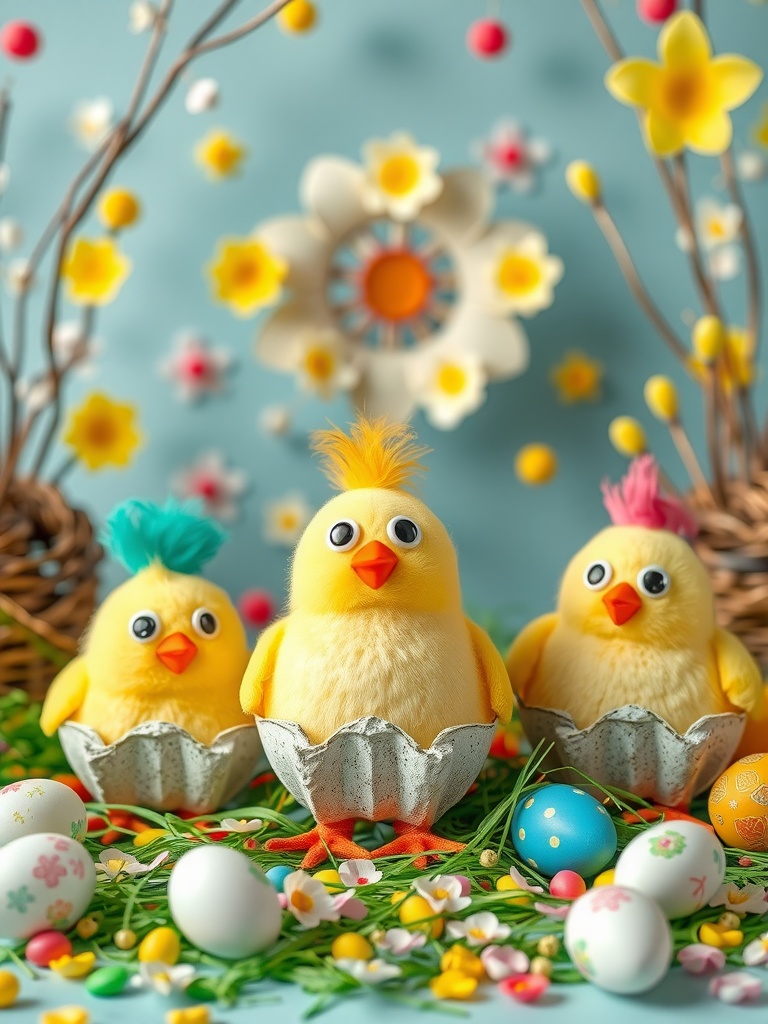
These adorable egg carton chicks are a fun and simple craft for kids to enjoy during Easter. Using recycled materials makes this project not only creative but also eco-friendly. The bright colors and cheerful look of these chicks bring a smile to everyone’s face.
Start by cutting an egg carton into individual cups. Let the kids paint them in vibrant colors like yellow, pink, or blue. Once the cups are dry, they can add googly eyes, a beak made from paper, and feathers for added flair. This craft can spark creativity and encourage kids to personalize their chicks.
For a fun twist, use these chicks as decorations around the house or as part of an Easter centerpiece. They can even make great gifts for family and friends. The process of making these adorable chicks is simple, and the kids will love showing off their creations.
Leave a Reply