
Looking for fun and thoughtful ways to celebrate Mother’s Day? Whether you’re crafting, cooking, or creating something special, we’ve rounded up a variety of projects that are sure to bring smiles and show your appreciation. Dive in to find ideas that fit every skill level and allow you to share some love with the special mom figures in your life!
Customized Coffee Mugs
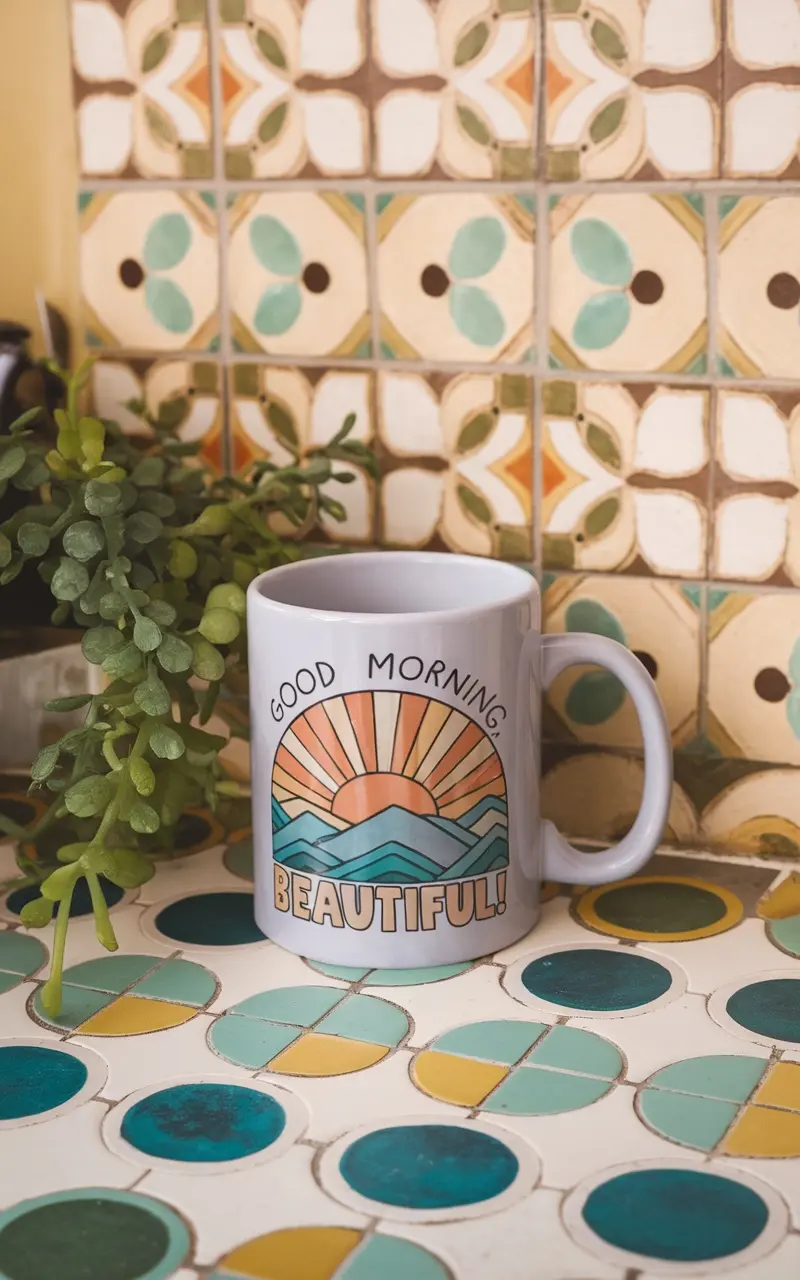
Creating customized coffee mugs is a delightful project that allows you to add a personal touch to a daily ritual. Whether you want to express your love, share a motivational message, or add a bit of flair to your kitchen, these personalized mugs are a perfect choice. Plus, they are easy to make, making them a fun activity for all skill levels.
For this project, you can use a variety of materials like ceramic paint or markers. Just gather your supplies and let your creativity flow. A customized coffee mug makes for a lovely gift, especially on occasions like Mother’s Day, where you can remind someone special how beautiful they are each morning.
What You’ll Need
- 1 plain ceramic mug
- Oil-based sharpie markers or ceramic paint
- Stencils (optional)
- Oven (for curing)
- Clear acrylic sealer (optional)
Instructions
- Prepare Your Mug: Start with a clean, dry ceramic mug. Ensure there are no fingerprints or residue on the surface.
- Design Your Mug: Using the oil-based sharpie markers or ceramic paint, create your design. You can freehand or use stencils for a more polished look.
- Let it Dry: Allow the mug to dry completely for a few hours to avoid smudging. If you’re using paint, consider letting it sit overnight.
- Cure the Mug: Place the mug in a cold oven, then heat to 350°F (175°C) and bake for 30 minutes. This step will help set your design.
- Cool and Seal: Turn off the oven and let the mug cool inside. Once cool, you can apply a clear acrylic sealer for extra protection.
Handmade Jewelry for Mom
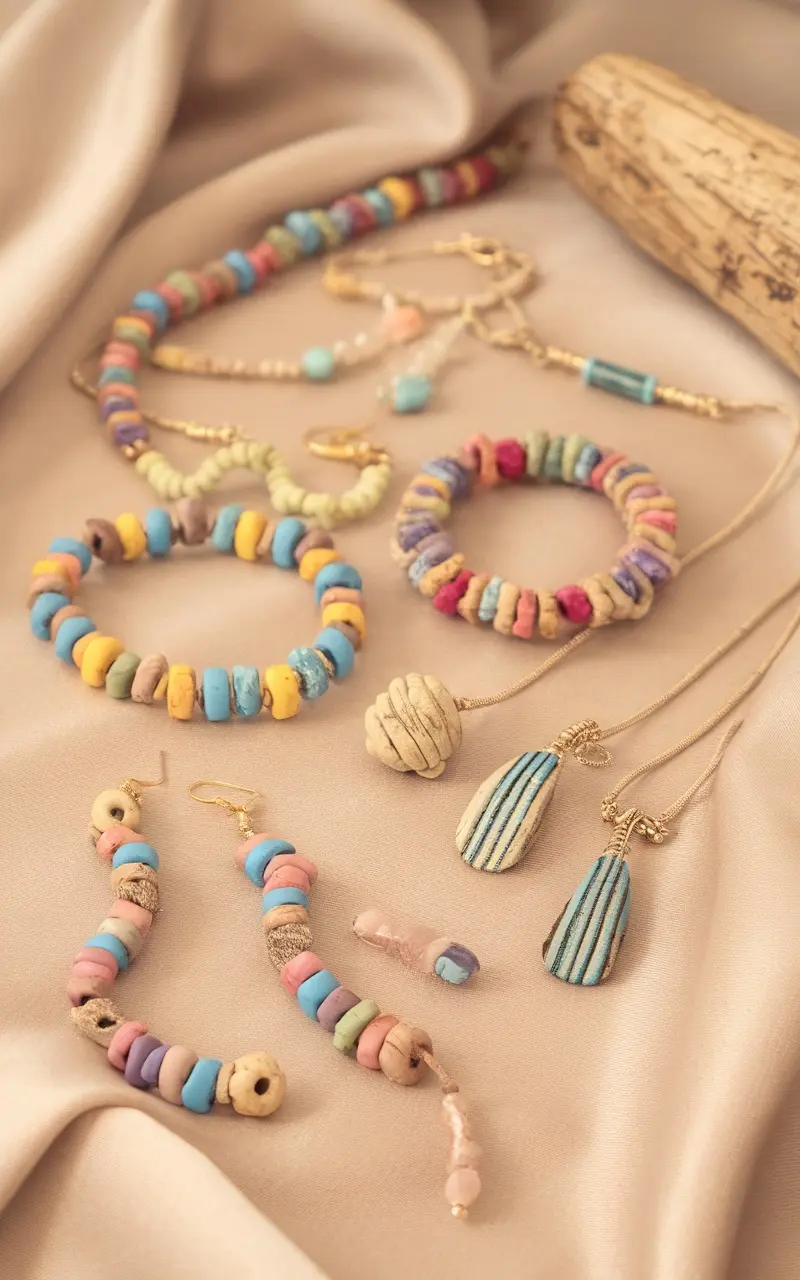
This Mother’s Day, why not get crafty and make some handmade jewelry for mom? It’s a fun project that allows you to express your creativity while creating a unique gift she can cherish. The colorful beads and textures make each piece special, and it’s a delightful way to show your love.
Making jewelry at home is simple and enjoyable. You can customize colors and styles that match your mom’s personality. Plus, it’s an opportunity to spend quality time together if you decide to make it a joint project. Here’s a quick recipe to create some lovely bead bracelets that she’ll adore!
What You’ll Need
- 1 cup of colorful beads (wooden or craft beads)
- Stretchy elastic cord (about 1 yard)
- Scissors
- Optional: charms or pendants for personalization
Instructions
- Cut a piece of the elastic cord about 10 inches longer than the desired length of the bracelet.
- String the beads onto the elastic cord, arranging them as you like. Be creative with color combinations!
- If using charms or pendants, add them in between beads for extra flair.
- Once you have strung all the beads, tie a secure knot at the ends of the cord to keep everything in place.
- Trim any excess cord, and your handmade bracelet is ready to be gifted to mom!
Personalized Flower Pots
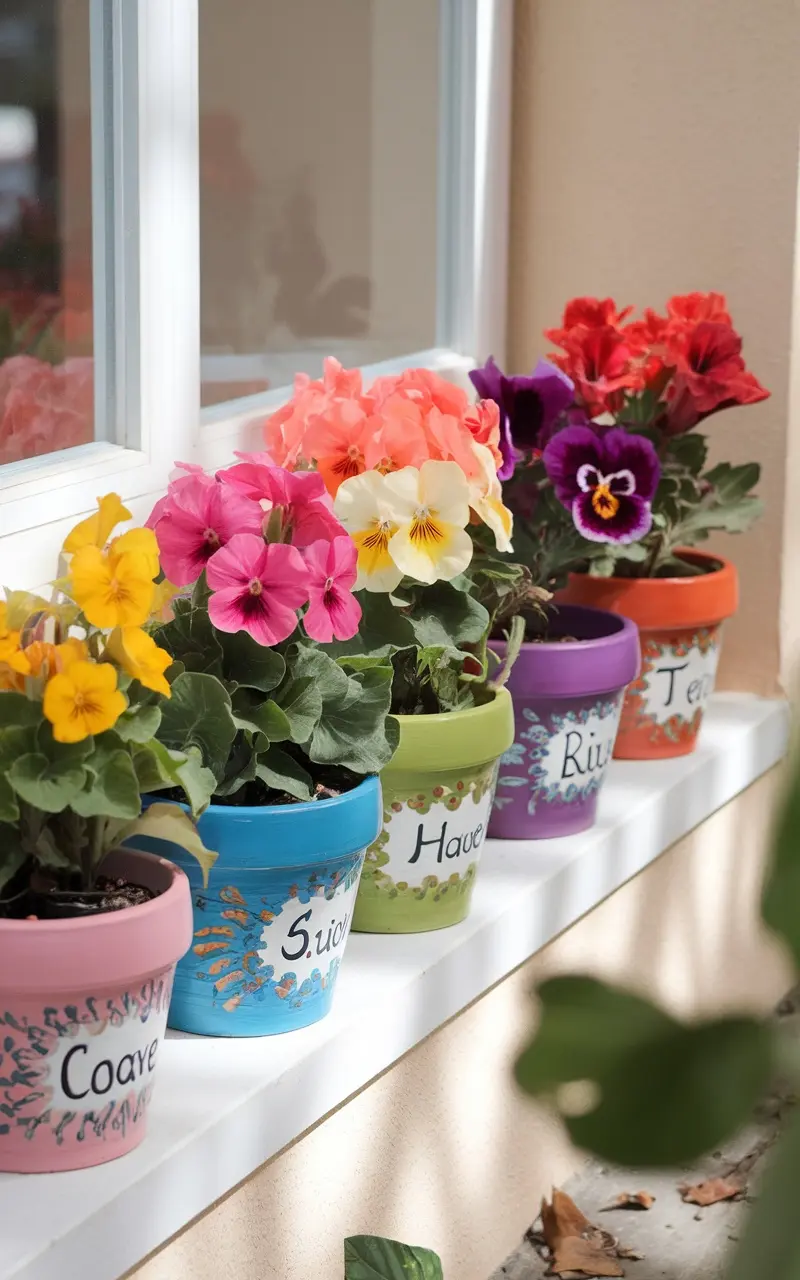
Creating personalized flower pots is a delightful way to show appreciation this Mother’s Day. This simple project allows you to add a personal touch to your home or garden while making a thoughtful gift. Whether you’re using vibrant colors or beautiful designs, these pots are sure to brighten any space.
The process is straightforward and can be enjoyed by all ages. All you need are some clay pots, paint, and creativity. Each pot can be unique, reflecting the personality of the recipient or the wonderful memories shared. Get ready to unleash your inner artist!
What You’ll Need
- Terracotta or clay pots
- Acrylic paints
- Paintbrushes
- Pencil for sketching designs
- Clear sealant (optional)
- Potting soil
- Flower seedlings or seeds
Instructions
- Prepare Your Work Area: Lay down newspaper or a protective cover to keep your workspace clean.
- Design Your Pots: Use a pencil to lightly sketch out your designs or names on the pots.
- Paint the Pots: Apply acrylic paint over the designs. Let each layer dry completely before adding more paint.
- Seal (Optional): If you want added durability, spray a clear sealant over the finished pots.
- Fill with Soil: Once the paint is dry, add potting soil to your pots, leaving space for plants.
- Plant Your Flowers: Carefully place your flower seedlings or seeds into the soil and water them as needed.
DIY Scented Candles
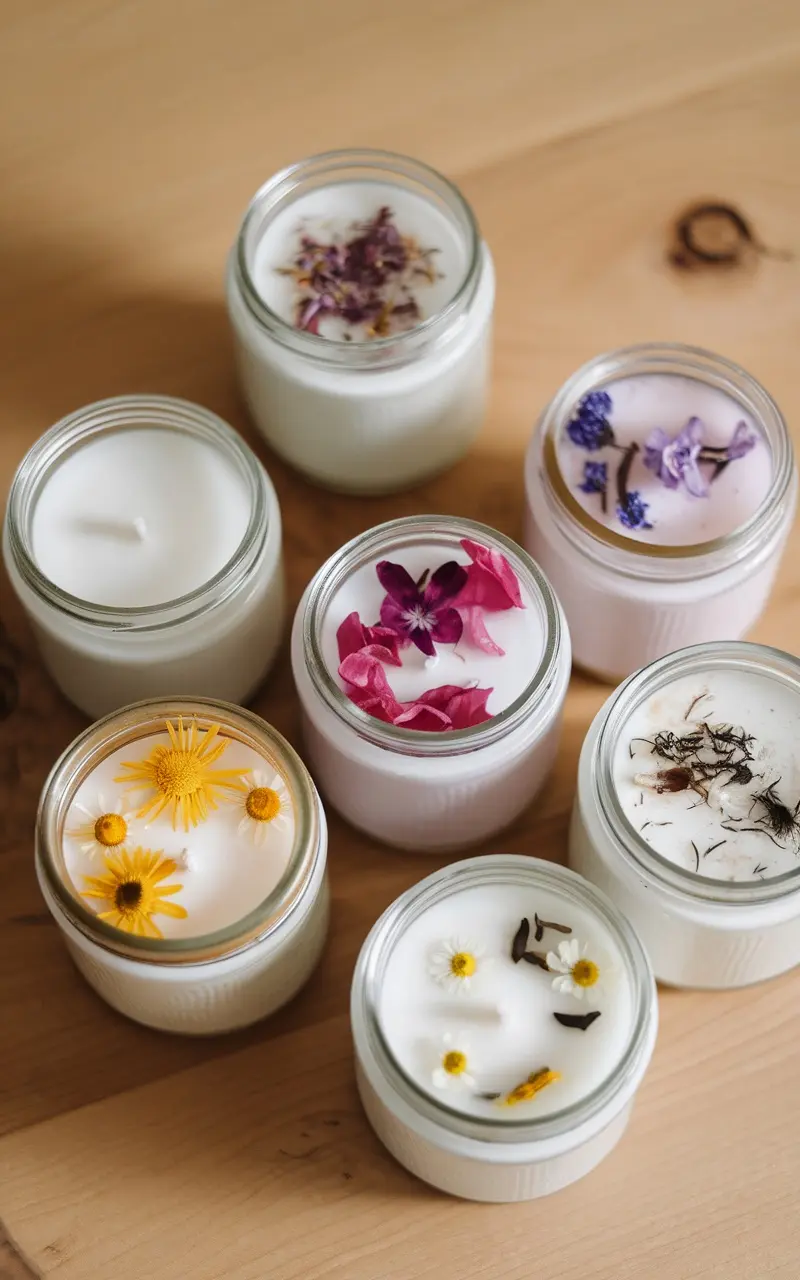
Making your own scented candles can be a delightful and aromatic project, perfect for celebrating special occasions like Mother’s Day. The process is simple and allows for creativity as you can choose your favorite scents and decorations. Plus, your handmade candles can add a personal touch to any space, making them a great gift.
Not only are homemade scented candles enjoyable to create, but they also fill your home with beautiful fragrances. You can experiment with various essential oils and natural ingredients. This project is easy enough for beginners, and the result is a lovely, customized candle that anyone would appreciate.
What You’ll Need
- 1 pound of soy wax flakes
- 1/2 ounce of essential oil (such as lavender, vanilla, or eucalyptus)
- Wick (pre-waxed and tabbed)
- Glass jars or containers
- Optional: dried flowers or herbs for decoration
Instructions
- Melt the Wax: In a double boiler, melt the soy wax flakes over medium heat until completely liquefied.
- Add Fragrance: Once the wax is melted, remove it from heat and add your chosen essential oil. Stir well to ensure the fragrance is evenly distributed.
- Prepare the Jars: Secure the wick to the bottom of your glass jar using a bit of melted wax. This will keep the wick in place as you pour the wax.
- Pour the Wax: Slowly pour the melted wax into the jar, leaving a little space at the top. If desired, sprinkle dried flowers or herbs on top before the wax hardens.
- Cool and Trim: Allow the candle to cool completely, which may take a few hours. Once cooled, trim the wick to about 1/4 inch above the wax surface.
Painted Rocks for Garden
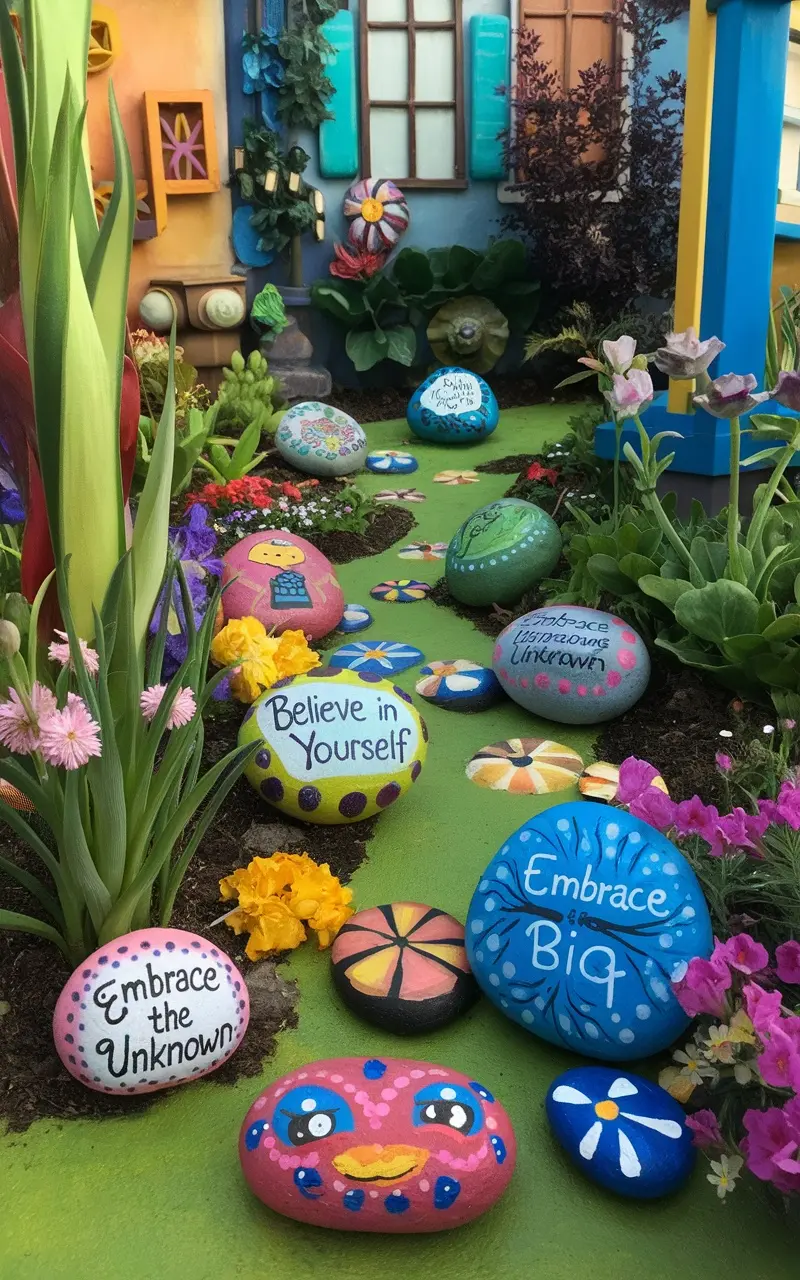
Painting rocks is a delightful and simple project that adds a personal touch to any garden. This fun activity not only allows for creativity but also results in cheerful decor that can brighten up outdoor spaces. Whether you’re looking for a way to express your personality or create heartfelt gifts for loved ones, painted garden rocks are a charming choice.
Using just a few materials, you can transform ordinary stones into colorful creations. This project is accessible to all skill levels, making it a great family activity. Let’s dive into the materials needed and the step-by-step process to create your own painted rocks!
What You’ll Need
- Smooth, clean rocks (various sizes)
- Acrylic paints in assorted colors
- Paintbrushes (various sizes)
- Sealer (clear acrylic spray or paint)
- Palette or paper plate for mixing colors
- Water and paper towels for cleaning brushes
Instructions
- Select your rocks: Choose smooth, clean rocks that will work well for painting.
- Prepare your workspace: Lay down newspaper or a drop cloth to protect your work area.
- Paint a base coat: Use a larger brush to apply a base coat of paint on each rock. Let it dry completely.
- Add designs: Once the base coat is dry, use smaller brushes to add details and designs. You can try patterns, words, or even small pictures.
- Seal your artwork: Once the paint is fully dry, spray a clear acrylic sealer over the rocks to protect your design from the elements.
- Place them in your garden: Find the perfect spots in your garden to place your painted rocks, or gift them to family and friends!
Customized Photo Book
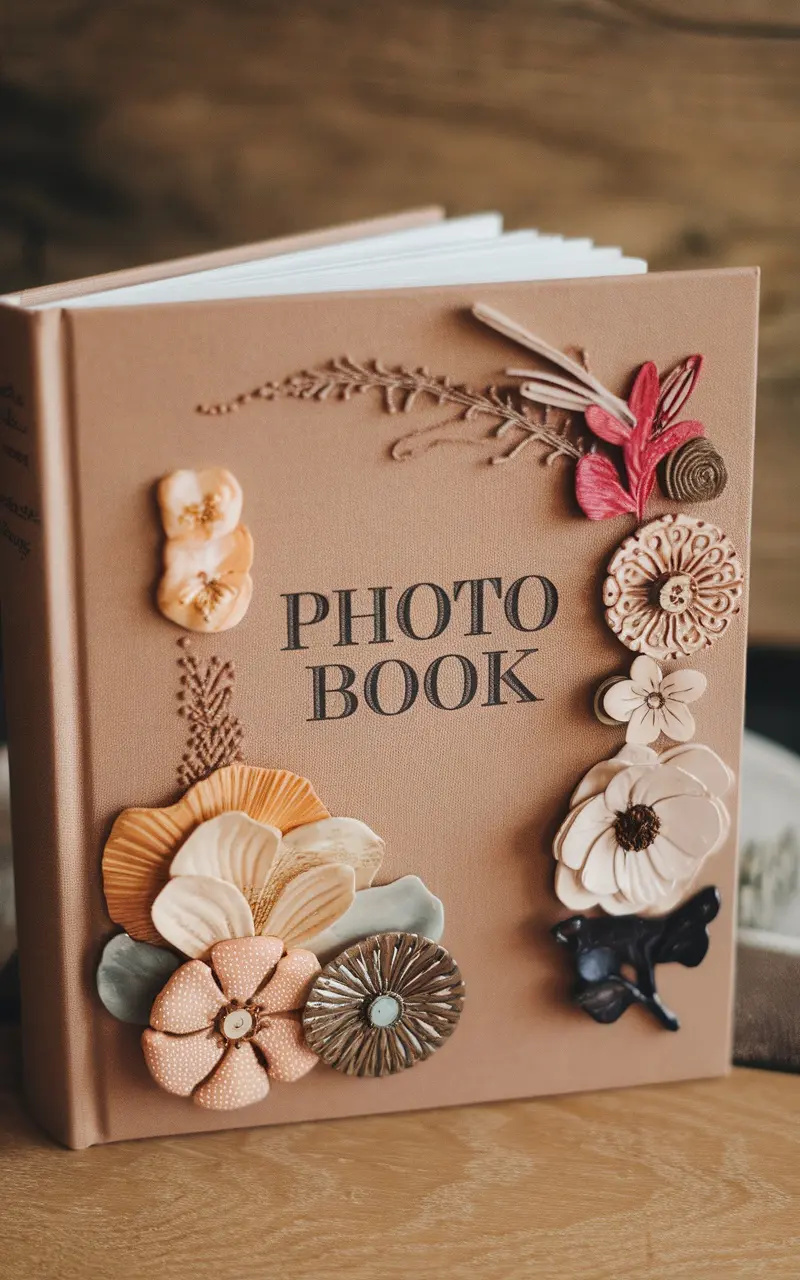
A customized photo book is a delightful way to preserve memories and celebrate special moments. It’s a simple project that can be personalized to reflect your unique experiences, making it a thoughtful gift for Mother’s Day. You can fill it with family photographs, handwritten notes, and decorative elements to bring your memories to life.
The process is straightforward and can be a fun activity to do with loved ones. Gather your favorite pictures, choose a theme, and let your creativity shine through. This project not only captures memories but also creates a keepsake that can be cherished for years to come.
What You’ll Need
- 20-30 printed photos
- 1 photo book (blank pages or custom layout)
- Adhesive (glue or double-sided tape)
- Decorative stickers and embellishments
- Colored pens or markers
- Scissors
Instructions
- Select Your Photos: Choose 20-30 of your favorite photos that represent special moments with family and friends.
- Plan the Layout: Before adhering, plan how you want your photos arranged on each page. Consider themes or chronological order.
- Adhere the Photos: Use glue or double-sided tape to secure your photos onto the pages of the book.
- Add Personal Touches: Use decorative stickers and embellishments to enhance your pages. Write captions or notes using colored pens to add a personal touch.
- Finish and Share: Once completed, gift the photo book to your mom, or keep it as a family keepsake to look back on in the future.
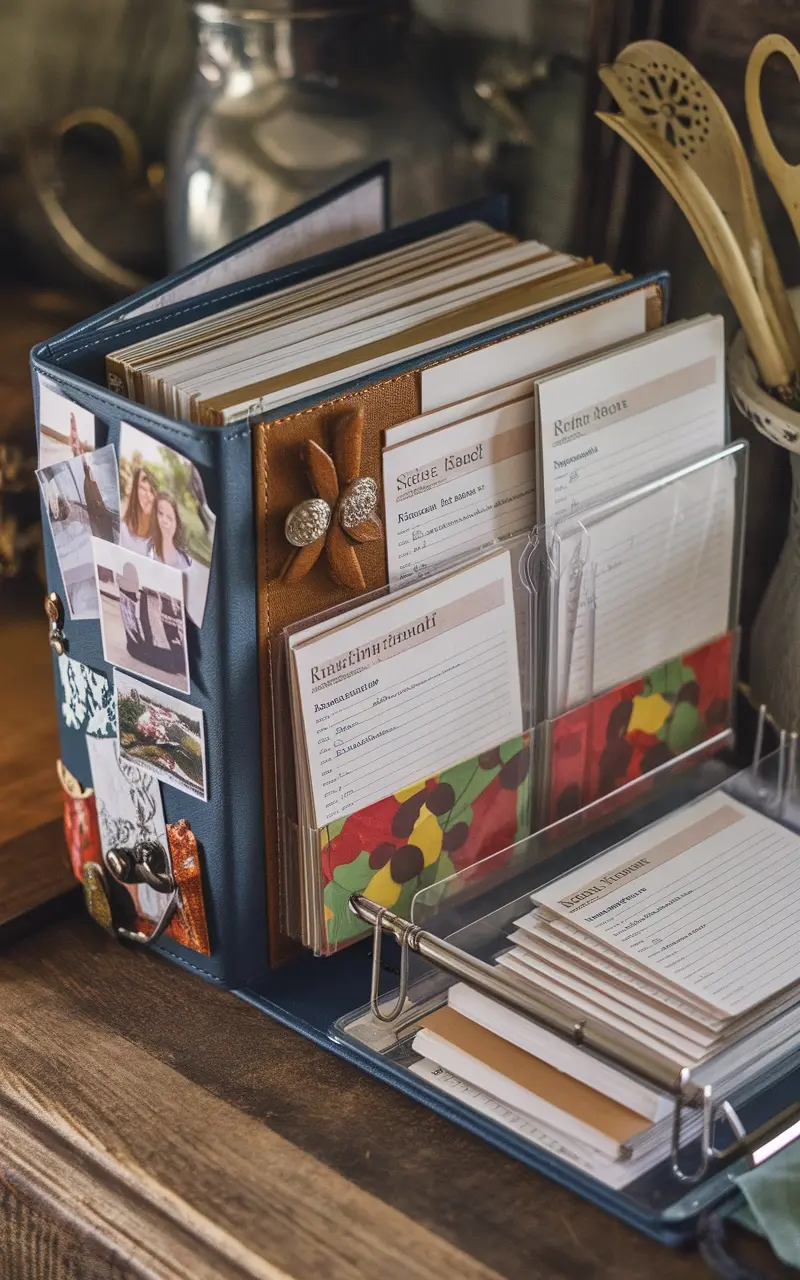
Handwritten Recipe Cards
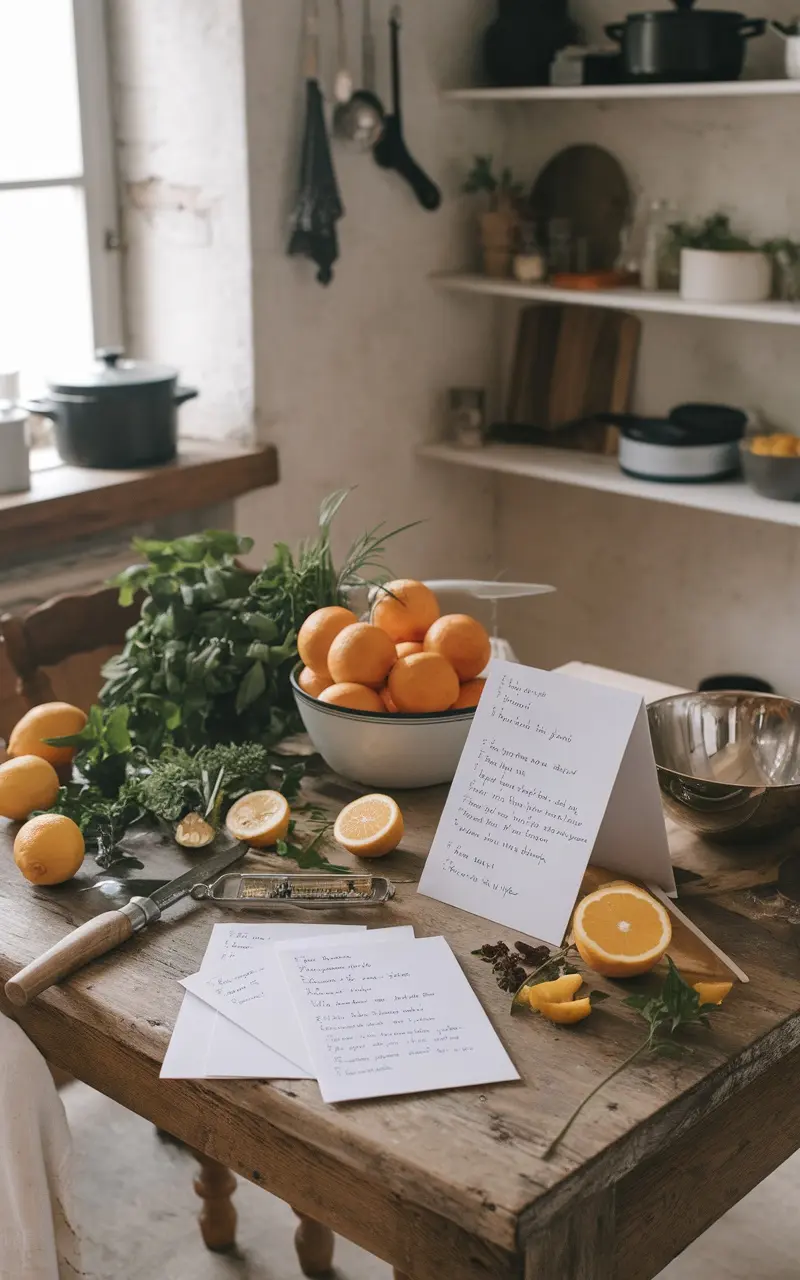
Creating handwritten recipe cards is a delightful way to share cherished family recipes, especially for special occasions like Mother’s Day. This project combines the warmth of personal touch with the joy of cooking. You’ll find that these cards not only hold recipes but also memories of love, laughter, and shared meals.
Whether you’re writing down Grandma’s famous lemon tart or your own unique twist on a classic dish, the flavors will remind you of home. Handwritten cards are simple to make and add a special charm to any kitchen. This project encourages creativity and connection, perfect for making someone feel loved and appreciated.
What You’ll Need
- 2 cups all-purpose flour
- 1 cup unsalted butter, softened
- 1 cup granulated sugar
- 2 large eggs
- 1 tablespoon vanilla extract
- 1 teaspoon baking powder
- 1/2 teaspoon salt
- 1 cup fresh lemon juice
- 2 tablespoons lemon zest
- Powdered sugar for dusting
Instructions
- Preheat your oven to 350°F (175°C) and grease a 9×13 inch baking dish.
- In a mixing bowl, cream together the softened butter and granulated sugar until light and fluffy.
- Add the eggs one at a time, mixing well after each addition. Then stir in the vanilla extract.
- In a separate bowl, combine the flour, baking powder, and salt. Gradually add this to the wet mixture, alternating with lemon juice, beginning and ending with the flour mixture. Mix until just combined.
- Fold in the lemon zest for an extra burst of flavor.
- Pour the batter into the prepared baking dish and spread evenly. Bake for 25-30 minutes or until a toothpick inserted in the center comes out clean.
- Allow cooling before dusting with powdered sugar. Cut into squares and serve as a sweet treat alongside your handwritten recipe cards!
Memory Quilt Creation
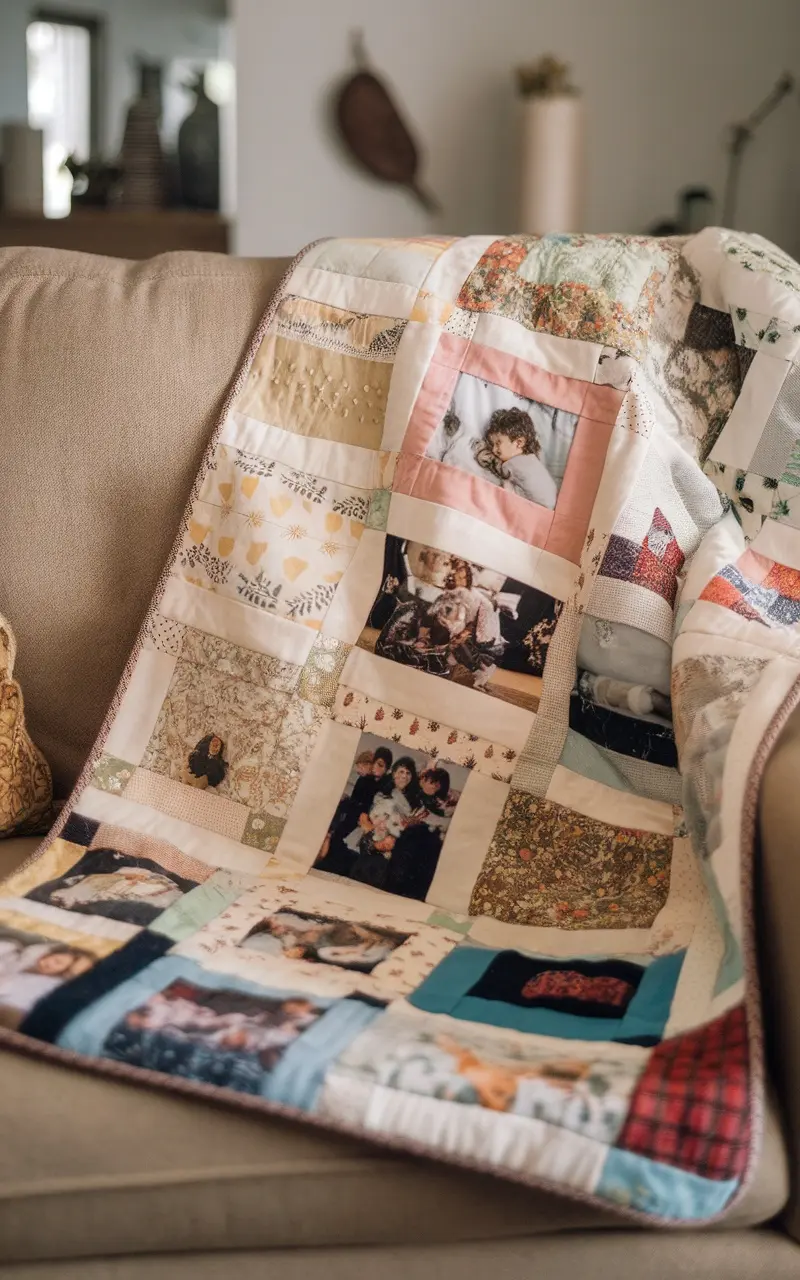
A memory quilt is a heartfelt way to preserve cherished moments and celebrate special occasions. Combining fabrics and photos, this project is both enjoyable and meaningful, allowing you to create a cozy keepsake that tells a story. The taste of nostalgia is rich and warm, reminiscent of family gatherings and love, making it a perfect gift for Mother’s Day.
This project is simple enough for beginners and rewarding for experienced crafters alike. You can personalize it to reflect the unique memories shared with your loved ones, making it a treasured addition to any home.
What You’ll Need
- 12-15 pieces of fabric (cotton or cotton blend)
- 5-10 printed fabric squares with photos
- Batting (for the inner layer)
- Sewing thread (matching colors)
- Fabric scissors
- Sewing machine (or needle and thread for hand sewing)
- Iron and ironing board
Instructions
- Select your fabrics: Choose a mix of colors and patterns that resonate with your memories, along with fabric that will showcase your photos.
- Prepare the photo squares: Print your chosen photos on fabric paper, following the manufacturer’s instructions, and cut them into squares.
- Design your layout: Lay out your squares on a flat surface to plan the arrangement. This will help you visualize the final quilt.
- Sew the squares together: Start by sewing the photo squares to the fabric pieces, using a straight stitch. Continue sewing until you have completed rows.
- Assemble the quilt: Layer the fabric squares with batting in between, and back with a larger piece of fabric. Pin the layers together to keep them in place.
- Quilt it: Sew through all layers to secure them, either with quilting stitches or by creating a simple grid pattern.
- Finish the edges: Trim any excess fabric and finish the edges with a bias tape or by folding over the edges and sewing them down.
- Enjoy and gift: Once complete, your memory quilt is ready to be displayed or gifted, creating warmth and sharing memories with those you love.
Customized Recipe Book
A customized recipe book is a heartfelt way to celebrate family traditions and cherished moments. Filled with favorite recipes, it not only captures the essence of home-cooked meals but also serves as a keepsake for generations to come. The flavors represented in each dish can take you on a nostalgic journey, reminding you of family gatherings and special occasions.
Creating your own recipe book can be simple and enjoyable. Start by gathering recipes that hold sentimental value, whether they are passed down from family members or your own culinary creations. Add personal notes or stories to each recipe to make it even more special. Here’s a delightful recipe to include in your customized book, perfect for any occasion!
What You’ll Need
- 2 cups all-purpose flour
- 1 teaspoon baking powder
- 1/2 teaspoon salt
- 1/2 cup unsalted butter, softened
- 1 cup granulated sugar
- 2 large eggs
- 2 teaspoons vanilla extract
- 1/2 cup milk
- 1 cup chocolate chips
Instructions
- Preheat your oven to 350°F (175°C) and grease a baking dish.
- In a bowl, mix flour, baking powder, and salt together. Set aside.
- In another bowl, cream the butter and sugar until light and fluffy. Add eggs and vanilla, mixing well.
- Gradually add the dry ingredients to the wet mixture, alternating with milk. Mix until just combined.
- Fold in the chocolate chips.
- Pour the batter into the prepared baking dish and bake for 25-30 minutes, or until a toothpick inserted in the center comes out clean.
- Let it cool before serving. Enjoy this delicious treat with family and friends!
Handmade Cards for All Occasions
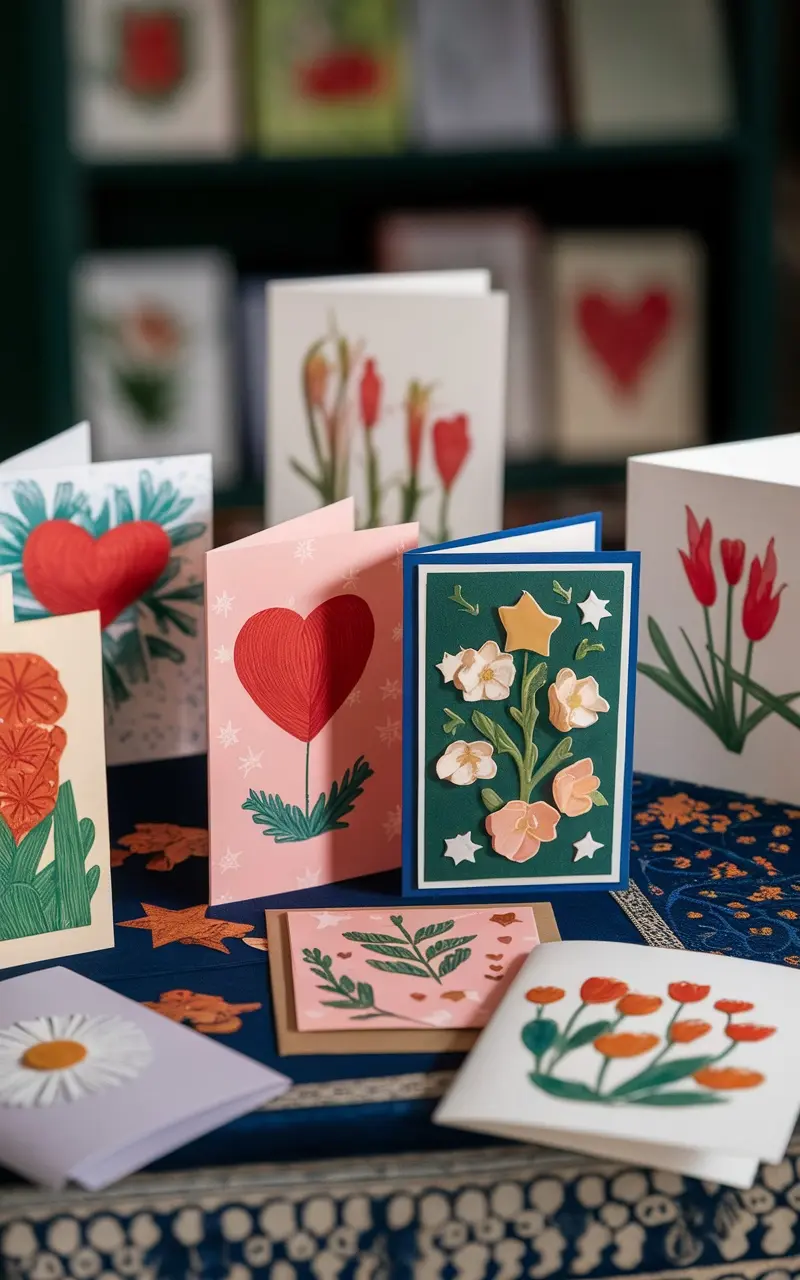
Creating handmade cards is a delightful way to express your feelings for any occasion. Whether it’s to celebrate a birthday, show appreciation, or simply say ‘I care’, these cards add a personal touch that store-bought options often lack. The process is simple and enjoyable, making it a great project for both kids and adults.
Using basic craft supplies, you can design cards that are as unique as the sentiments they convey. From vibrant flowers to heartfelt messages, the possibilities are endless, allowing you to tailor each card to the recipient’s taste. Plus, this is a budget-friendly option that doesn’t skimp on creativity!
What You’ll Need
- Cardstock paper (various colors)
- Colored markers or pens
- Scissors
- Glue or double-sided tape
- Decorative items (stickers, ribbons, etc.)
- Stamps (optional)
Instructions
- Start by cutting the cardstock to your desired size. A standard size is 5×7 inches, but you can customize it.
- Fold the cardstock in half to create a card shape.
- Use colored markers to draw or write a message on the front. You can also decorate with stickers or other embellishments.
- On the inside, write a personal note to the recipient. Feel free to add more decorative elements.
- Allow any glue or ink to dry before placing the card in an envelope.
Homemade Bath Bombs

Creating homemade bath bombs is a delightful way to enjoy some self-care. They add a splash of color and fragrance to your bath, making it a relaxing escape. Plus, they’re simple to make and can be customized to suit your favorite scents and colors.
This recipe offers a fun way to bring a spa experience into your home. You can whip up these fizzy treats in no time and even involve the kids for a fun activity. Gather your ingredients and let’s create something special!
What You’ll Need
- 1 cup baking soda
- 1/2 cup citric acid
- 1/2 cup Epsom salt
- 1/2 cup cornstarch
- 2 1/2 tablespoons essential oil (your choice)
- 1 teaspoon water
- Food coloring (optional)
- Silicone molds
Instructions
- Mix Dry Ingredients: In a large bowl, combine baking soda, citric acid, Epsom salt, and cornstarch. Stir well to ensure there are no clumps.
- Add Wet Ingredients: In a separate small bowl, mix the essential oil, water, and food coloring. Slowly add this mixture to the dry ingredients, a little at a time, while stirring continuously to avoid fizzing.
- Shape the Bath Bombs: Once the mixture holds together like damp sand, pack it tightly into your silicone molds. Press firmly to ensure they hold their shape.
- Let Them Dry: Allow the bath bombs to dry for at least 24 hours. Once dry, gently remove them from the molds.
- Store and Enjoy: Store your bath bombs in an airtight container until you’re ready to use them in your bath!
Personalized Tote Bags
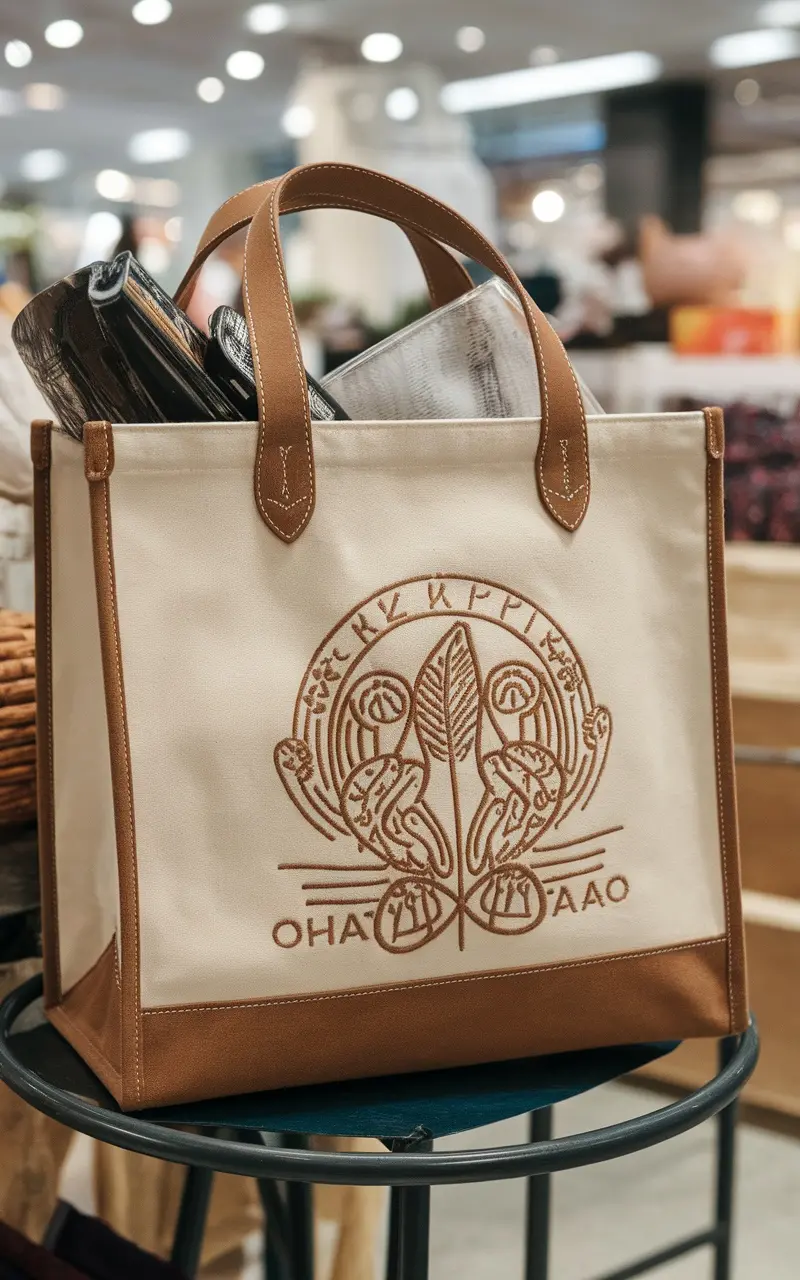
Creating personalized tote bags is a fun and straightforward project that adds a touch of individuality to a practical item. These bags are not only useful for carrying groceries or books but also serve as a canvas for your creativity. You can customize them with names, quotes, or unique designs, making them perfect for gifts, especially for special occasions like Mother’s Day.
The process is simple and requires minimal materials, making it accessible for crafters of all skill levels. Using fabric paint, embroidery, or iron-on transfers, you can turn a plain canvas bag into a treasured keepsake.
What You’ll Need
- 1 plain canvas tote bag
- Fabric paint or markers
- Iron-on transfer paper (if using images)
- Stencils (optional)
- Embroidery thread and needle (if sewing)
- Iron (for iron-on transfers)
- Protective paper (to place inside the bag while painting or ironing)
Instructions
- Prepare Your Area: Lay down protective paper on your work surface to prevent any paint or ink from spilling.
- Design Your Bag: Sketch your design on paper first. If using stencils, position them on the bag.
- Paint or Draw: Use fabric paint or markers to bring your design to life. If using iron-on transfers, print your design onto transfer paper and cut it out.
- Iron the Transfer: Preheat your iron according to the transfer paper instructions. Place the transfer on the bag and iron it for the recommended time to ensure it adheres properly.
- Add Embroidery: For an extra touch, you can sew over parts of your design with colorful embroidery thread.
- Let It Dry: Allow the paint or ink to dry completely before using your tote.
Decorative Wall Art
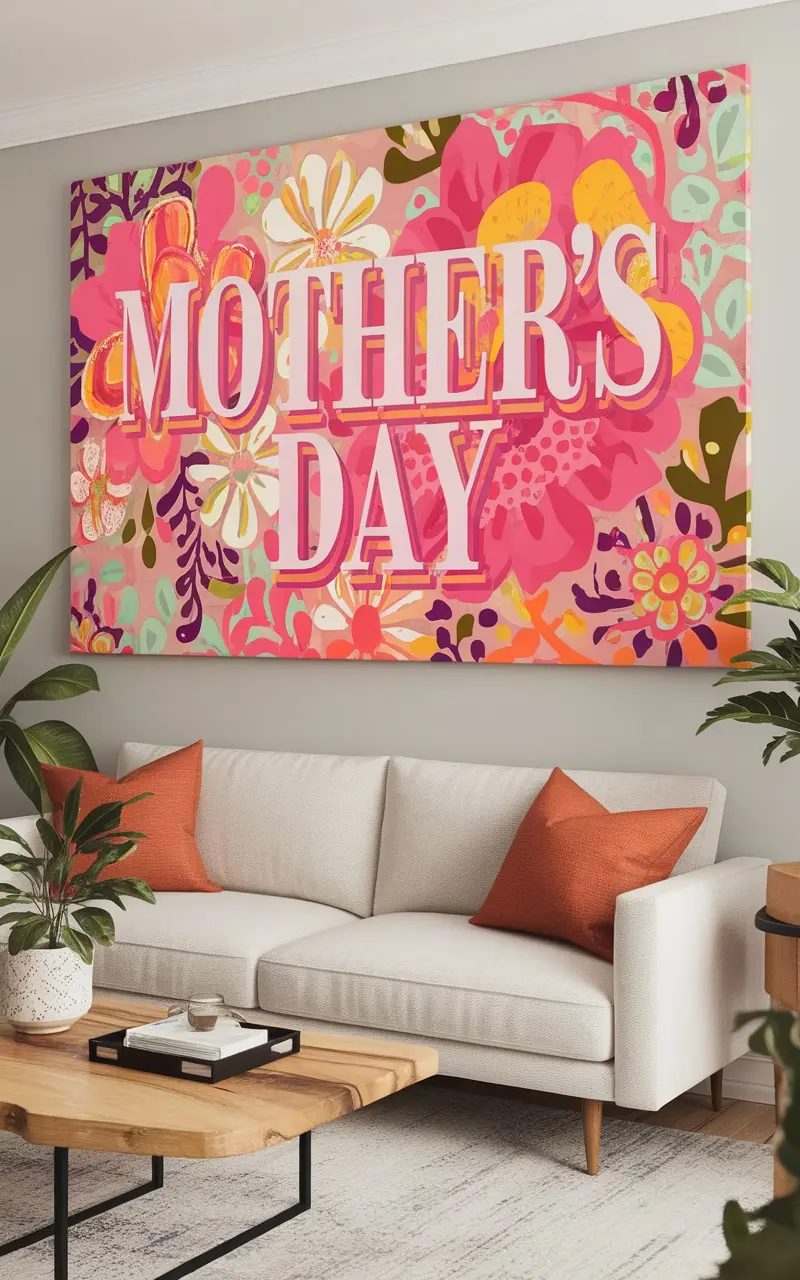
Creating decorative wall art can be a delightful and fulfilling project, especially when you want to showcase love and positivity in your home. This simple recipe for DIY wall art not only adds a splash of color but also serves as a heartfelt reminder of the importance of love in our lives. With just a few materials, you can easily transform a blank wall into a vibrant focal point.
The beauty of this project is in its simplicity. You don’t need to be a professional artist to create something that looks stunning and personalized. With a little creativity, you can craft a piece of art that speaks to your heart and resonates with anyone who walks into the room. Get ready to gather your supplies and let your imagination flow!
What You’ll Need
- 1 canvas or large piece of sturdy paper
- Acrylic paints in various colors
- Paintbrushes (various sizes)
- Painter’s tape (optional)
- Stencils or a printout of your desired phrase
- Palette for mixing colors
- Water and paper towels for cleaning brushes
Instructions
- Prepare Your Canvas: Start with a clean canvas or sturdy paper. If using painter’s tape, apply it to the edges to create a border.
- Design Your Layout: Decide on a phrase or design you’d like to feature. You can use stencils or a printout to help outline your design lightly with a pencil.
- Paint the Background: Choose a base color for the background and use a large brush to paint it evenly across the canvas. Let it dry completely.
- Add Your Design: Using smaller brushes, begin painting your phrase or design with contrasting colors. Be creative with colors and techniques, blending as you go to create depth.
- Finishing Touches: Once dry, remove any painter’s tape and touch up edges if needed. Display your artwork in a prominent place or gift it to someone you love!
Memory Jar Full of Notes
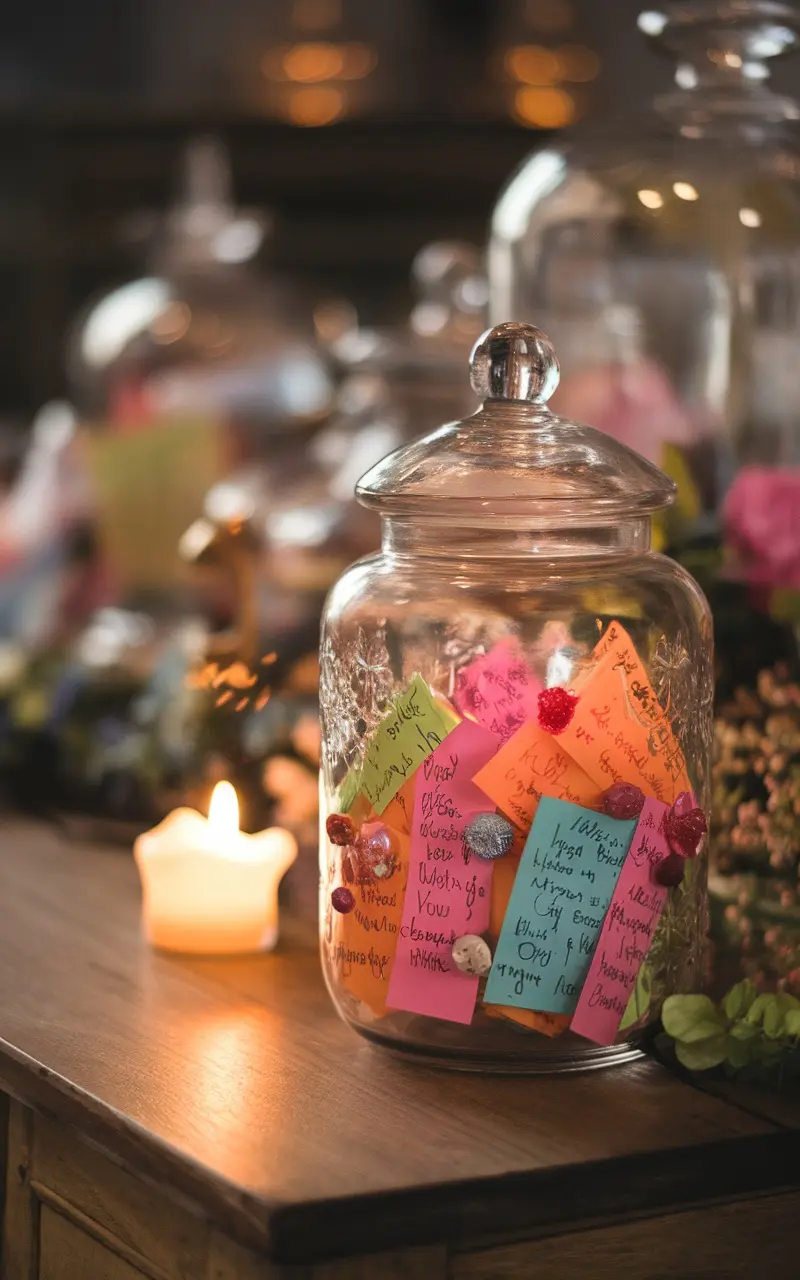
A memory jar is a heartfelt project that captures cherished moments and sentiments. It’s a simple yet meaningful way to celebrate the love and bond shared with someone special. Each note can contain a memory, a kind word, or a favorite quote, making it a delightful keepsake that can be revisited time and again.
Creating a memory jar is straightforward and can even be a fun activity to do with family or friends. All you need are some colorful papers, a jar, and a bit of creativity. Whether you fill it with memories from the past year or notes celebrating a special person, it’s a wonderful way to reflect on the joy in your life.
What You’ll Need
- A large glass jar
- Colorful paper or sticky notes
- Pens or markers
- Decorative items (optional, like ribbons or stickers)
- A small bag or bowl for keeping the notes
Instructions
- Gather your materials: Choose a jar that resonates with you and collect colorful papers or sticky notes for your messages.
- Write your notes: Take a moment to reflect on your favorite memories or things you appreciate about the person. Write these down on the colorful paper.
- Fill the jar: Fold the notes and place them in the jar. You can mix them up or organize them by date or theme.
- Add some flair: If desired, decorate the jar with ribbons or stickers to make it even more special.
- Seal and gift: Once the jar is filled, seal it with the lid. Present it as a thoughtful gift or keep it as a personal treasure.
Unique Plant Terrariums
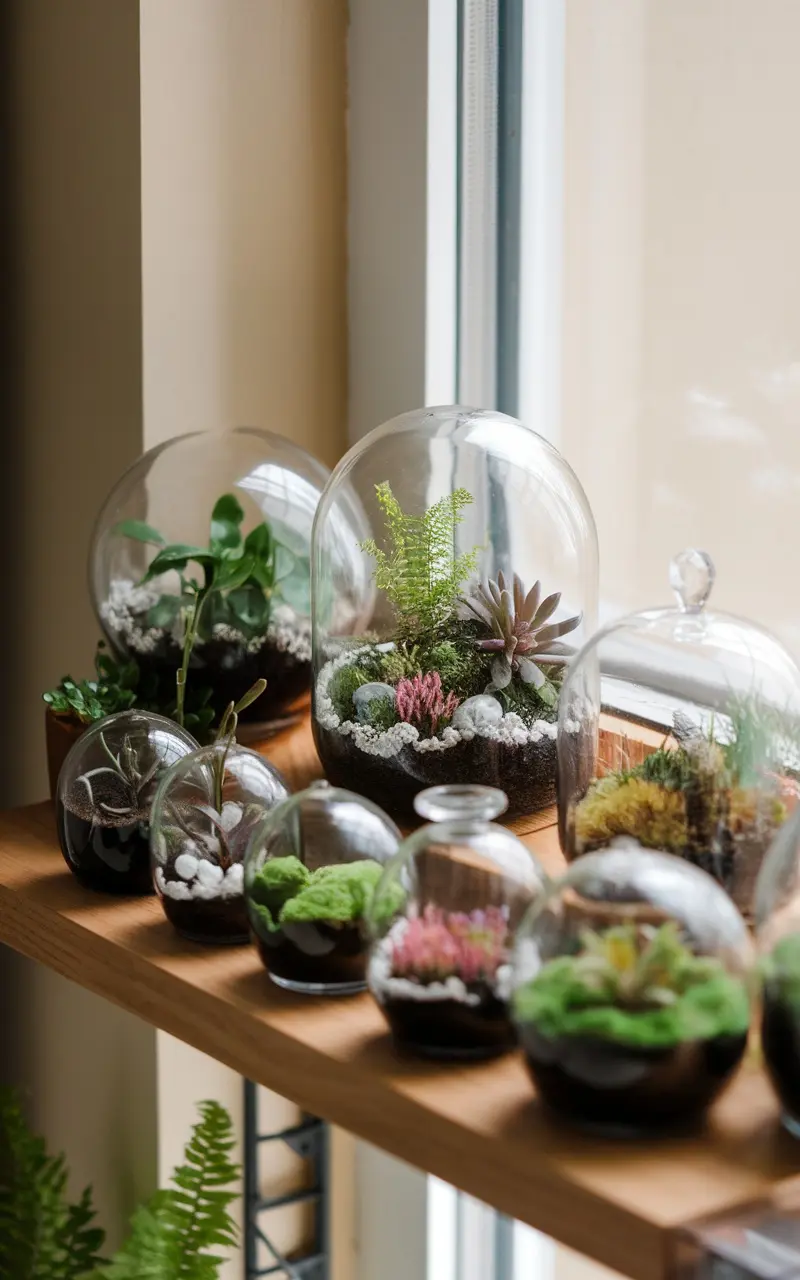
Creating a plant terrarium is a fun and creative project that can bring a touch of greenery into your home. These miniature gardens are not only visually appealing but also provide a great way to showcase various plants in a contained environment. The taste of this project is all about the enjoyment of nature, as you craft a vibrant ecosystem with your own hands. Plus, it’s simple enough for anyone to try, making it an ideal activity for Mother’s Day.
Gather your materials, choose your favorite plants, and let your creativity shine. Whether you opt for succulents, ferns, or moss, the possibilities are endless. This project is perfect for all ages and can be a lovely gift for loved ones. To get started, here’s a basic recipe for a charming terrarium that will brighten up any space.
What You’ll Need
- 1 glass container or terrarium jar
- Small pebbles (for drainage)
- Activated charcoal (to prevent odors)
- Potting soil
- Small plants (like succulents or air plants)
- Moss (optional, for decoration)
- Decorative stones or figurines (optional)
Instructions
- Prepare the Container: Start by adding a layer of small pebbles to the bottom of your glass container. This will help with drainage.
- Add Charcoal: Sprinkle a thin layer of activated charcoal over the pebbles to keep the terrarium fresh.
- Layer the Soil: Next, add a layer of potting soil on top of the charcoal, making sure it’s deep enough to support your plants.
- Plant Your Greens: Carefully remove your plants from their pots and arrange them in the soil. Make sure to leave some space between each plant.
- Finish Up: If desired, add decorative stones, figurines, or moss for a finishing touch. Water lightly.
- Seal and Enjoy: If your container has a lid, you can seal it to create a humid environment. Otherwise, place it in a well-lit spot and enjoy watching it grow!
Personalized Calendars
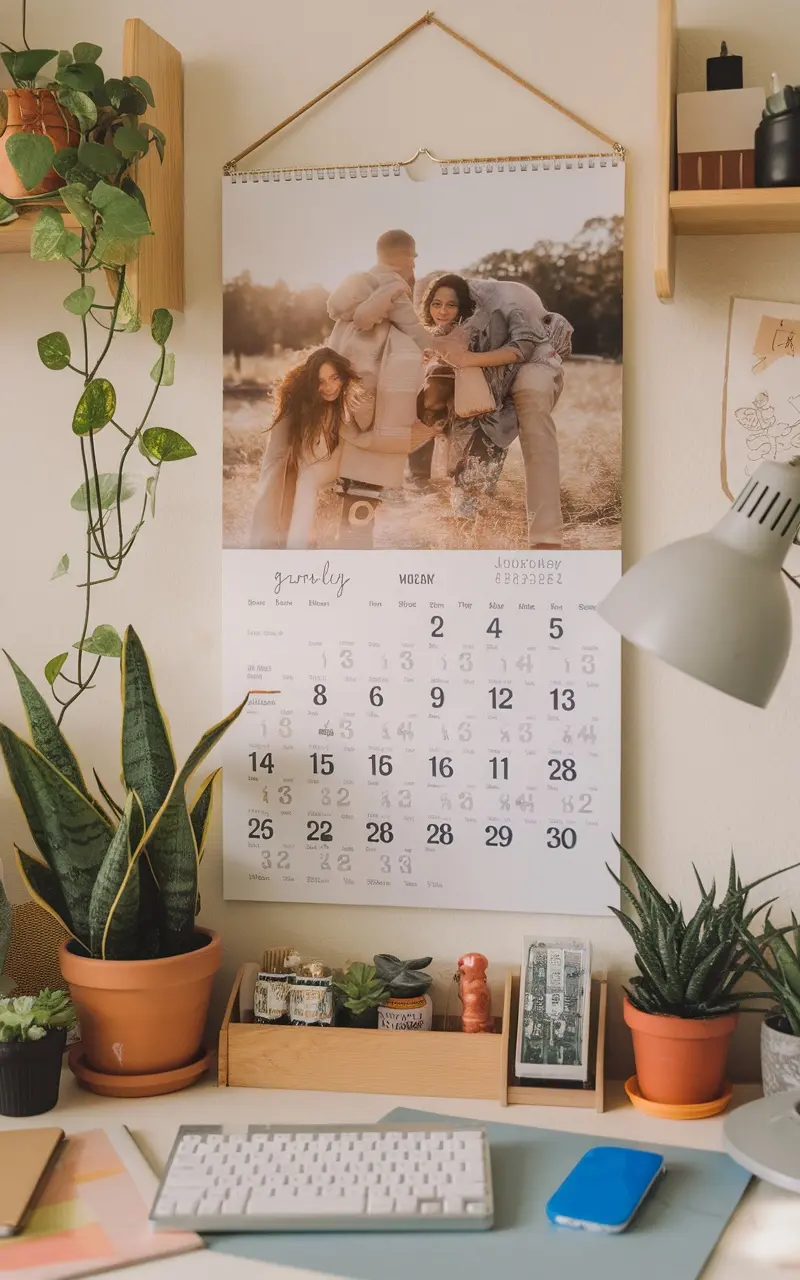
Creating a personalized calendar is a delightful way to add a touch of warmth to your space while celebrating special moments throughout the year. This project is not only simple but also allows for a lot of creativity, making it a fantastic gift for Mother’s Day. Each month can be adorned with photos or illustrations that spark joy and nostalgia, turning an ordinary calendar into a cherished keepsake.
Whether you choose to feature family photos, significant quotes, or your own artwork, crafting a personalized calendar is a fun and crafty way to show love. Plus, it’s a project that can be tailored to any skill level, making it accessible for everyone!
What You’ll Need
- 12 high-quality photos (one for each month)
- 1 large sheet of sturdy cardstock or poster board
- Binding materials (like a hole punch and ribbon or clips)
- Markers or pens for personalization
- Glue or double-sided tape
Instructions
- Select Your Photos: Choose 12 of your favorite photos that hold special memories. You can even get creative by using themes for each month.
- Prepare the Base: Cut your cardstock or poster board to create a sturdy base for your calendar. Make sure it’s large enough to hold all the monthly photos and dates.
- Arrange Your Layout: Plan how you want the photos and calendar dates to be arranged. You can place the photo at the top and the dates below or have them side by side.
- Adhere the Photos: Use glue or double-sided tape to secure your selected photos onto the base. Ensure they’re evenly spaced and aligned.
- Add the Dates: Write or print out the calendar dates for each month. You can design them in a way that complements your photos for a cohesive look.
- Bind the Calendar: Use a hole punch to create holes for binding the calendar. Thread a ribbon or use clips to hold everything together.
- Personalize: Add any extra decorations, notes, or quotes that you think will make it special. This is where you can really make it your own!
DIY Spa Day Kit
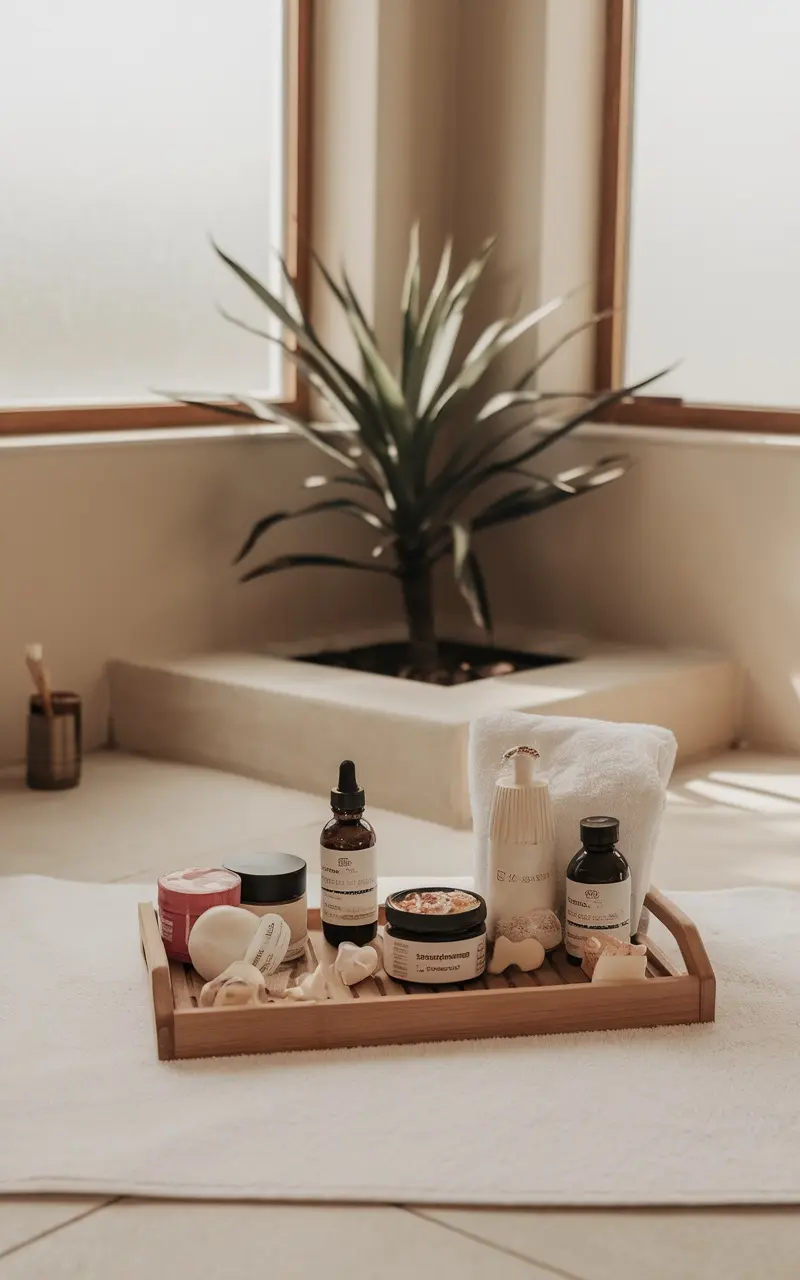
Creating a DIY Spa Day Kit is a delightful way to treat yourself or someone special. It’s all about combining relaxation and self-care with a personal touch. You can include simple yet luxurious items like homemade scrubs, soothing bath bombs, and calming oils. The best part is that you can customize each item to suit your preferences or those of your loved ones.
The flavors and scents you choose can transport you to your favorite spa or create a serene atmosphere right at home. Plus, making these products is usually straightforward and a lot of fun! Here’s a simple recipe for a refreshing DIY Lemon Sugar Scrub that’s perfect for your spa day kit.
What You’ll Need
- 1 cup granulated sugar
- 1/2 cup coconut oil, melted
- 1 tablespoon lemon juice
- 1 tablespoon lemon zest
- 1 teaspoon vanilla extract
Instructions
- Mix Ingredients: In a bowl, combine the granulated sugar and melted coconut oil. Stir until well combined.
- Add Flavors: Incorporate the lemon juice, lemon zest, and vanilla extract into the sugar mixture. Mix until everything is evenly distributed.
- Package: Transfer your scrub into a clean jar, seal it tightly, and label it for a lovely touch.
- Use: To enjoy, simply take a small amount, massage onto damp skin in circular motions, and rinse off for smooth, refreshed skin.
Homemade Treats Basket
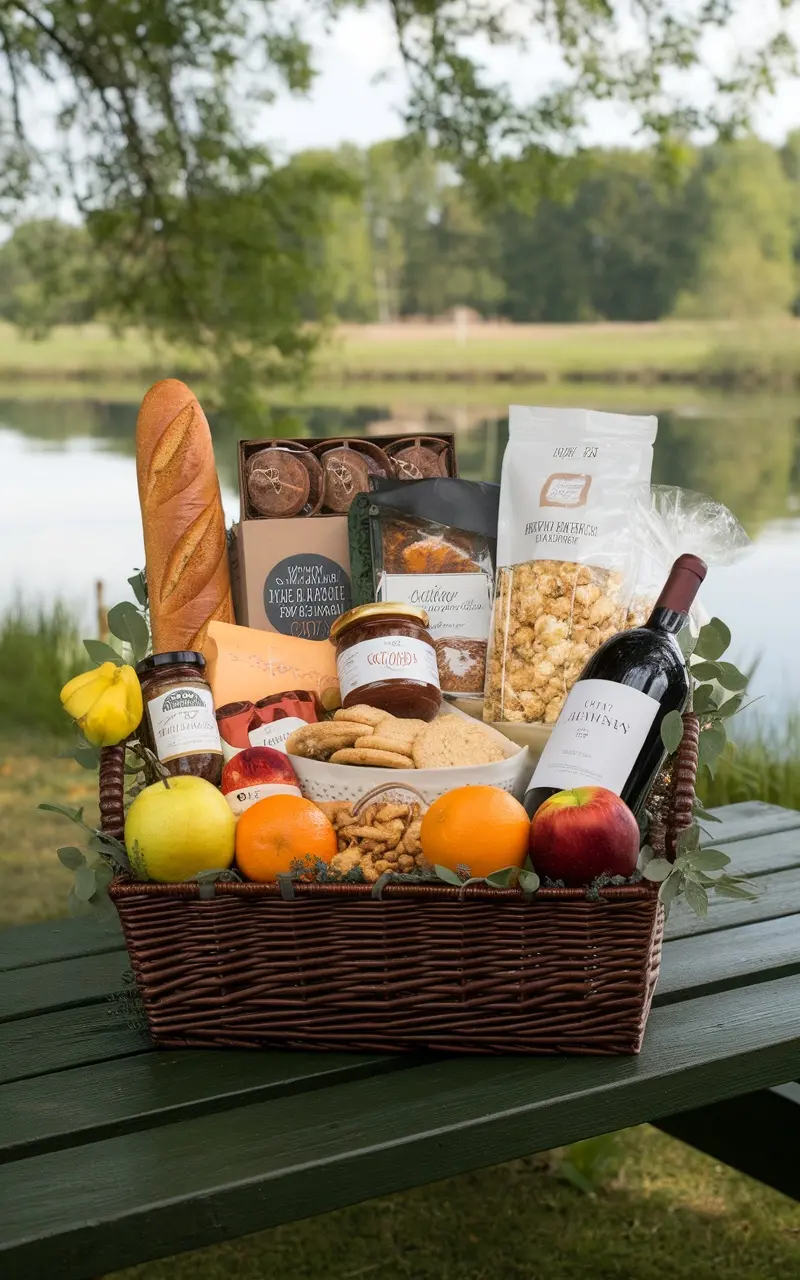
Creating a homemade treats basket is a delightful way to show love and appreciation, especially on Mother’s Day. This basket can be filled with a variety of tasty goodies that not only look beautiful but also taste wonderful. From sweet cookies to savory snacks, these treats can cater to every palate. Plus, assembling the basket is a simple process, allowing you to focus on the joy of gifting.
Imagine a basket brimming with freshly baked cookies, homemade jams, and a selection of fruits. Each item can be personalized based on your mother’s preferences, making this gift truly special. Whether she loves chocolate chip cookies or tangy lemon bars, this basket is sure to bring a smile to her face. Here’s a delicious cookie recipe to get you started:
What You’ll Need
- 1 cup unsalted butter, softened
- 1 cup granulated sugar
- 1 cup brown sugar, packed
- 2 large eggs
- 2 teaspoons vanilla extract
- 3 cups all-purpose flour
- 1 teaspoon baking soda
- 1/2 teaspoon salt
- 2 cups chocolate chips
Instructions
- Preheat your oven to 350°F (175°C) and line a baking sheet with parchment paper.
- In a large bowl, cream together the softened butter, granulated sugar, and brown sugar until light and fluffy.
- Beat in the eggs one at a time, then stir in the vanilla extract.
- In another bowl, whisk together the flour, baking soda, and salt. Gradually add the dry ingredients to the wet ingredients, mixing until just combined.
- Fold in the chocolate chips.
- Drop rounded tablespoons of dough onto the prepared baking sheet, leaving space between each cookie.
- Bake for 10-12 minutes or until the edges are golden. Allow to cool slightly on the baking sheet before transferring to a wire rack.
Leave a Reply