
Resin enthusiasts can achieve glass-like shine through five effective methods. Start with buffing wheels and quality compounds like Turtle Wax for professional results. Hand polishing works great for small projects—just use microfiber cloths and progressive sanding grits. For ultimate clarity, add a fresh thin layer of crystal-clear epoxy resin. Clear sprays offer quick enhancement with UV protection. Cleaning thoroughly before each method is essential for that jaw-dropping finish you’ve been dreaming about.
Key Takeaways
- Use cutting compound followed by ultra-gloss compound for a two-step professional polishing process.
- Apply Turtle Wax or fine scratch remover with a microfiber cloth for hand polishing smaller items.
- Progress through sandpaper grits from 400 to 1500 before applying polishing compounds.
- Add a thin layer of crystal-clear epoxy resin to fill scratches and enhance depth.
- Apply multiple thin coats of clear protective spray to create shine while providing UV protection.
What to Use to Polish Resin: 5 Ways to Achieve a Crystal-Clear Shine

Every resin artist knows the frustration of finishing a project only to find it lacks that perfect, glass-like shine! Achieving that crystal clear resin finish isn’t magic—it’s all about using the right polishing compound and tools.
That flawless glass-like finish isn’t just luck—it’s technique and the right polishing compounds working together.
Start by cleaning your piece with warm soapy water to remove any dust that might ruin your hard work!
For smaller items, hand polishing with a microfiber cloth and fine-grit compound gives you amazing control.
Larger projects? Try a buffing wheel attached to a power drill—just keep it moving to avoid overheating!
The pros swear by a two-step polishing process: first a cutting compound to smooth the surface, then an ultra-gloss compound for that jaw-dropping glossy finish.
Regular maintenance and storage in a cool, dry place help preserve the resin’s shine and prevent yellowing over time.
Your friends won’t believe it’s handmade!
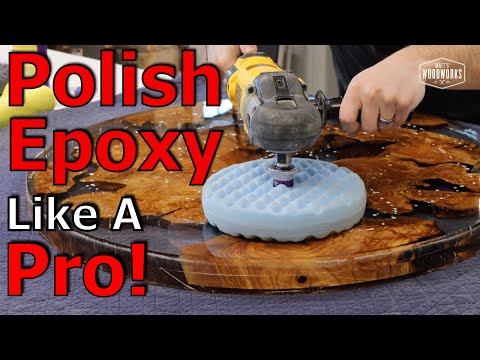
Buffing Wheels and Polishing Compounds for Professional Results
Professional-looking resin pieces require professional-grade tools! Buffing wheels made from foam or felt are the secret weapons of resin artists who want that jaw-dropping high-gloss finish.
When paired with quality polishing compounds like Turtle Wax, these wheels transform cloudy resin surfaces into mirror-like masterpieces!
For best results, attach a buffing wheel to a polishing machine or drill and keep the speed around 1200 RPM—fast enough to remove fine scratches but not so fast that it melts your creation (yikes!).
Don’t have power tools? No problem! A microfiber cloth with fine scratch remover works wonders for smaller projects.
Cured ArtResin is suitable for incidental food contact and complies with FDA regulations, making it safe for use in resin projects that may come in contact with food.
Just remember, the final step is super important: clean off any dust or residue after polishing. This simple step guarantees your professional results maintain that crystal-clear shine that makes everyone ask, “How’d you do that?”
Hand Polishing Techniques for Small Resin Projects
Small resin projects deserve the same stunning finish as their larger counterparts, just with a gentler touch! Hand polishing is perfect for small pieces of resin when you want that crystal-clear shine without bulky equipment.
Start by washing your resin with warm soapy water to guarantee a clean surface before sanding. The magic happens when you progress through different grits – from 400 all the way to 1500 – creating an ultra-smooth base for polishing.
- Apply colorless polishing compound liberally with a microfiber cloth, focusing on scratched areas
- Use circular motions and a bit more pressure on problem spots to buff away imperfections
- Regularly inspect for imperfections and repeat polishing if necessary to ensure the final product meets high standards.
- Wipe away any remaining haze with a clean microfiber cloth for that jaw-dropping shiny finish
These simple tips and tricks make hand polishing resin fun and effective!
Adding a Fresh Resin Coat for Ultimate Clarity
When ordinary polishing techniques aren’t giving your resin project that water-clear finish you’re dreaming of, adding a fresh coat of resin can work absolute wonders! This method fundamentally fills in those tiny scratches that even the best sand and polish efforts can leave behind. For jaw-dropping clarity, start with a super clean surface—any speck of dust will be trapped forever! Then, apply a thin layer (no more than ¼ inch) of high-quality crystal-clear epoxy over your resin piece. The fresh resin flows like liquid glass, creating that gorgeous glossy finish we all drool over. Give your masterpiece plenty of time to cure completely—usually 24-48 hours. Be patient! Rushing this step can ruin everything. Once fully hardened, you’ll be amazed at the incredible clarity and depth that a fresh resin coat delivers! Remember, using a well-ventilated workspace is crucial to avoid harmful fumes while working with resin.
Clear Spray Applications for Quick Surface Enhancement
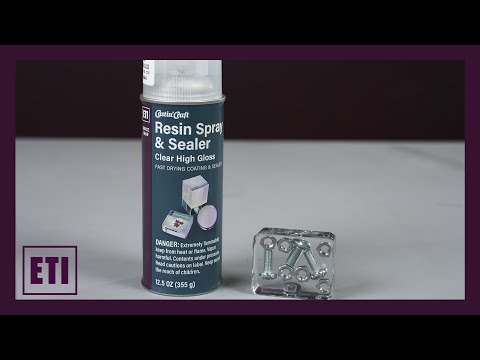
For those moments when time is short but a brilliant shine is non-negotiable, clear spray applications offer a fantastic shortcut to gorgeous resin surfaces.
These sprays create a protective layer that enhances shine while simultaneously shielding against UV exposure that can cause yellowing. The application process is straightforward but requires attention to detail for ideal results.
A quick-drying UV shield that delivers mirror-like brilliance with minimal effort—just follow the simple application steps precisely.
- Always start with a perfectly clean resin surface—even tiny dust particles can ruin your smooth finish!
- Apply multiple thin coats rather than one thick layer, allowing proper drying times between applications.
- Maintain recommended application distances (usually 8-12 inches) to prevent drips and guarantee even coverage.
It’s crucial to ensure good ventilation during the application to manage fumes and maintain safety in your workspace.
Frequently Asked Questions
What to Put on Resin to Make It Shine?
Resin finishing techniques utilize polishing compounds, proper sanding, and clear coat application. For peak shine, DIY polishing methods include buffing with microfiber cloths and applying automotive wax after thorough surface preparation.
How Do I Get My Resin Crystal Clear?
Achieving crystal clear resin requires careful attention to resin types, mixing ratios, and curing methods. Quality epoxy selection, proper surface preparation, thorough mixing, and progressive polishing with specialized tools guarantee ideal clarity for projects.
How Do You Get a Shiny Finish on Resin?
Achieving a shiny resin finish requires proper surface preparation, progressive sanding methods, quality polishing compounds, and suitable buffing tools. Some resin types benefit from heat gun application or protective coatings for enhanced epoxy clarity.
Can I Use Toothpaste to Polish Resin?
Toothpaste offers limited effectiveness for DIY resin polishing compared to specialized polishing compounds. While it can remove minor scratches after proper surface preparation, dedicated resin polishing tools yield superior shine results.
Conclusion
Polishing resin doesn’t have to be complicated! With these five techniques—buffing wheels, hand polishing, fresh resin coats, clear sprays, and professional compounds—even beginners can achieve stunning results. Remember, patience is key when bringing out that glass-like finish. Whether you’re crafting jewelry, figurines, or artwork, these methods will transform your cloudy creations into eye-catching masterpieces that sparkle with professional-quality shine. Happy polishing, resin artists!
Leave a Reply