Jump into the world of acrylic pouring—where creativity meets chaos and beautiful art emerges from colorful chaos. Start by gathering essentials like acrylic paints, Floetrol or Liquitex as your pouring medium, and some disposable cups. Protect your workspace from inevitable splashes with plastic sheeting and raise your canvas on cups for easy flow. Mix paints and medium in a 1:1 ratio, aiming for a smooth, syrupy texture. Experiment with techniques like dirty pours or flip cups, and watch vibrant designs take shape as you tilt the canvas. Give it time to dry, and seal your masterpiece for a lasting finish. Ready to pour more into this journey?
Key Takeaways
- Mix acrylic paint with a pouring medium in equal parts for a smooth, consistent texture.
- Choose a harmonious palette of 4-5 complementary colors to create visually appealing designs.
- Utilize techniques like dirty pour, flip cup, and Dutch pour to achieve varied patterns.
- Protect your workspace with plastic sheeting and ensure your canvas is raised to catch excess paint.
What Is Acrylic Pouring?
Acrylic pouring is a dynamic art technique that involves mixing acrylic paint with a pouring medium and then pouring it onto a canvas to create intricate, fluid designs. This method offers endless possibilities for artistic inspiration, allowing artists to experiment with vibrant colors and fluid movements.
By tilting the canvas in various directions, artists can manipulate the flow of paint, resulting in mesmerizing patterns and effects. The beauty of acrylic pouring lies in its unpredictability and the unique outcome of each piece.
Understanding color theory is essential in acrylic pouring. Knowing how colors interact can help artists create harmonious or strikingly contrasting designs. For instance, complementary colors placed side by side can make each hue pop, while analogous colors blend seamlessly for a more cohesive look.
Popular techniques like the dirty pour, flip cup, and ring pour each bring their own distinct visual results, making the process exciting and full of creative potential.
Over the past five years, acrylic pouring has surged in popularity, largely due to its accessibility. It’s a fun, affordable way for beginners to explore the world of art without needing expensive supplies.
With a drying period of at least 24 hours, the final artwork emerges as a stunning reflection of the artist’s vision and creativity.
Essential Supplies

To successfully initiate an acrylic pour painting project, one must gather a set of essential supplies that guarantee both efficiency and quality in the creative process.
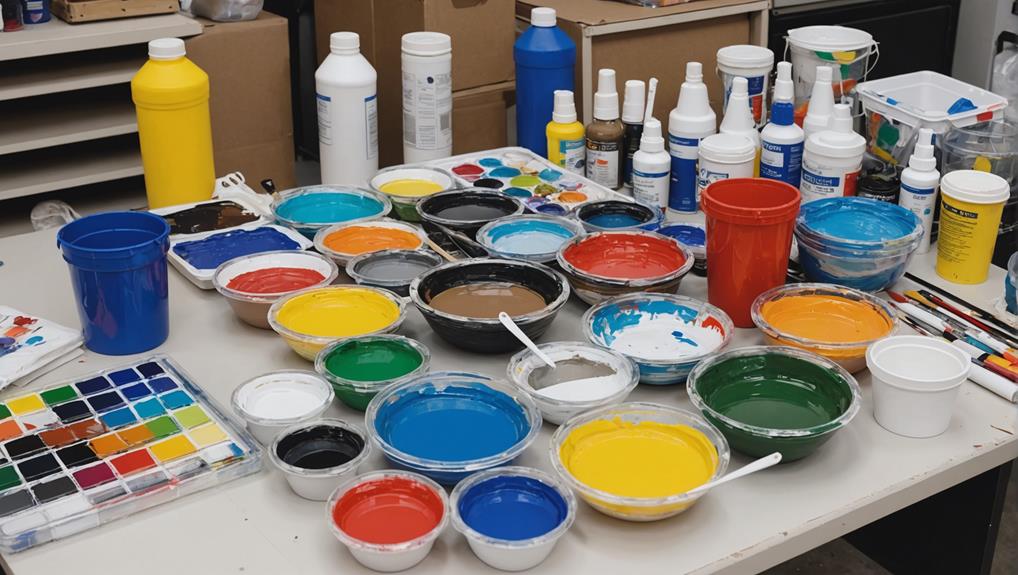
First and foremost, selecting the right acrylic paint types is vital. Opt for affordable and accessible brands like Folk Art, Americana, or Apple Barrel, which you can easily find at craft or dollar stores. You’ll need 2-3 colors to start.
A key component in acrylic pouring is the pouring medium. Products like Floetrol or Liquitex are ideal for mixing with your acrylic paints to achieve the perfect flow consistency. This mixture guarantees your colors blend seamlessly on your canvas.
Your painting surface is equally important. A canvas board or regular canvas works best, providing a sturdy foundation for your artwork.
For mixing the paint and pouring medium, small disposable cups (2-3 oz) and an approximately 8 oz pouring cup are recommended. Wood stir sticks are perfect for combining these elements together.
Lastly, to maintain a clean workspace, protect your area with a tarp or an old baking sheet to catch any drips.
With these essential supplies, you’ll be well-prepared to create stunning acrylic pour paintings.
Preparing Your Workspace
Before you start creating your acrylic pour masterpiece, it’s essential to prepare your workspace properly to avoid any messy surprises.
Lay down plastic sheeting, drop cloths, or newspapers to catch spills, and use a foil cookie tray to keep things tidy.
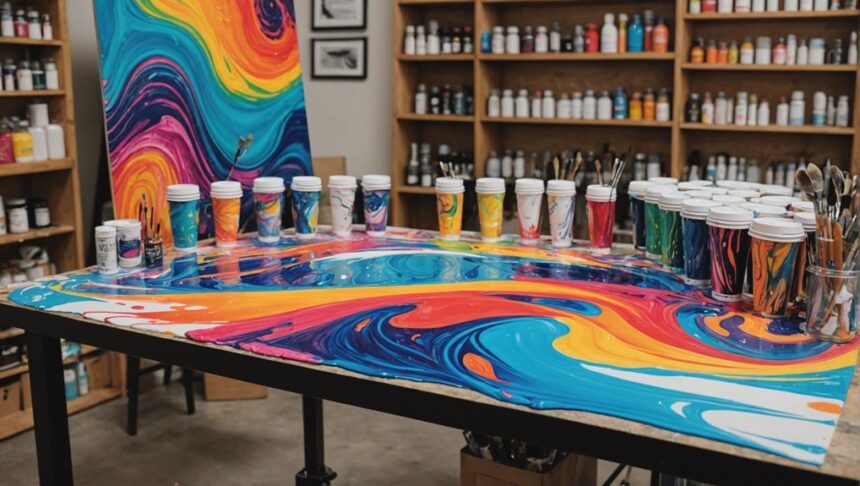
Raise your canvas on plastic cups or yogurt containers, gather all your supplies, and don’t forget to wear old clothes or an apron to protect yourself from paint splatters.
Workspace Protection Tips
Guaranteeing a clean and organized workspace is essential for a successful acrylic pour painting session. Effective workspace organization and cleanup strategies can save you from a lot of headaches later.
Start by protecting your work surface: lay down plastic sheeting, drop cloths, or even newspapers to catch any spills and drips. This simple step makes a world of difference in keeping your workspace tidy.
For an even easier cleanup, place a foil cookie tray under your canvas. It will catch any excess paint, preventing a mess on your table. Raise your canvas using plastic cups or yogurt containers. This not only allows the paint to run off freely but also prevents the canvas from sticking to your work surface.
Don’t forget to wear vinyl gloves; they’re an excellent way to avoid paint stains on your hands, making the cleanup process much more manageable. Keep paper towels handy for quick cleanups and to wipe away spills immediately.
Essential Setup Supplies
Preparing your workspace with the right supplies is essential for a successful acrylic pour painting session. First, protect your area with plastic sheeting, drop cloths, or newspapers to catch any drips and prevent paint stains on surfaces. Gather essential supplies such as acrylic craft paint in at least 2-3 colors to explore color theory, a pouring medium like Floetrol, plastic cups for mixing, and wood stir sticks for application. Raise your canvas using 3-4 plastic cups to guarantee proper paint runoff and prevent it from sitting directly on your work surface.
Here’s a quick rundown of what you’ll need:
| Item | Purpose | Notes |
|---|---|---|
| Plastic Sheeting | Protects workspace | Also use drop cloths |
| Acrylic Craft Paint | Explore color theory | At least 2-3 colors |
| Pouring Medium | Smooths flow | Floetrol recommended |
| Plastic Cups | Mixing paints | Use for paint layering |
| Wood Stir Sticks | Mixing and applying | Disposable |
| Canvas | Painting surface | Raise with plastic cups |
Prepare a cleanup station with paper towels and a foil cookie tray for easy disposal of excess paint, managing mess during the pouring process. Guarantee you also have a stable, flat area for drying your artwork for at least 24 hours, keeping it undisturbed to allow the paint to settle and dry evenly. Following these steps will set you up for a fun and successful acrylic pour painting experience!
Mixing Your Paints
Mixing your paints is an exciting step where the magic begins, and getting the right consistency is key.
Start by combining your acrylic paint with a pouring medium in equal parts to achieve a smooth, buttermilk-like texture, which is perfect for creating those beautiful, flowing patterns.
Once you’ve nailed the consistency, you can experiment with combining different colors and even adding silicone oil for those eye-catching cell effects.
Choosing Paint Consistency
Achieving the perfect paint consistency is vital for successful acrylic pour painting, where the ideal texture resembles warm honey or chocolate syrup. This consistency guarantees peak paint viscosity and flow characteristics, which are essential for your artwork to turn out beautifully.
When mixing your paints, start by combining acrylic paint with a pouring medium at a 1:1 ratio. This balance provides a good starting point, but you may need to adjust based on the thickness of the paint you’re using. Too thin, and you risk excessive runoff, while too thick can hinder the paint from flowing smoothly on the canvas.
Use small containers to mix your paint and pouring medium. Be certain to shake or stir thoroughly to get an even consistency. Trust me, you don’t want any lumps or uneven spots messing up your masterpiece!
If you’re new to this, it’s wise to mix a little extra paint to avoid running out during your pour, especially for larger canvases like 12×12, which might need at least 6 oz of thinned paint.
Getting this balance right can make a huge difference in your final piece, setting the stage for a stunning acrylic pour painting.
Combining Colors Effectively
Selecting a harmonious palette of 4-5 complementary colors is vital for creating a visually striking acrylic pour painting. Understanding color theory helps in choosing colors that work well together, preventing your masterpiece from turning into a muddy mess.
Complementary colors, which sit opposite each other on the color wheel, can create vibrant contrasts. Imagine a sunset where oranges and blues dance together on the canvas.
When mixing your paints, aim for a 1:1 ratio of acrylic paint to pouring medium. This consistency should be like warm honey, perfect for a smooth flow.
Mix each color separately in small disposable cups. This keeps your colors distinct and avoids them blending into an undesirable brown.
For an 8×10 canvas, you’ll need at least 4 oz of each thinned paint. Thorough mixing is essential to eliminate lumps and guarantee an even pour.
To add some excitement, try a few drops of silicone oil. It creates amazing cells and textures, giving your artwork a dynamic look.
Selecting a Pouring Technique
Choosing the right pouring technique is essential for achieving the desired visual effects in your acrylic pour painting. With various methods available, understanding the characteristics of each can help you decide which to try.
The Dirty Pour is often recommended for beginners. This technique involves mixing multiple colors in a single cup before pouring them onto the canvas, resulting in a harmonious blend of colors.
Another straightforward method is the Flip Cup pour, where you fill a cup with paint, flip it onto the canvas, and lift it to let the paint flow naturally. This creates an unpredictable and exciting design.
For more control over the layers and patterns, you might try the Ring Pour, which creates mesmerizing circular designs by pouring paint in concentric rings. Alternatively, the Puddle Pour lets you pour separate colors onto the canvas without much mixing, preserving distinct layers. The Tree Ring pour, similar to the Ring Pour, adds a swirling motion to mimic tree rings’ natural patterns.
Experimenting with the Dutch Pour involves using a hairdryer to blow the paint around, allowing for intricate and unique designs.
- Dirty Pour: Mix colors in one cup.
- Flip Cup: Flip and lift the cup.
Each technique offers unique aesthetic possibilities, so try different methods to discover your style.
Executing the Pour
Once you’ve selected your pouring technique, the next step is to execute the pour with precision and care. Start by verifying your canvas height is correct, so the paint flow is even and smooth. Raising the canvas helps the paint spread more easily and prevents it from pooling in one spot.
Pour the mixed paint directly onto the center of the raised canvas to create a puddle that will spread outward. This is where the magic begins! As you tilt the canvas gently in different directions, you’ll see unique patterns forming right before your eyes. Make certain you keep tilting until the entire surface is covered, but don’t rush—patience is key.
Sometimes, after you’ve poured, there might be some bare spots. No worries! Just mix a little more paint and carefully pour it over those areas to guarantee even coverage. Use a palette knife or brush to clean any excess paint from the edges of the canvas for a neat finish. This step may seem small, but it makes a big difference.
Drying and Finishing

Guaranteeing your acrylic pour painting dries properly is essential for achieving a polished and professional final product. To start, place your painting in a flat, undisturbed area and allow it to dry for at least 24 to 36 hours. This helps prevent smudging and guarantees the paint cures correctly. For those thicker pours, be patient; they may require more time, so check for any remaining tackiness before moving it.
Once your masterpiece is fully dry, it’s time to think about a protective finish. Applying a layer of polyurethane or a spray sealant will enhance the durability and longevity of your artwork. This step not only protects your painting but also brings out the vibrancy of the colors.
Here’s a quick checklist to keep you on track:
- Drying Time: Guarantee a flat, undisturbed area for 24-36 hours.
- Protective Finish: Use polyurethane or spray sealant for durability.
While waiting, keep an eye on any changes in the artwork, as acrylics can continue to evolve, revealing new effects. Documenting this process can be both fascinating and helpful for future projects. Enjoy watching your creation come to life!
Troubleshooting Tips
Addressing common issues that arise during the acrylic pour process can greatly improve the final outcome of your artwork.
One of the most common mistakes is dealing with paint that refuses to move on the canvas. If this happens, it usually means the paint is too thick. Don’t worry! Simply add more pouring medium to thin it out, and you’ll see a smoother flow in no time.
On the flip side, if your paint is cascading off the canvas too quickly, the opposite is true. You’ll need to reduce the pouring medium and increase the paint ratio. This helps maintain better control over the pour and prevents a mess.
Sometimes, you might find annoying empty spots where the paint just didn’t reach. In such cases, mix a bit more paint and carefully pour it over those areas for full coverage.
Bubbles in your paint can also be a bummer. Tackle them by gently tapping the underside of the canvas or use a toothpick to pop them before they dry.
And hey, if you’re unhappy with the result, no biggie! You can scrape off the wet paint or start fresh with a new pour over a dry canvas.
Frequently Asked Questions
How to Make Acrylic Pouring Paint for Beginners?
To make acrylic pouring paint for beginners, mix acrylic craft paint with a pouring medium in a 1:1 ratio. For effective acrylic pouring techniques, blend 4-5 colors without overmixing to maintain distinct layers, ensuring smooth color blending.
How Do You Embellish an Acrylic Pour Painting?
To embellish an acrylic pour painting, employ color techniques such as metallic or iridescent paints for highlights. Utilize texture additives like beads, glitter, or sand to enhance depth and dimension. Finalize with a clear resin coat for polish.
What Do I Mix With Acrylic Paint for Pouring?
To achieve ideal paint viscosity for acrylic pouring, mix acrylic paint with pouring mediums like Floetrol. Maintain a consistency akin to warm honey. A 1:1 ratio is common, but adjust based on the paint’s thickness.
What Do You Put on Canvas Before Pouring Acrylic?
For ideal canvas preparation before pouring acrylic, guarantee the canvas is pre-gessoed, raise it using 3-4 cups, and apply a white base coat if reusing an old canvas. Select appropriate pouring techniques for best results.
Conclusion
Acrylic pouring offers an exciting and accessible avenue for artistic expression. Mastery of essential supplies and techniques, such as paint mixing and selecting a pouring method, enables the creation of visually striking pieces.
Proper workspace preparation, execution, and finishing guarantee ideal results. Troubleshooting common issues further refines the process. With dedication to these principles, individuals can produce stunning acrylic pour paintings that reflect both creativity and skill.


Leave a Reply