
Clay crafting offers endless DIY possibilities for creators of all skill levels. Fun projects include marbled jewelry dishes, miniature garden markers, and textured wall hangings using natural impressions. You can create custom shapes with homemade silicone molds, craft seasonal decorations, or upcycle terracotta pots with colorful designs. Even kids can join in, making simple figurines without special tools. These hands-on projects transform ordinary clay into beautiful, personalized creations with just a few techniques.
Key Takeaways
- Create air dry clay jewelry dishes with marbled effects using silicone molds for elegant home decor.
- Craft miniature garden markers from clay to identify plants with personalized, weatherproof labels.
- Transform terracotta pots with colorful polymer clay designs attached with strong adhesive.
- Make seasonal decorations like holiday ornaments, snowflakes, or Halloween figures from various clay types.
- Design textured wall hangings by pressing natural elements like leaves and flowers into clay for artistic impressions.
12 Clay DIY Ideas: Creative Ways to Shape & Mold Clay

When it comes to clay DIY ideas, the possibilities are truly endless! From sculpting adorable animals to crafting functional items like mugs and vases, clay offers a creative outlet for crafters of all skill levels.
Using a clay mold can take your projects to the next level, allowing you to create intricate designs without advanced sculpting skills. Silicone molds work wonderfully with different clay types – air dry, polymer, or ceramic – and help maintain consistent results every time.
Just remember to dust your clay mold with cornstarch for easy release! Kids especially love pressing clay into molds and revealing the perfect shapes that emerge. The satisfaction of peeling back the mold to reveal your creation is absolutely magical, making clay molding an addictive hobby for creative minds!
Air Dry Clay Jewelry Dishes With Marbled Effects
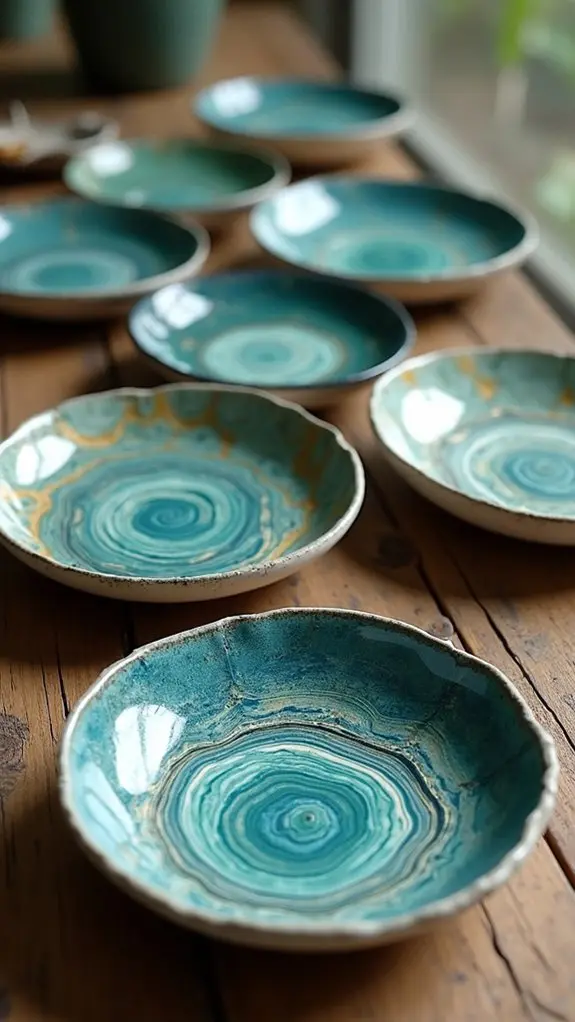
Crafting marbled jewelry dishes with air dry clay lets crafters mix colors and create one-of-a-kind swirled patterns that catch the eye.
Beginners can easily shape these personalized dishes using silicone molds, which help maintain the beautiful marbling while forming perfect edges for holding rings and small treasures.
Once dry, the dishes transform from simple clay into gorgeous accessories with a few finishing touches—sanding rough spots and adding a protective gloss finish that makes the colors pop!
Creating Marbled Patterns
The magic of marbled patterns transforms ordinary air dry clay into stunning jewelry dishes that look almost too beautiful to use! Achieving this effect is surprisingly simple—just knead together two or more colors of air-dry clay until they’re partially blended, creating those eye-catching swirls while keeping the colors distinct.
| Clay Marbling Tips | Results |
|---|---|
| Gentle kneading | Subtle swirls |
| Twist & fold technique | Bold patterns |
| Limited mixing | Crisp color definition |
Once you’ve created your marbled masterpiece, roll it into a flat sheet and cut out your dish shapes. Make sure the edges are smooth and the base is flat. After about 24 hours of drying time, finish with a clear varnish for extra shine that really makes those swirly patterns pop!
Forming Perfect Dishes
Transforming your beautifully marbled clay into functional jewelry dishes requires attention to form and technique!
Once you’ve created that gorgeous swirl of colors in your air dry clay, it’s time to shape it into something both pretty and practical. Grab your rolling pin and flatten the clay to about 1/4 inch thickness—not too thin or it might crack!
Cut out your dish shape using cookie cutters or a simple knife. For a more personal touch, press stamps, leaves, or textured tools into the surface to create unique patterns.
Then, gently curve the edges upward to form a shallow dish that’ll cradle your favorite rings and earrings.
Let your creation dry completely for 24-48 hours before sealing it with clear varnish for that extra wow factor!
Applying Protective Finishes
Seal your stunning marbled creations with protective finishes that bring them to life!
After your air-dry clay jewelry dishes have completely dried, it’s time for the exciting final touch that makes your swirls pop and shine. A clear varnish or gloss spray acts like magic, transforming your dish from dull to dazzling while keeping it safe from moisture and everyday dirt.
Different protective finish options offer unique looks—glossy for a wet-look shine, satin for subtle elegance, or matte for modern sophistication. The choice is yours!
Just remember to follow the product instructions carefully and give your sealer plenty of time to cure completely. This patience pays off big time, as proper sealing not only makes your marbled patterns more vibrant but also guarantees your awesome clay creation lasts for years to come!
Miniature Clay Garden Markers for Indoor Plants

Miniature clay garden markers bring both practical organization and artistic charm to indoor plant collections.
These personalized tags, which can feature simple shapes or intricate designs, help plant parents keep track of their leafy friends with style.
Creating custom herb labels with different colors or patterns transforms basic plant identification into a fun craft project that makes your indoor garden uniquely yours.
Simple Clay Designs
Create enchanting plant labels for your indoor garden with easy-to-make clay markers! These miniature designs offer both functionality and charm, helping you identify your plant babies while adding a decorative touch to your green space.
Rolling out air-dry clay into thin, manageable shapes creates the perfect canvas for imprinting plant names or fun designs that reflect your personal style.
- Make unique shapes like leaves, clouds, or simple rectangles for variety
- Press plant names using small letter stamps or a toothpick for a handwritten look
- Seal finished clay markers with clear varnish for protection against water
After drying completely, these cute clay markers can be placed directly in your plant pots.
Experiment with different colors and designs—the possibilities are endless, and the creative satisfaction is huge!
Herb Labeling Tips
When it comes to indoor herb gardens, proper labeling makes all the difference! Miniature clay garden markers are among the best ideas and inspiration for keeping track of your leafy friends.
With just some air dry clay and a few simple tools, you can create adorable labels that’ll make your plants look extra fancy! Start by cutting uniform shapes with small cookie cutters, then press actual herbs into the clay for a totally cool identification method.
Once dry, grab some acrylic paints or permanent markers and write the herb names – make them bold and clear! For super durability (because nobody wants soggy labels), seal your finished masterpieces with clear varnish.
Your friends will be amazed at how organized and professional your herb garden looks, and you’ll never mistake oregano for basil again!
Personalized Plant Tags
Indoor plants deserve stylish name tags that are as unique as they are! Air dry clay offers an easy way to create personalized plant tags that add charm to your green friends.
Try making these miniature garden markers by rolling out clay, cutting into fun shapes, and inscribing plant names with a toothpick. After drying completely, seal them with varnish for extra durability and shine.
- Mix different colored clays for a marbled effect that makes each tag one-of-a-kind
- Press small leaves or flowers into the clay for natural textures before it dries
- Add tiny painted details like polka dots or stripes for extra personality
These custom markers aren’t just practical—they’re mini works of art! Kids and adults alike will enjoy this crafty project that combines creativity with plant care.
Textured Wall Hangings Using Natural Impressions
Numerous breathtaking wall hangings can emerge from the simple act of pressing nature’s treasures into clay. Air dry clay works perfectly for this project, making it easy to create wall art without needing fancy equipment like kilns!
Kids can collect leaves, flowers, or even textured fabrics from around the house to press into the soft clay, creating one-of-a-kind natural impressions that look super cool.
For extra-impressive designs, try layering different thicknesses of clay or using a variety of materials for your impressions. Once dry, a coat of varnish not only protects your masterpiece but makes those awesome textures pop!
Want to take it up another notch? Add some paint to highlight the impressions—suddenly that leaf pattern becomes magical with a touch of gold or blue!
Homemade Silicone Molds for Custom Clay Shapes
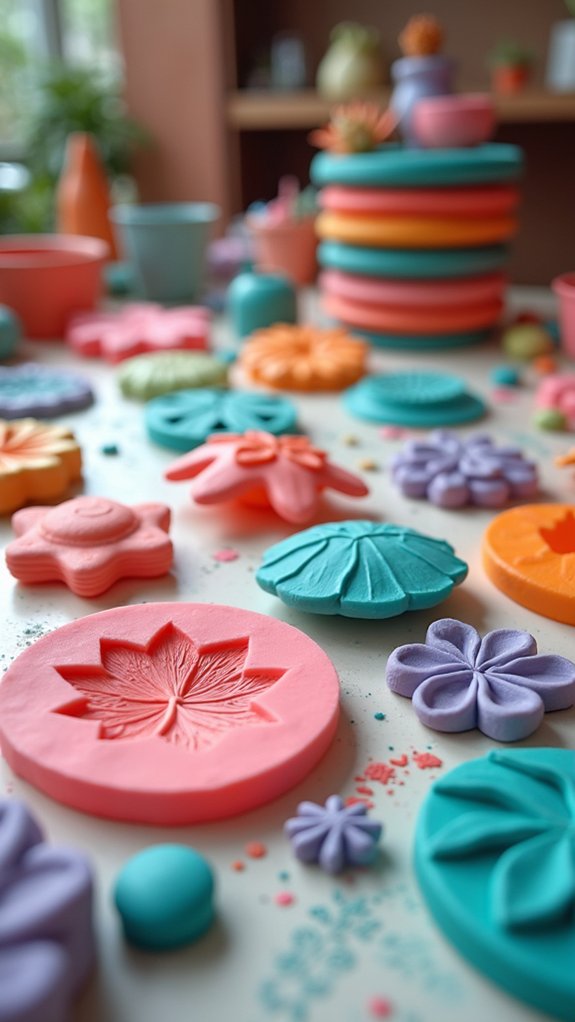
Crafters can transform ordinary objects into personalized clay creations by making their own silicone molds at home with just a few supplies and some patience.
The type of clay used—whether air-dry, polymer, or earthenware—affects the final result, so it’s important to match the clay to your project goals and drying capabilities.
Applying a thin layer of cornstarch or baby powder as a release agent prevents the clay from sticking to the mold, ensuring crisp details and clean edges every time.
Making Silicone Molds
Creating your own silicone molds opens up a world of possibilities for clay artists looking to add unique shapes and textures to their projects. The process is surprisingly simple but requires attention to detail for the best results.
Silicone molds capture even the tiniest features, making them perfect for intricate designs!
When making your molds, remember these key points:
- Mix the silicone and catalyst thoroughly in the exact ratio specified – lumps or incorrect proportions can ruin your mold
- Apply a generous coating of release agent (cornstarch works great!) to prevent sticking
- Allow a full 24 hours of curing time – rushing this step can lead to floppy, unusable molds
Once finished, your custom silicone molds will be ready to help you create countless clay masterpieces!
Clay Selection Tips
Every silicone mold deserves the perfect clay companion! When creating with homemade silicone molds, choosing the right clay makes all the difference in how your project turns out.
Polymer clay is super popular because it’s easy to work with and holds detailed impressions amazingly well. Plus, it hardens permanently after baking in a regular home oven!
Air-dry clay offers another fantastic option, though it might need a bit more care when removing from intricate molds. For beginners, a soft, pliable clay that doesn’t dry out quickly gives you plenty of time to experiment with shapes and textures.
Remember to match your clay type to your project goals—some clays work better for jewelry, while others are perfect for larger decorative pieces.
Don’t forget to dust your mold with cornstarch before pressing any clay into it!
Release Agent Techniques
Many crafty projects fail at the final step when clay stubbornly sticks to the mold!
Mastering release agent techniques can save your creation from disaster and preserve your silicone molds for future use. The secret lies in preparing the mold before pressing in your clay.
- Dust the mold evenly with cornstarch or baby powder—this creates a thin barrier that helps clay slide out smoothly.
- Apply a light coating of vaseline or baby oil to both rejuvenate brittle clay and prevent sticking.
- Pop your filled mold in the freezer for just one minute to make sticky clay shrink slightly and release easily.
Shiny-Finished Air Dry Clay Ornaments and Decorations
When air dry clay ornaments have fully hardened, they can be transformed into dazzling decorations with the right finishing techniques. The secret to achieving that eye-catching, shiny-finished look is all about proper sealing!
First, make sure your clay creation is completely dry and dust-free. Any tiny particles will ruin that perfect shine—imagine finding a bug stuck in your glossy masterpiece, yuck!
Apply a layer of gloss varnish or try a high-gloss acrylic spray for that “wow” factor. These products not only make your ornaments gleam like treasures but also protect them from moisture and dirt.
Don’t be afraid to experiment with different sealants! Each product creates unique effects, turning ordinary clay pieces into spectacular decorations that’ll have everyone asking, “Did you really make that yourself?”
Paper Clay Recipe for Lightweight Sculptural Projects
Creating your own paper clay at home is surprisingly simple and incredibly budget-friendly! This lightweight material combines paper pulp with clay and water to create a versatile medium perfect for delicate sculptures. The best part? Paper clay doesn’t need a kiln to set—it air dries on its own, making it accessible for crafters of all skill levels.
Paper clay: the DIY crafter’s secret weapon for creating stunning sculptures without expensive equipment or complicated techniques.
- Mix torn paper scraps with water until mushy, then blend with white glue or flour as a binding agent.
- Shape your paper clay into figurines, ornaments, or decorative items while it’s still moist and pliable.
- Once dry, sand rough edges and paint with vibrant colors to bring your creations to life!
Paper clay’s unique composition allows artists to create intricate details without worrying about weight. Kids and adults alike will love how forgiving this medium is—mistakes can be fixed easily before drying!
Polymer Clay Statement Earrings With Bold Patterns
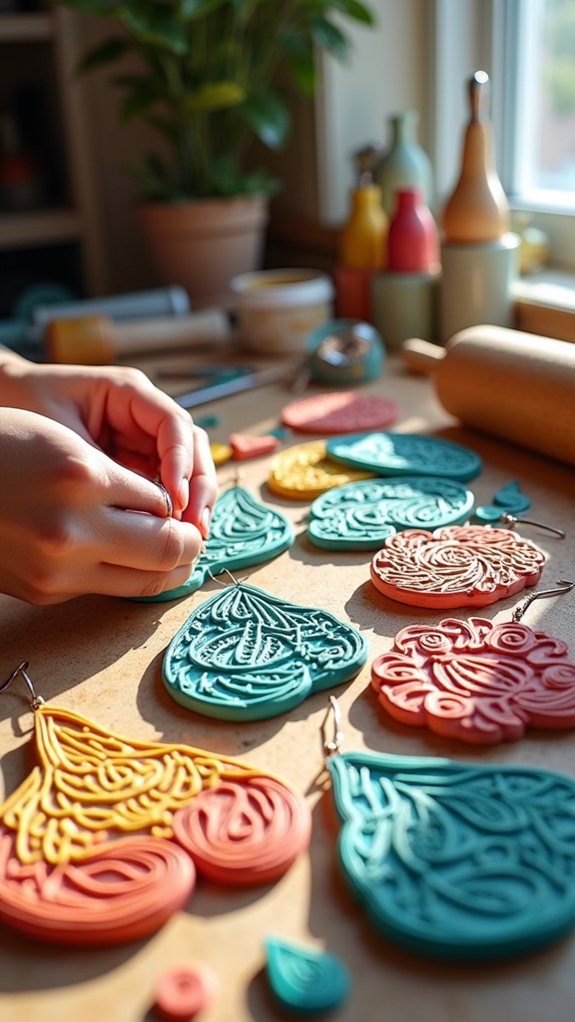
Bold, eye-catching statement earrings have become a fashion staple, and polymer clay offers the perfect medium for crafting these attention-grabbing accessories! Due to its incredible pliability, polymer clay makes creating intricate designs a breeze—no fancy tools required!
The magic of polymer clay lies in its versatility. Artists can mix different colors to achieve stunning marbled effects that practically scream “Look at me!”
Want texture? Simply stamp or carve patterns into the clay before baking. The possibilities are endless!
After shaping your masterpieces, pop them in the oven at 275°F for about 15 minutes per quarter-inch thickness.
Once cooled, add a glossy glaze for that extra wow factor! The finished earrings not only look professional but will have friends asking, “Where did you buy those?”
Imagine their surprise when you say, “I made them!”
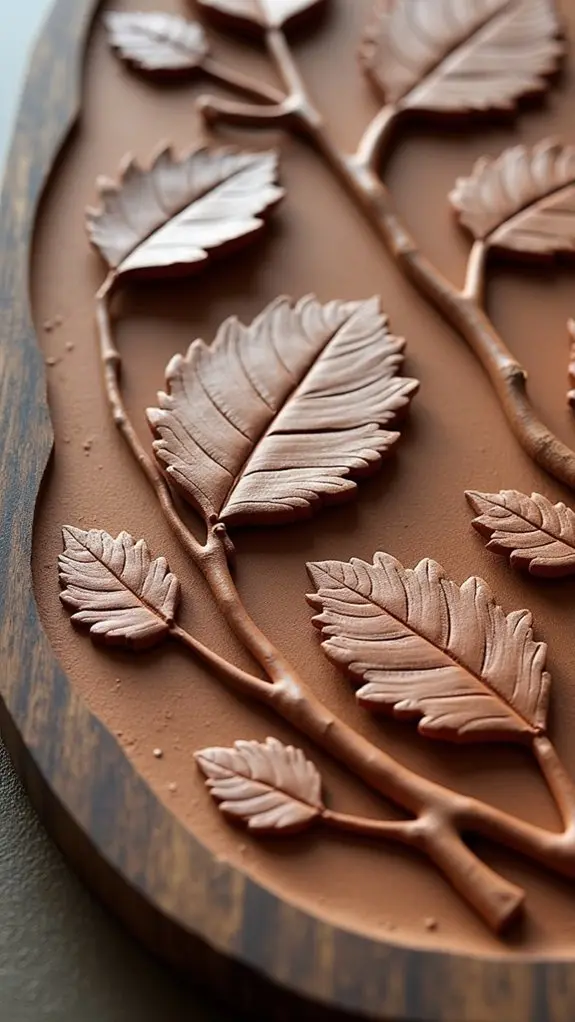
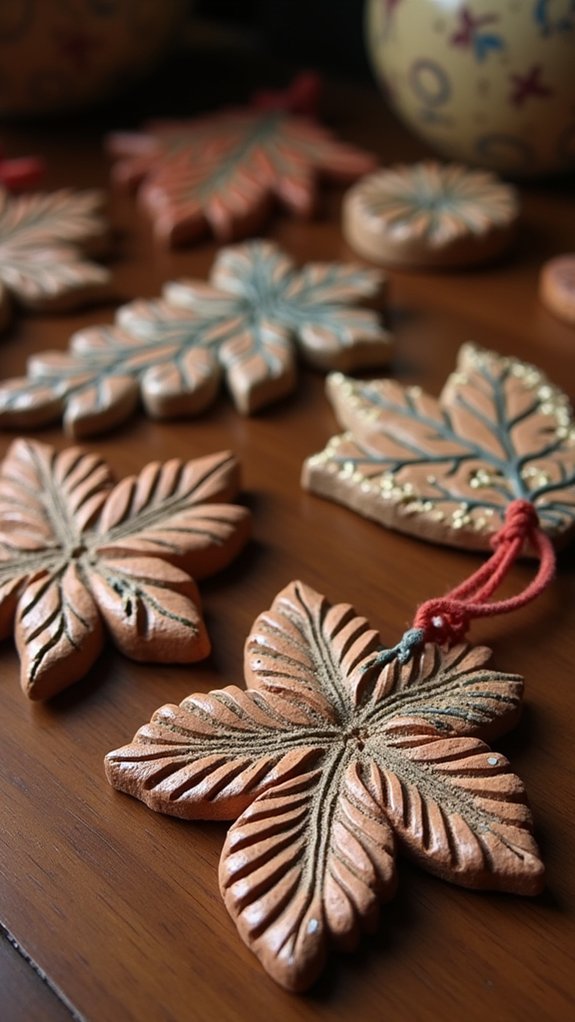
DIY Intaglio Art: Creating Framed Clay Impressions
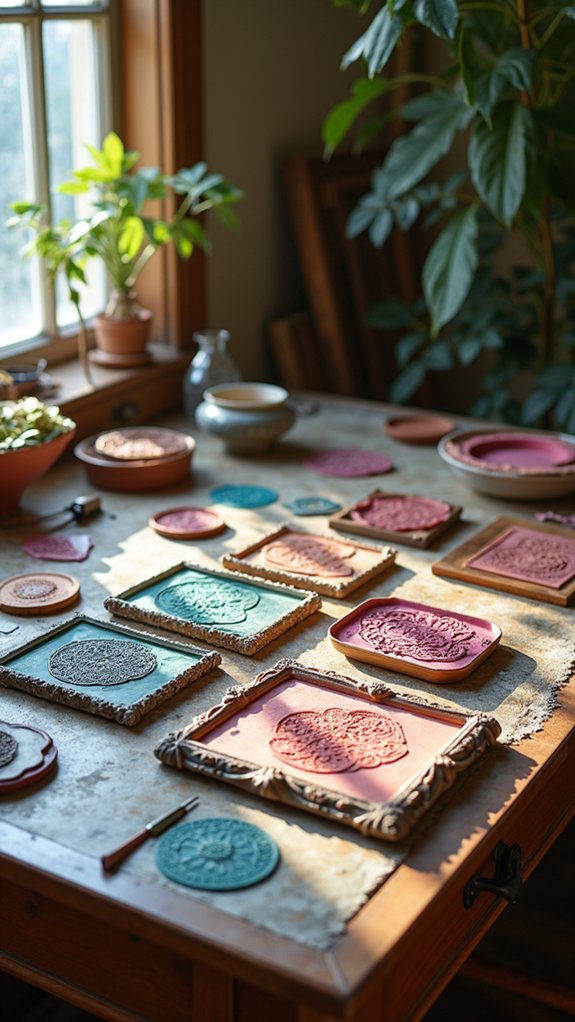
Transform your home decor with the ancient art of intaglio, reimagined through simple air-dry clay! This cool technique involves pressing objects into clay to create amazing textured impressions that capture every detail.
Give your space instant character with textural clay impressions that turn everyday objects into artistic masterpieces.
Once dried, these personal masterpieces can be painted or glazed to make the patterns pop with vibrant color and depth.
- Gather unusual objects like lace, leaves, or shells for unique imprint ideas
- Try layering different textures for one-of-a-kind dimensional effects
- Experiment with metallic paints to highlight the recessed areas
Mounting your finished intaglios in frames or on canvas takes them from craft to art in seconds!
Perfect for beginners and experienced crafters alike, these clay impressions make stunning wall art that’ll have friends asking, “Where did you buy that?!” — when you proudly tell them you made it yourself!
Clay Terracotta Pot Upcycling With Modern Designs
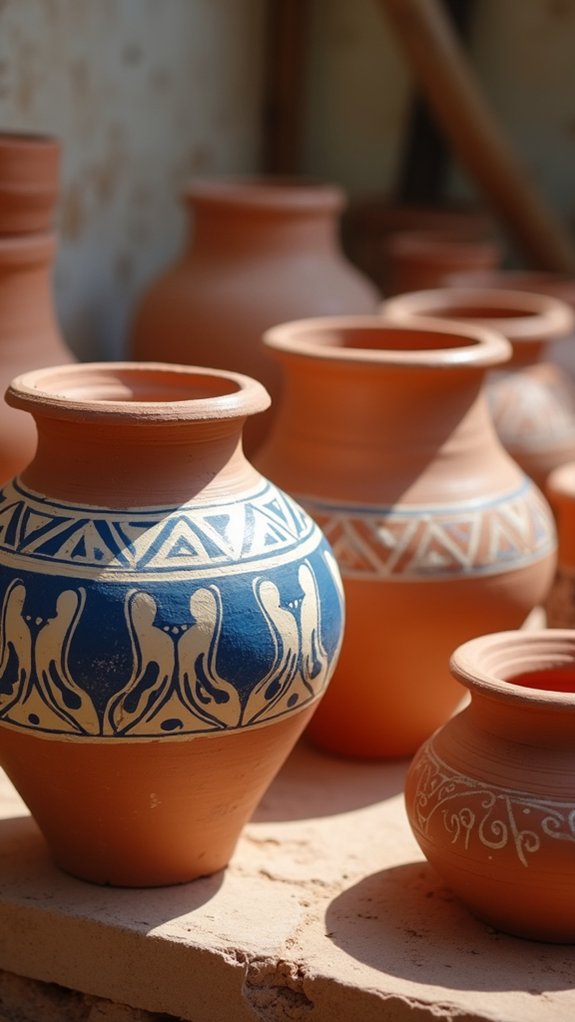
Those dusty terracotta pots sitting in your garden shed can become stunning decor pieces with a bit of polymer clay magic! By adding colorful designs and sculptural elements, ordinary pots transform into personalized art that brightens any space.
| Design Idea | Materials Needed | Difficulty | Drying Time | Best For |
|---|---|---|---|---|
| Geometric Patterns | Colored clay, ruler | Easy | 24 hours | Indoor plants |
| Nature Motifs | Clay, leaf stamps | Medium | 48 hours | Outdoor display |
| Textured Handles | Clay, texture tools | Medium | 24 hours | Large planters |
| Marbled Effects | 2+ clay colors | Easy | 24 hours | Gift items |
| 3D Elements | Clay, cutting tools | Hard | 72 hours | Statement pieces |
Why not try out new color combinations or textures? Simply attach your designs with strong glue, and suddenly those boring pots become conversation pieces that show off your creativity while giving old items new life!
Seasonal Clay Decorations Using Simple Techniques
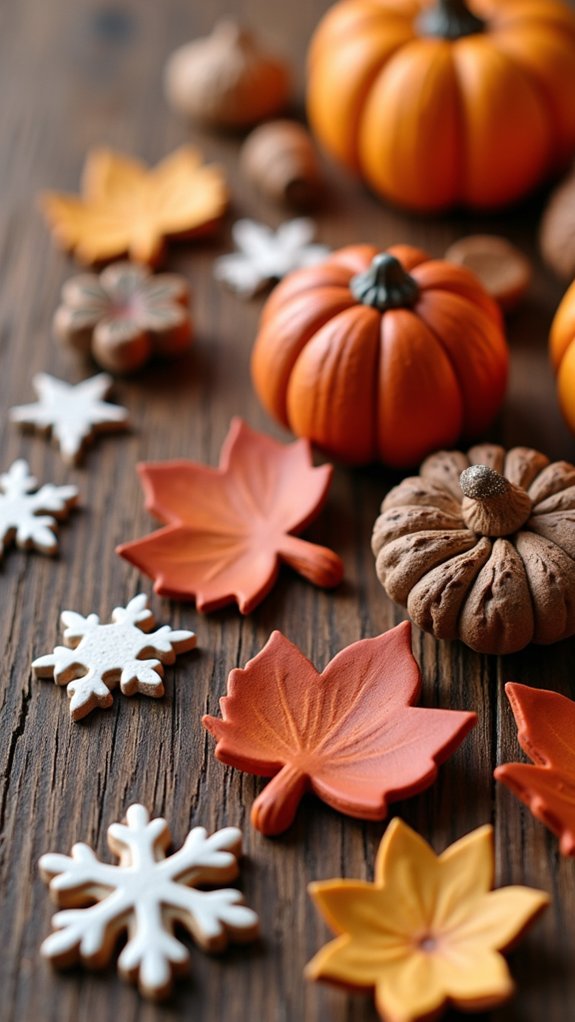
Creating seasonal clay decorations offers endless possibilities to celebrate holidays and special occasions throughout the year. With polymer or air dry clay, crafters can try molding festive ornaments that bring joy to any home. These charming decorations, once completed, can become treasured keepsakes displayed annually.
- Try adding glitter to snowflakes for winter sparkle that catches light beautifully.
- Mix vibrant colors into clay for Easter eggs that never crack or spoil.
- Shape spooky figures for Halloween with glow-in-the-dark paint for extra fun.
Simple techniques like rolling, cutting, and texturing make these projects perfect for crafters of all skill levels. Even beginners can create impressive results by following easy tutorials that break down the process into manageable steps, turning ordinary clay into extraordinary seasonal art!
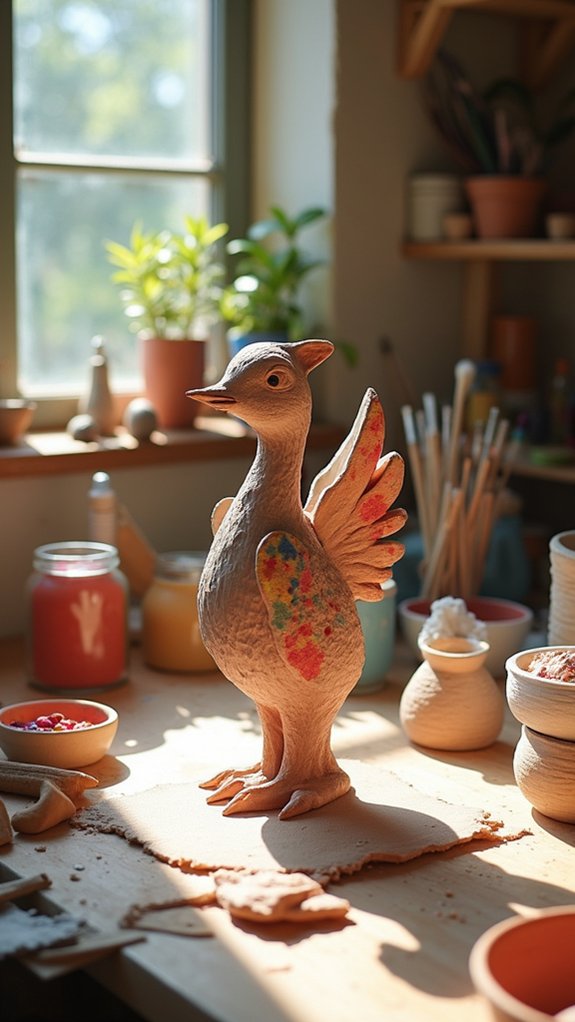
Child-Friendly Clay Figurines Without Special Tools
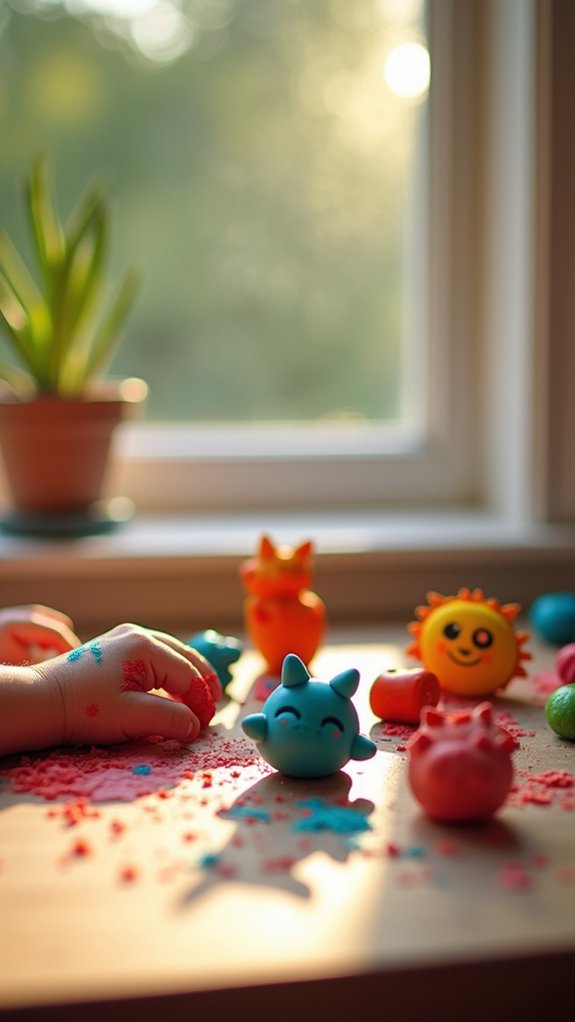
While seasonal decorations bring joy to homes year-round, clay projects can also provide endless entertainment for younger crafters. Air dry clay is the best choice for kids since they can jump right in without fancy tools—just their enthusiastic hands and wild imaginations!
| Project Ideas | Materials | Skills Developed |
|---|---|---|
| Animal figures | Clay + buttons | Fine motor skills |
| Mini people | Clay + beads | Creativity |
| Fantasy creatures | Clay + nature items | Imagination |
Children can easily roll, pinch, and squish the clay into super cool shapes. Want to make your creations even more awesome? Grab some everyday treasures like colorful buttons or pretty leaves to press into the clay! Once dry, kids can paint their masterpieces with bright colors or add sparkly glitter for that extra pizzazz.
Frequently Asked Questions
What Can I Make With Molding Clay?
Molding clay enables crafters to produce various Clay Creations including decorative sculptures, functional jewelry, personalized home accessories, buttons, dollhouse miniatures, and seasonal ornaments for artistic expression.
How Do You Shape Dried Clay?
Dried clay can be shaped through various sculpting techniques including carving with tools, sanding with fine-grit sandpaper, or careful rehydration. Light water application softens surfaces for detail work without breakage.
How Do You Make Shaping Clay?
Shaping techniques for clay involve kneading to condition properly, then utilizing methods like pinching, coiling, or slab building. Tools such as sculpting knives and silicone molds enhance precision and detail.
What Can Be Created From Clay?
Clay Creations span from beginner-friendly caterpillar sculptures to functional stoneware mugs, elegant porcelain vases, customized polymer jewelry, and decorative items made from DIY paper clay compositions.
Conclusion
Working with clay opens up a world of creativity that anyone can enjoy. These 12 DIY ideas prove that you don’t need fancy equipment or years of experience to create something beautiful. Whether you’re making jewelry dishes with swirly patterns or cute plant markers, clay is forgiving and fun. So grab some clay, roll up your sleeves, and let your imagination run wild – your next masterpiece is just a squish away!
Leave a Reply