
From wild spiral op-art illusions that hypnotize, to whimsical flower doodles bursting with personality, there’s a doodle style for every mood. Clover field creations and majestic mountain sketches turn blank pages into nature wonderlands, while Keith Haring-inspired abstracts practically leap off the paper. Busy mandalas and vibrant zendoodle designs explode with pattern and color, and stendoodle masterpieces bring order to the chaos. Expressive collages, playful blobs, and wagon wheels keep things quirky—you won’t want to miss what’s next!
Key Takeaways
- Relax with Zentangle and mandala doodles, which blend geometric patterns and repeated shapes for soothing, eye-catching designs.
- Experiment with vibrant Keith Haring-inspired abstracts, full of bold lines, neon colors, and energetic figures.
- Create expressive doodle collages combining whimsical flowers, colored markers, and mixed materials to capture ideas and emotions visually.
- Master geometric art with layered rose petals, spiral op-art illusions, and elegant clover fields for harmonious, striking patterns.
- Have fun with playful wagon wheels, cow print blobs, and rainbow wave patterns to fill sketchbooks with charming, lively art.
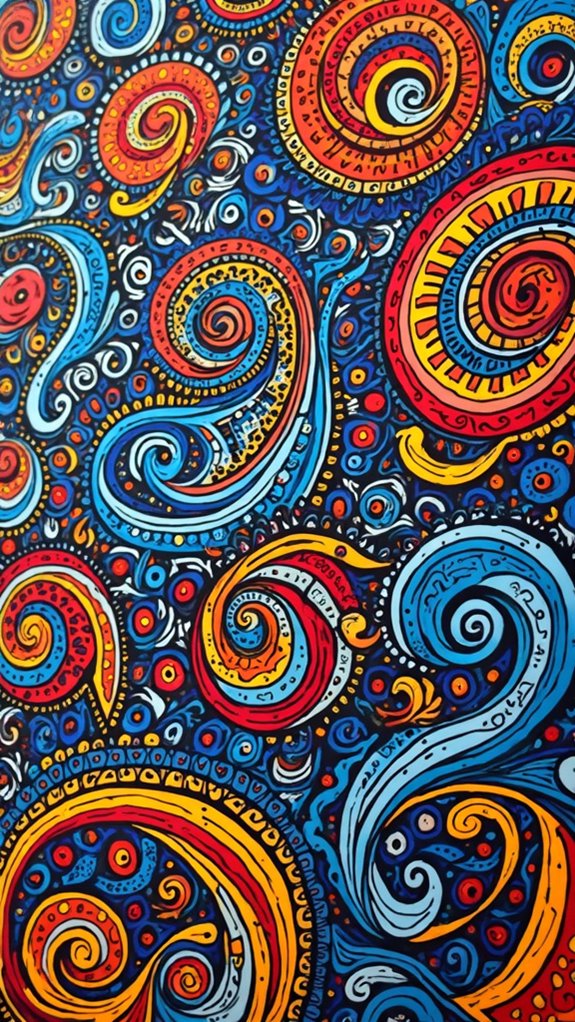
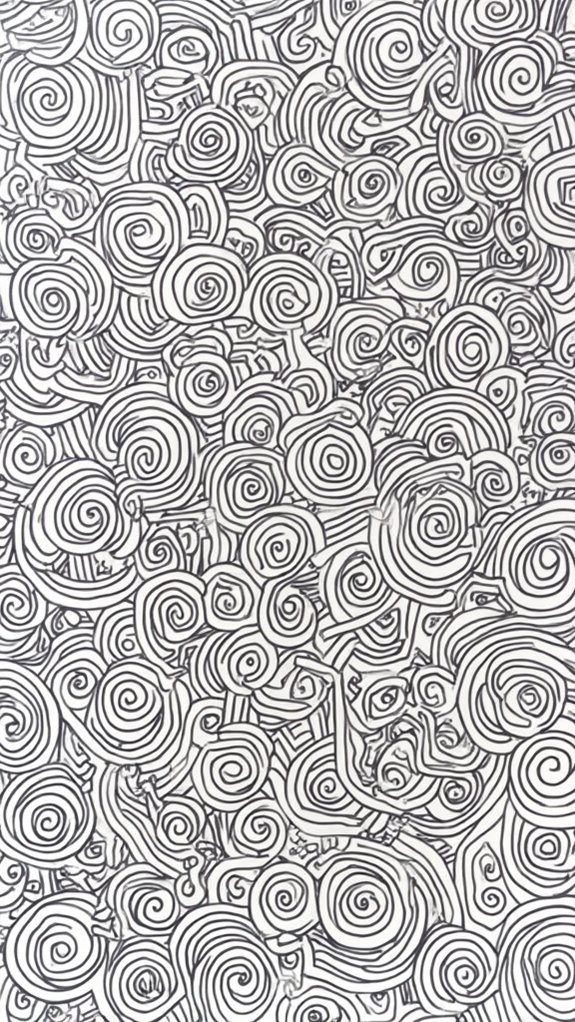
Spiral Op-Art Illusions
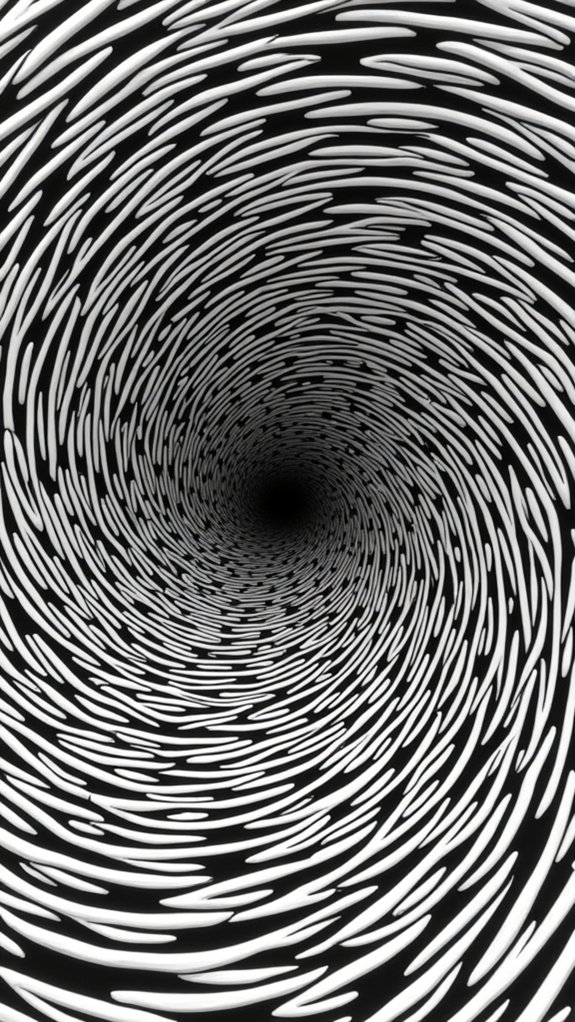
One of the coolest ways to plunge into doodle art is by trying Spiral Op-Art illusions—they look complicated, but anyone can give them a shot!
These designs start with a dot in the center of your page and wavy lines that spread out like rays from the sun. What happens next? In each section, upside-down “u” shapes are drawn, and that’s where the magic kicks in.
Suddenly, a wild three-dimensional effect appears, making your doodle art pop off the page! Not only does it look hypnotizing and, honestly, kind of trippy, but it’s also a great way to test your control using fine-tip pens or markers.
Spiral Op-Art illusions challenge both beginners and pros—they turn practice into art and doodling into pure eye-candy fun.
Clover Field Creations
Even though it might sound like something out of a fairy tale, Clover Field Creations are what happens when doodling meets a crazy garden party!
Imagine connecting three or four teardrop shapes at the top, and suddenly you’ve got clover petals instead of just random doodles. Want to level up? Add even smaller teardrop shapes inside each petal—kind of like sneaking bonus petals into the mix.
The fun part about Clover Field Creations is how quickly those empty spaces disappear. There’s this urge to fill every gap, forming a lush, tangled field that looks almost alive.
Throw in some bright colors, and bam—instant garden! Besides looking totally magical, Clover Field Creations help anyone get better at symmetry and repeating patterns.
Keith Haring Inspired Abstracts

After wandering through a wild field of clover doodles, suddenly—bam!—Keith Haring’s world comes bursting in, with its electric energy and wild shapes.
Haring-inspired abstract art is impossible to ignore. It’s all bold lines, popping neon colors, and figures that look like they’re about to dance right off the page. Each doodle doesn’t just sit still; it bounces, shimmies, sometimes even zooms like it’s fueled by extra-bold markers and a bunch of cool ideas.
Haring’s art is fearless—it shouts about unity and activism, mixing playful patterns with powerful messages. Look closely and you might spot the “radiant baby,” lighting up hope like a doodle superhero.
These funky designs prove that doodling isn’t just fun—it can spark real conversations, too.
Whimsical Flower Doodles
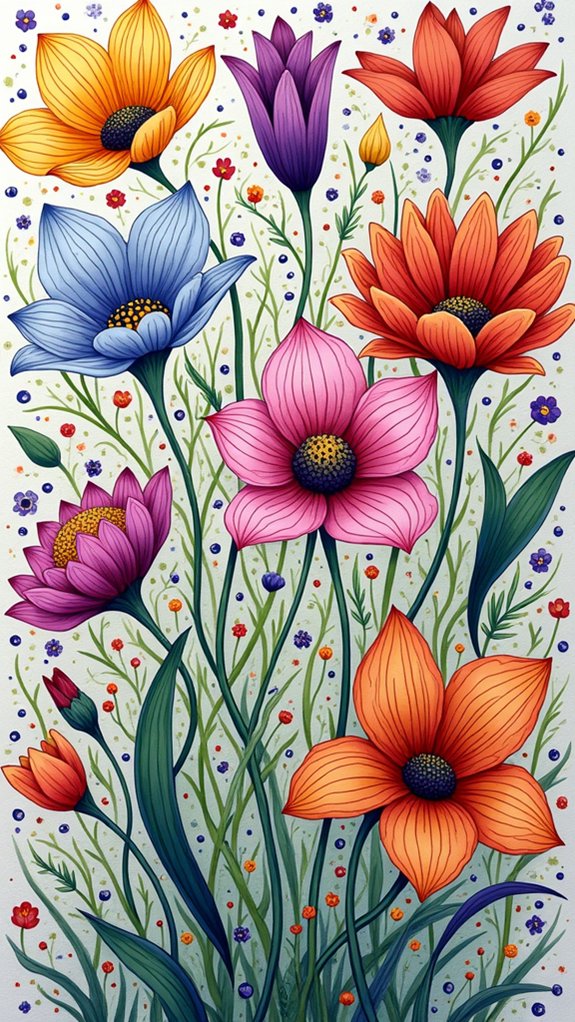
While some people think of flowers as delicate or fancy, whimsical flower doodles are pure mischief on the page. These playful designs often leap off the paper with wobbly petals, crazy shapes, and every color of the rainbow.
Artists of all ages love how easy and fun whimsical flower doodles can be—just start with a simple circle for the center, then add petals in all kinds of wild styles and unexpected sizes. Toss in swirls, dots, and squiggly lines for extra flair. The more details, the more awesome the result!
These doodles don’t have to stay trapped in a sketchbook, either. Use them on greeting cards, journals, or whatever you want. Plus, drawing whimsical flower doodles is super relaxing—almost like art therapy!
Majestic Mountain Sketches

Majestic mountain sketches are all about creating the feeling of epic scenery using just lines and shading, almost like magic with markers.
By stacking wavy triangles and playing with light and shadow—making one side bold and dark while the other stays bright—artists can turn a flat page into a world that feels huge.
Add some creative line textures, maybe a little squiggle here or a wild zigzag there, and suddenly every mountain looks like it has its own personality (and maybe even a hidden yeti or two).
Layering for Depth
Bold mountain peaks bursting off the page is what layering for depth is all about in doodle art. It’s like watching a simple art journal page turn into a wild adventure in the clouds!
To nail that look, artists grab a thick marker to draw chunky, wavy triangles for mountains. But it doesn’t stop there—oh no. They split each mountain in half, then get sneaky: they fill one side with tight, close lines (hellooo shadows), and jazz up the other side with lines that are way more spaced out. Instantly, it looks three-dimensional!
To really bring the scene to life, imagine these details:
- Different mountain sizes and cool angles
- Fluffy clouds floating nearby
- Tiny, quirky pine trees framing the base
Layering for depth makes mountain doodles pop!
Textural Line Techniques
Although doodle mountains might seem simple at first glance, getting them to look super cool and realistic is all about using textural line techniques. Just outlining wavy triangles isn’t enough—you have to mix up your lines! Artists vary line thickness and change how close together they draw lines. They use thick lines for outer mountain shapes, then break each mountain with more lines that show where the light and shadows would be. Check out this quick cheat sheet to see what different line styles can look like:
| Technique | Description | Visual Effect |
|---|---|---|
| Hatching | Parallel lines close together | Shaded texture |
| Cross-hatching | Crisscrossing lines | Richer, darker |
| Bold outlining | Thick outer lines | Strong mountain |
| Sparse lines | Spaced out, gentle lines | Light areas stand out |
| Layered strokes | Multiple line layers | Extra depth |
Mix these textural line techniques for mountains that totally pop!
Light and Shadow Play
Once those textured lines are down, it’s time to play with one of the coolest tricks in mountain doodling—light and shadow.
Majestic mountain sketches really pop when artists create wavy triangle peaks using a thicker marker for bold outlines.
Next, by splitting each peak with a sharp line, the artist chooses which side gets a deep shadow, and tightly packs lines together for that moody, dramatic look.
The other side? It stays lighter, with lines further apart, totally bringing out the bright sunlit effect and making the mountain seem almost three-dimensional.
The result is pure magic, like a mountain rising right out of the doodle page!
Imagine this:
- Wavy triangle peaks boldly outlined
- One half dark with tightly spaced lines
- Other half light with wide gap lines
This is true light and shadow play in action!
Elegant Rose Blooms
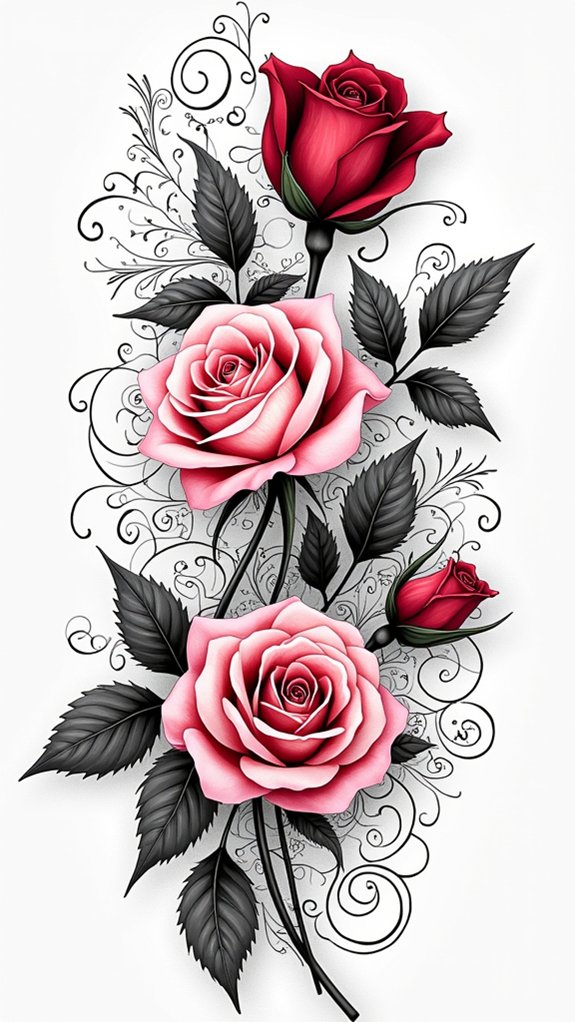
When it comes to doodling elegant rose blooms, getting those swirling petals just right is both a challenge and a thrill—kind of like trying to eat spaghetti gracefully!
Artists usually start with a simple center, then slowly build up layers of petals, making sure each one overlaps just enough to give the flower real-life depth and that wow factor.
With every extra swirl and curl, the rose seems to pop off the page, convincing anyone looking that they might just catch a whiff of its sweet scent.
Simple Rose Drawing Techniques
Creating a doodle of a rose might sound a little fancy at first, but with some simple steps, anyone can draw an elegant rose bloom that actually looks like the real thing—no green thumb required!
The best tips for working with rose doodles start super easy: begin with a small circle for the center. Then, sketch loose, overlapping petal shapes all around it, making each layer a bit bigger—this really helps your rose pop.
Want your bloom to look real? Add fine lines or curves inside the petals to show off those natural folds. For extra flair, try these:
- Darken one edge of each petal for realistic shading.
- Play with different rose sizes and angles across your page.
- Use a fine-tipped pen for crisp, clean petal details.
Layering Petals for Depth
Every amazing rose doodle starts to look like pure magic the moment those layered petals come into play. Seriously, layering petals for depth takes your simple rose from “meh” to “wow, did I just draw THAT?”
The trick is starting with a little circle for the center, then adding overlapping petals all around it—each one a bit bigger and fancier than the last. Some petals should curl inward for an extra dose of realism that fools the eye.
Grab a finer pen and add lines inside each petal for more texture and dimension. Trust me, your rose will practically pop off the page! Shade or use color gradients for shadows and highlights.
Finally, layer multiple roses at different angles—now you’ve got a real doodle masterpiece!
Mesmerizing Drip Effects
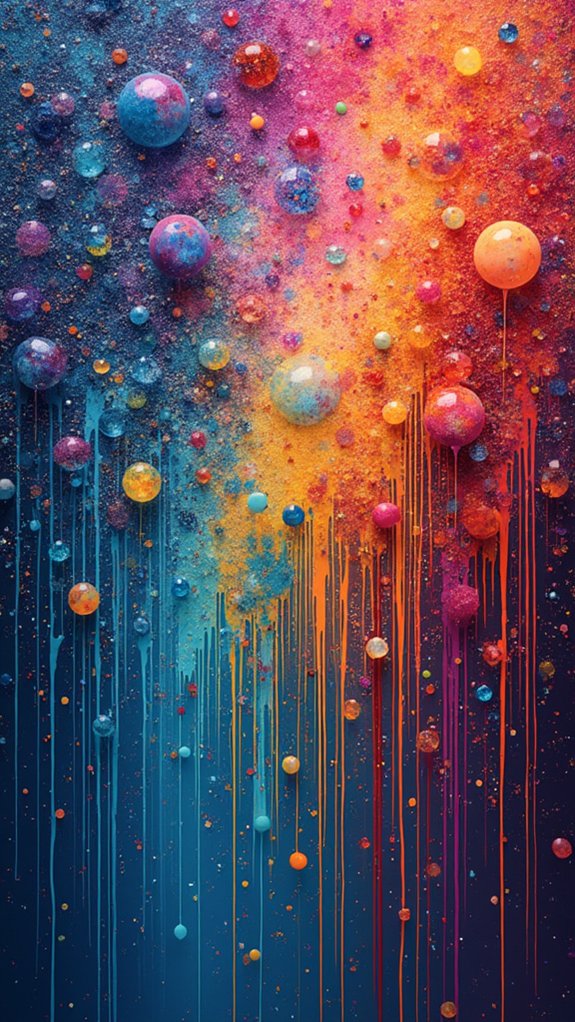
Liquid magic takes center stage with mesmerizing drip effects in doodle art. These doodles start out with wavy lines that look just like liquid slowly trickling down a window.
For artists who love adding a little “wow” factor, drip effects offer loads of possibilities. Using thinner markers to draw smaller drips inside bigger ones, young creators can make their art feel deep, cool, and energetic—almost like the page itself is melting!
- Thick, glossy drips hanging from cloud-like shapes
- Layers of tiny splashes nestled inside bold larger drops
- Swirling streams that branch off into playful blobs
What’s awesome about drip effects is their total flexibility. They slip and slide around other designs or even blend with abstract patterns, always bringing surprising energy and eye-catching fun to any doodle adventure.
Rainbow Wave Patterns
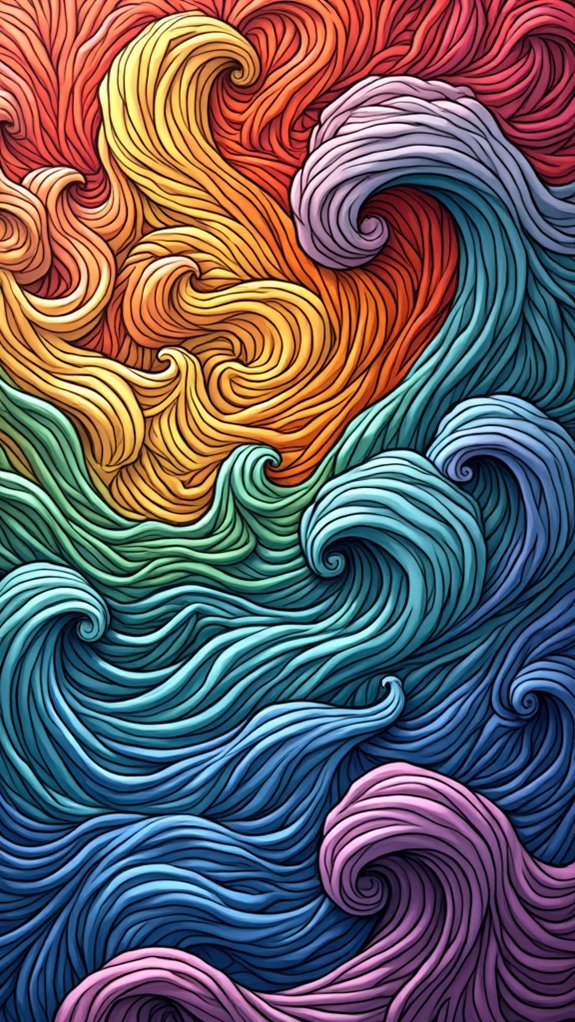
Rainbow wave patterns are all about creating lively, wavy lines that run across your page, almost like the ocean decided to dress up in rainbow colors.
Each time a wave swoops up or down, it carves out a new section just waiting to be packed with bright, eye-catching shades—there’s really no such thing as too much color here.
Artists love to flip rainbows right side up or upside down along these lines, making every section pop with personality and a bit of cheerful chaos.
Crafting Vibrant Wave Lines
Grab a marker and imagine waves rolling across your page—big, bold, and totally impossible to ignore. Crafting vibrant wave lines is all about making your doodle come alive with movement and color.
First, those wavy lines zig and zag horizontally, sometimes skinny, sometimes thick, like your page can’t quite decide if it’s a roller coaster or the ocean. Some artists use stencils to create super smooth curves, others just go wild and let their hand take over.
Here’s how the action happens:
- Layered horizontal waves—stacked like rainbow pancakes, each with its own unique squiggle
- Alternating upright and upside-down rainbows to keep eyes bouncing around the page
- Bursts of color using bold markers for that “wow” factor
Simple lines, endless possibilities!
Exploring Colorful Sectional Fills
Even after sketching a page full of wild waves, things get way more exciting once those empty spaces turn into a burst of color.
With colorful sectional fills, every wavy stripe is almost begging to be packed with bright, cheerful hues. Rainbow Wave Patterns really shine here—just fill each section between the squiggles with a color from the spectrum, or mix it up with random shades for some extra flair.
Switch between regular and upside-down rainbows, and suddenly your doodle seems almost alive, full of wild energy. It’s super easy and there’s zero pressure—just let your hand do its thing.
Playful Wagon Wheels

Wagon Wheels, at first glance, might look like something you’d spot in an old western movie, but in the world of doodle art, they’re pure magic.
Drawing them is almost difficult to stop—once you start circling, dotting, and adding lines, there’s a mesmerizing rhythm that just pulls you in.
Even beginners can join the fun, since all it takes is a circle, a dot, and a bunch of lines shooting outward. The real kicker? You can change things up however you want!
- Try thick and thin lines to make each wheel pop with dimension.
- Go wild with colors, or keep it sleek in black and white.
- Fill a page, blend them together, and watch a plain sheet transform.
Repetitive? Maybe, but oh, so charming!
Cow Print Inspired Blobs
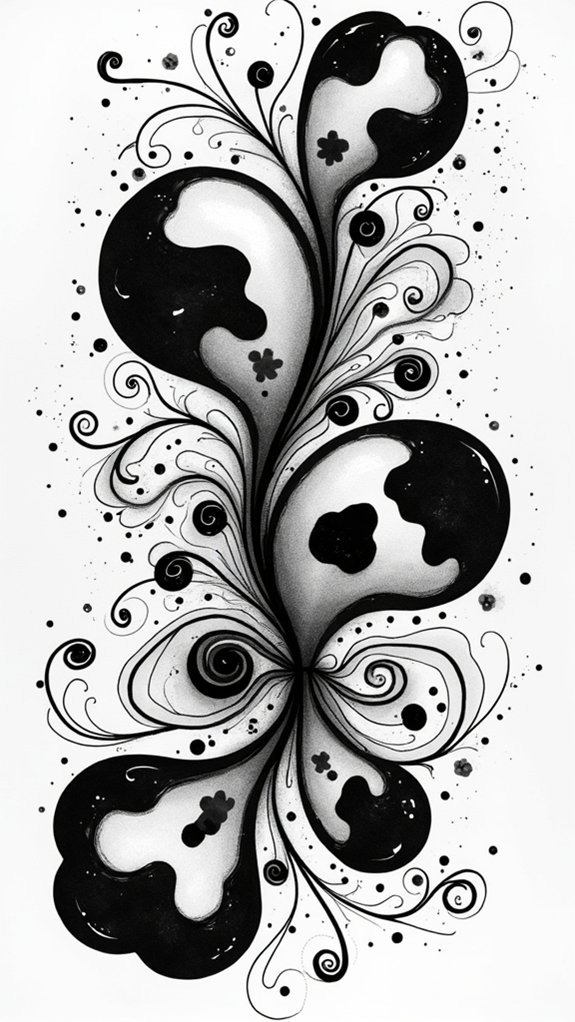
Cow print inspired blobs start with drawing big, funky shapes that swirl and squiggle all over the page, kind of like puddles after a rainstorm.
Inside those blobs, smaller and even weirder shapes get packed in, almost like they’re having a little blob party.
Once the shapes are down, coloring the spaces around them with dark shades makes the whole thing pop, letting the playful spots jump out in true cow fashion.
Drawing Organic Blob Shapes
There’s something strangely satisfying about doodling a bunch of wobbly blobs that look like they’ve just plopped onto the page—especially when those blobs start to remind everyone of the coolest cow print pajamas or that wild milkshake spill no one ever admits to.
Drawing organic blob shapes isn’t about perfect circles; it’s all about random, uneven, totally unpredictable lines. These quirky, soft-edged forms ooze with personality, letting your imagination roam wild.
To get that iconic cow print vibe, artists focus on three things:
- Letting each blob shape be unique, like snowflakes at a dairy farm.
- Mixing up sizes and angles for a lively, dancing effect across the page.
- Using bold, contrasting colors—think classic black and white, with maybe a splash of chocolate.
It’s playful, surprising, and never boring.
Filling With Smaller Forms
Sometimes, the real magic happens when those big, bouncy blob shapes get filled with a bunch of smaller, oddly-shaped blobs, turning the whole doodle into a wild playground of cow print patterns.
It’s like watching a blank sketchbook page burst into a patchy, spotty masterpiece—one wonky blob at a time. Creating these patterns is all about playing with different shapes; no two blobs should look the same.
Use a dark color, like black or deep brown, to make each little blob stand out against the larger, lighter blob from before. Outlining those tiny shapes with a fine pen adds just enough pop, making every part of the pattern look important.
Don’t be afraid to experiment—seriously, there’s no such thing as too many blobs!
Coloring the Negative Space
Plenty of doodlers love the instant excitement that erupts when focusing on the space between blob shapes instead of the blobs themselves—it’s like giving the background its time to shine.
Coloring the negative space in cow print inspired blobs takes this idea and runs wild! Artists start by doodling blobby shapes, then jazz up the background so it pops just as much as the blobs. It’s a little like sneaking into a DIY Pantry Makeover: Plus 7 best tips, but for your sketchbook—quick, playful, and super satisfying.
- Imagine big, splattered blobs covering the page, with the spaces between each one getting colored in bold, wild shades.
- Smaller shapes inside the blobs add depth and quirky detail.
- Contrasting colors between blobs and background make everything extra eye-catching and fun!
Enchanting Zentangle Patterns
Patterns have a way of pulling people in, and Zentangle takes this idea to a whole new level of fun and fascination. Imagine doodling on a tiny 3.5-inch tile, filling it with swirling lines, funky curves, and geometric shapes. That’s Zentangle!
The cool part? You don’t have to worry about messing up because every “mistake” just becomes part of the pattern. Artists call these repeating doodles “tangles”—and they’re seriously hypnotic.
Zentangle isn’t just about art, either; it’s like a built-in chill pill. People use it to relax, focus, and get creative. Workshops and classes make Zentangle easy for everyone, from beginners to doodling pros.
Seriously, the next time you’re stressed, grab a pen and Zentangle your worries away!
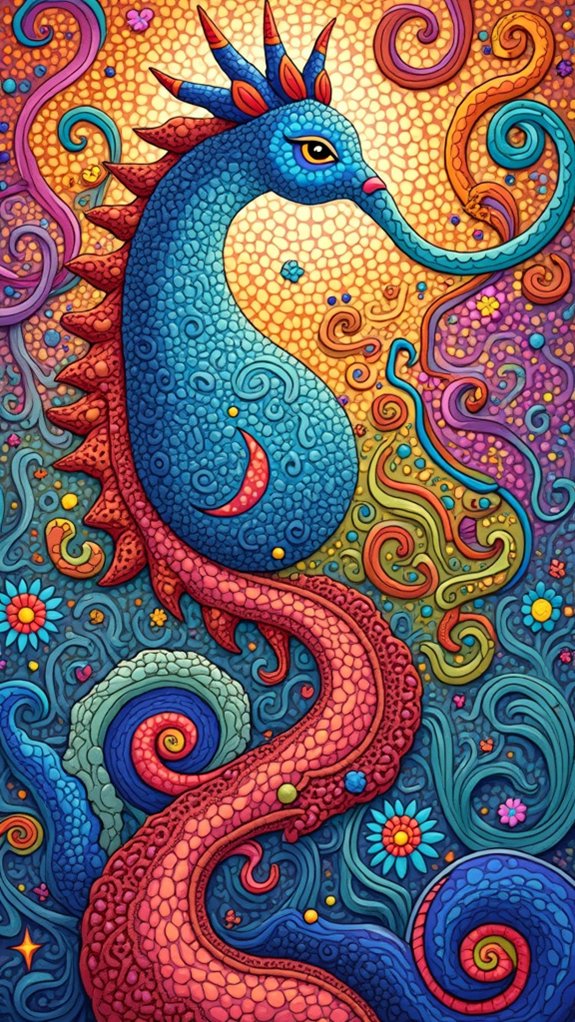
Vibrant Zendoodle Designs
If Zentangle is all about black-and-white calm, Zendoodle is like opening a box of crayons at a party—suddenly, everything gets brighter and a whole lot more wild.
Instead of classic black pen on white paper, Zendoodle brings color explosions, deeper patterns, and endless creative choices to the mix. People think Zendoodle is just for kids, but honestly, even adults can’t resist the charm of these vibrant, best designs.
Some artists even combine Wax Seal Stamped Images into their Zendoodle pieces for a twist of old-school cool. Just picture it:
- Giant swirls erupting with every color imaginable
- Animal outlines packed with mini-patterns and wild hues
- Repetitive shapes flowing together, calming but never boring
Zendoodle truly lets everyone’s creativity run wild, no rules required!
Stendoodle Masterpieces
Stencils aren’t just for tracing boring shapes in art class—enter Stendoodle, the ultimate mash-up of controlled outlines and free-spirited doodling.
Stendoodling lets anyone—even those who think their stick figures need a warning label—create stunning masterpieces. Here’s the trick: artists use stencils to lay down cool shapes and borders, then fill in each area with wild, creative doodles.
The best part? You don’t need to be Michelangelo. Michael Trent, the clever mind behind Stendoodling, made this style so fun and relaxing that anyone can jump in without stress.
The open design of the stencils means you can let your imagination go wild—think swirls, zigzags, even little monsters if you feel like it!
The result? Artwork that’s both precise and vibrantly personal.
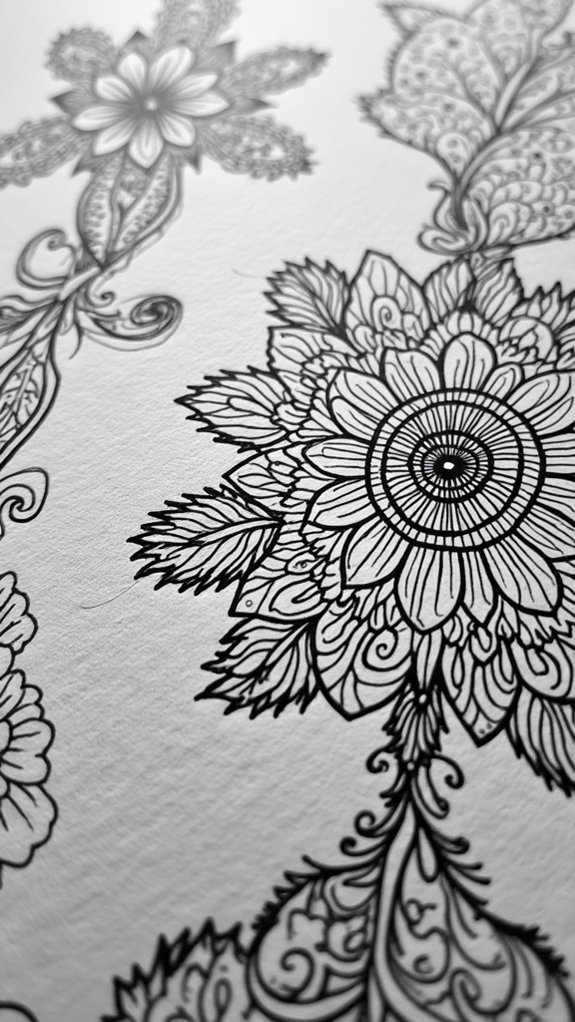
Intricate Mandala Art
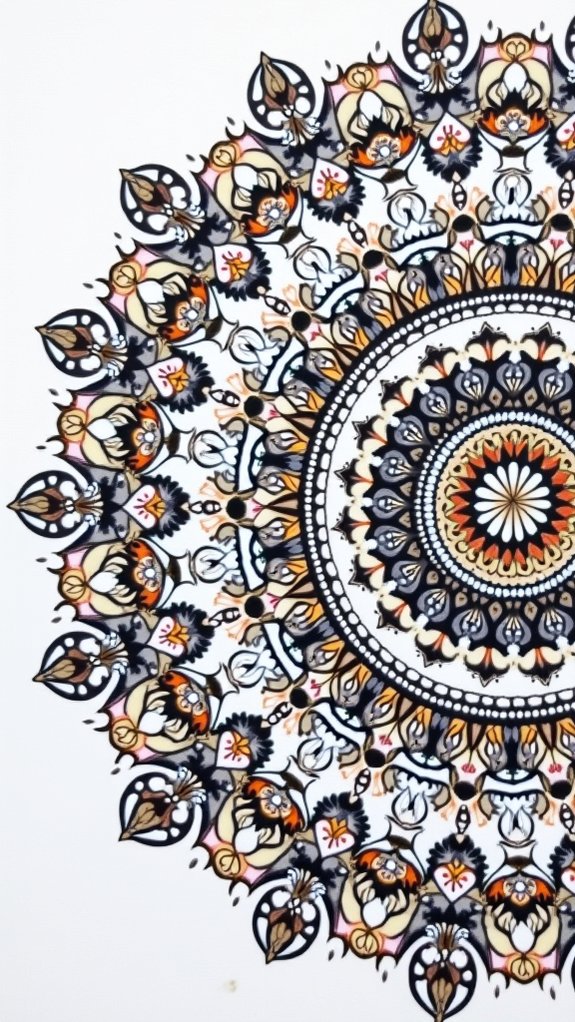
After exploring the wild and playful world of Stendoodle masterpieces, things get even more mesmerizing with intricate mandala art.
These dazzling designs are like a puzzle for your eyes, filled with geometric patterns that spiral out from a center spot—kind of like the universe doing a super chill dance. Mandalas aren’t just for looking at, though. Making one can seriously help you relax and focus, which is why they’re a top pick for art therapy.
Artists whip out everything from colored pencils to stamped images using ink to make each pattern pop. Imagine:
- Circles within circles, creating layers that seem to move
- Bright colors swirling between black, detailed lines
- Patterns stamped with ink, adding texture and surprise
Mandalas definitely bring harmony, one shape at a time!
Expressive Doodle Collages
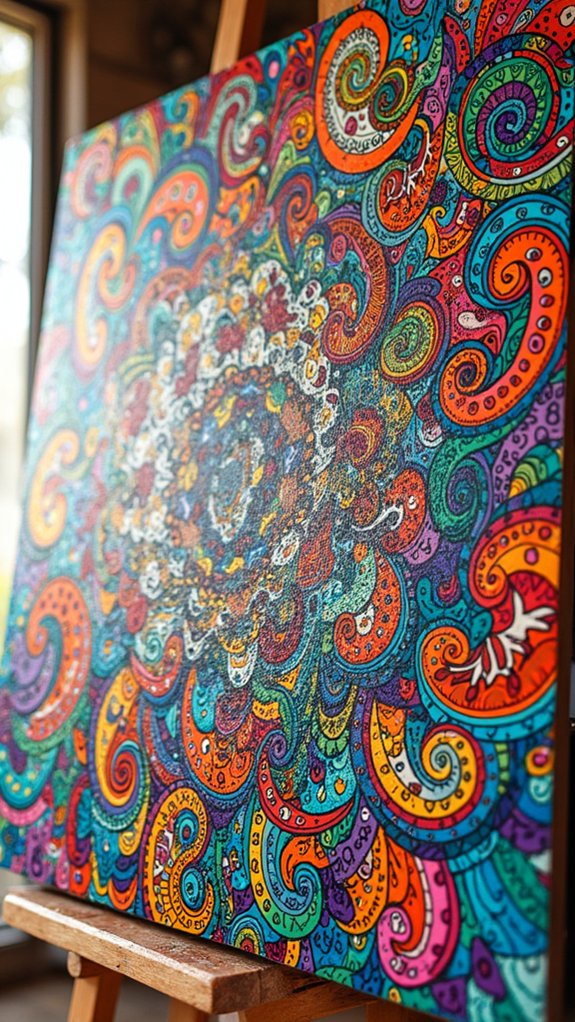
When it comes to expressive doodle collages, creativity really gets to let loose and run wild. These artworks are a total playground for imagination!
Artists mix all sorts of doodling techniques—think wild patterns, funky shapes, and even little cartoon people—into one big, eye-catching mashup. Doodle collages aren’t just about making things look cool, though. They’re like visual diaries, capturing the artist’s feelings and wild ideas in bursts of color and lines.
Colored pens, markers, and bits of crafty materials bring tons of texture and energy to these collages, making each one unique. Plus, sharing doodle collages online isn’t just satisfying—it inspires other doodlers and brings friendly vibes to the art community.
Who knew doodling could seriously connect people?
Frequently Asked Questions
What Materials Are Best for Starting Doodle Art?
When exploring Doodle Techniques, beginners find that fine-tipped pens, sketchbooks, pencils, and markers are ideal materials for starting doodle art. These tools offer control, versatility, and ease of use, encouraging creativity and experimentation.
How Can I Turn Doodle Art Into Digital Prints?
To transform doodle art into digital prints, an individual can scan or photograph the artwork and use digital tools such as Adobe Illustrator or Photoshop to refine, color, and resize the image, preparing it for high-quality printing.
Are There Proven Methods to Overcome Creative Block With Doodling?
When addressing creative block with doodling, individuals often utilize Creative Techniques such as timed drawing exercises, switching mediums, or exploring abstract patterns. Studies suggest these strategies can stimulate inspiration and help overcome barriers to the creative process.
Can Doodle Art Be Used for Mindfulness or Stress Relief?
Mindful Doodling is recognized as an effective tool for mindfulness and stress relief. Research suggests that the repetitive, free-flowing nature of doodle art can help individuals focus, reduce anxiety, and encourage relaxation through creative self-expression.
How Do I Safely Seal or Preserve My Doodle Artworks?
When considering Art Preservation, one may use archival sprays or fixatives to safely seal finished doodle artworks. Acid-free backing, protective sleeves, and proper storage environments help prevent fading, smudging, and other long-term damage to the pieces.
Conclusion
Doodle art truly lets your imagination go wild, right? Whether it’s sketching wild mountains, funky optical illusions, or swirling mandalas, there’s something here for every kind of doodler. It’s not just about lines and shapes—it’s about making something that feels totally you. So, grab your pen, release your creativity, and see where it takes you. Who knows? You might be the next doodle legend. The world (or at least your notebook) is waiting!
Leave a Reply