
Sophisticated Easter crafts are all about adding elegance and charm to your holiday decor! From crafting a stunning gold leaf Easter egg display to assembling a whimsical jeweled Easter egg tree, adults can explore a variety of creative projects. You could make a pearlized egg or plant succulents in egg planters for a natural touch. Want to impress? Try making a floral Easter tree or a chic Easter egg wreath. There’s so much fun waiting for you to discover!
Key Takeaways
- Create a Gold Leaf Easter Egg Display by painting ceramic eggs, applying gold leaf, and sealing with acrylic sealer for elegance.
- Assemble an Easter Egg Garland by threading decorated blown-out eggs on a cord, adding satin bows or greenery for sophistication.
- Craft a Pink Peony Wreath with faux flowers and embellishments for vibrant indoor or outdoor decoration.
- Make Pearlized Easter Eggs using metallic acrylic paints for a luxurious finish, ideal as elegant showpieces.
- Design a Floral Easter Tree by hanging decorated eggs and ornaments on colorful faux floral branches for a charming display.
Crafting an Elegant Easter Egg Wreath

Creating an elegant Easter egg wreath is like crafting a little piece of seasonal magic for your front door. It starts with a simple wire wreath form and a collection of plastic or ceramic Easter eggs, all in matching colors for a fancy vibe.
The fun part? Use decoupage to dress up those eggs with pretty napkins or paper, making them look extra special. Once they’re dressed to impress, use a hot glue gun to stick them onto the form, keeping things balanced.
Want to up the style game? Add some flowers, ribbons, or greenery for that extra pizzazz. Finally, hang your masterpiece with a nice ribbon. Voilà! Your Easter wreath is ready to welcome spring in style.
Creating Pearlized Easter Eggs
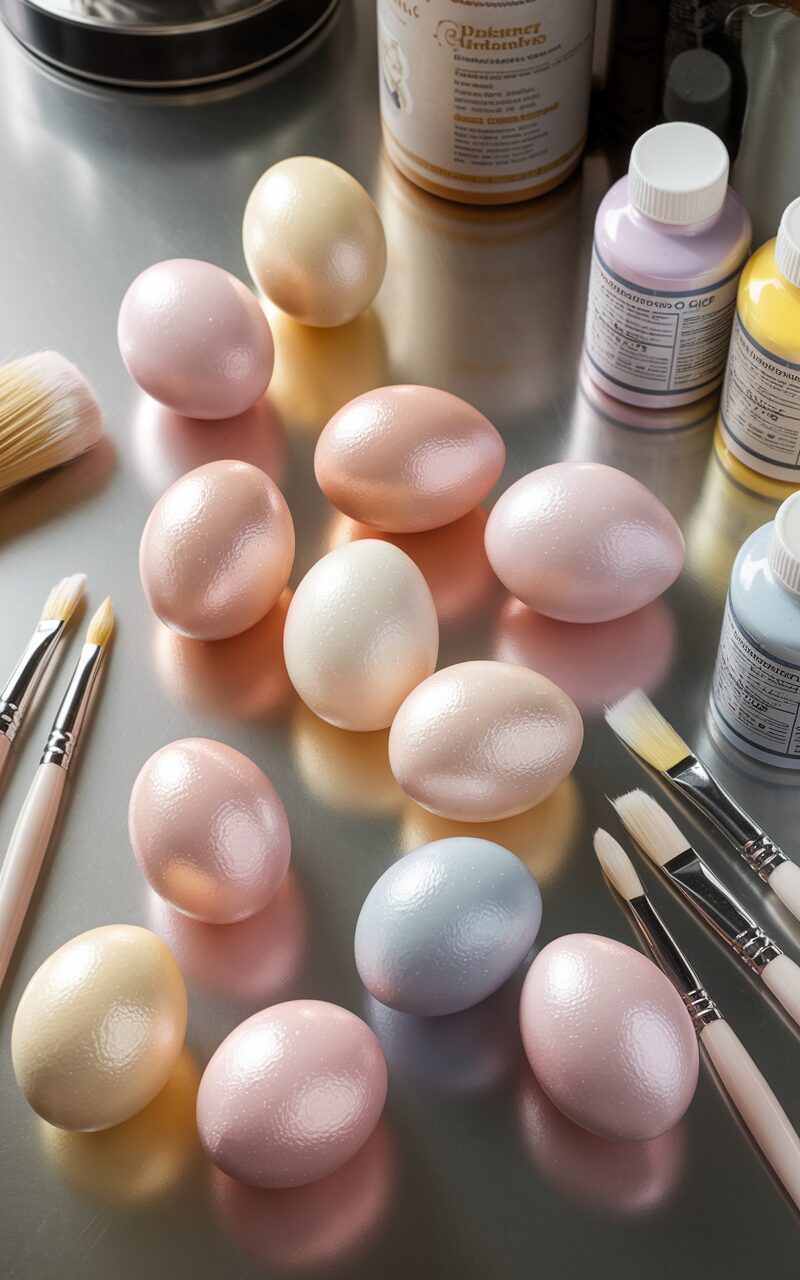
After crafting a fabulous Easter egg wreath, it’s time to try something equally exciting: making pearlized Easter eggs that sparkle with sophistication.
This Easter craft idea starts with selecting ceramic eggs and acrylic paints in dreamy pearl or metallic finishes. Begin by applying a base coat, let it dry, and then add another layer for extra oomph.
Now, here’s where the magic happens—use pearl finish acrylic paint for a luxurious touch, making sure every nook and cranny is covered.
Feeling adventurous? For a two-tone effect, paint one half of the egg in one color and the other in a complementary shade, blending them in the middle.
Once your masterpiece is dry, these eggs transform into elegant showpieces, ready to dazzle at your Easter festivities!
Designing a Floral Easter Tree

Creating a floral Easter tree is like crafting a piece of springtime magic right in your living room!
Start by picking out some colorful faux floral branches that will bring your tree to life with a burst of color, while being careful to choose the sturdiest ones to hold your decorations.
Once you’ve selected the perfect branches, hang lightweight hollow Easter eggs using pretty ribbons or strings.
Remember to throw in some assembly tips, like balancing the eggs to make sure your tree doesn’t end up looking like a lopsided Easter disaster!
Choosing Floral Branches
Imagine stepping into a garden bursting with cherry blossoms, dogwoods, and magnolias, all ready to become the stars of your very own Easter tree.
These floral beauties, with their lightweight branches, promise not to snap under the pressure of hanging decorations. It’s like finding the perfect balance between beauty and strength.
Picture the vibrant colors, the delicate petals, and the scent of spring all wrapped up in your creation.
As you gather these branches, think about how they’ll stand tall in a sturdy vase, supported by pebbles or floral foam. This is your canvas, and it’s begging for a splash of color.
The right floral branches set the stage for an Easter tree that’s both elegant and sturdy.
Hanging Easter Eggs
Transforming a simple bunch of branches into a stunning floral Easter tree is like turning up the fun dial on your spring decor.
Begin by arranging faux floral branches in a sturdy vase, making sure they’re as snug as a bunny in a basket. This forms the base for the Easter Craft Ideas ahead.
Now, grab some colorful hollow eggs. Whether you paint them with polka dots or stripes, let your creativity hop free! Use ribbon or string to hang these eggs from the branches.
Vary the lengths to create a playful scene, as if the eggs are dancing in mid-air. Amp up the charm by adding faux flowers or spring-themed ornaments.
Finally, place your masterpiece where everyone can admire your egg-cellent work!
Quick Assembly Tips
Starting off with a sturdy vase or container is like finding the perfect shoes for a long walk—it just makes everything better!
When diving into Easter crafts for adults, a solid base guarantees your floral Easter tree stands tall and proud. Once you have your vase, grab some faux floral branches and lightweight hollow Easter eggs.
Choose colors that sing spring! Use a hot glue gun to attach the eggs to your branches. Even spacing keeps it looking neat.
Add ribbons or floral picks for a touch of flair, creating texture and making it pop. Finally, arrange the branches, fluffing flowers and eggs for an eye-catching display.
- Select a sturdy vase for stability.
- Choose a spring color palette.
- Use hot glue for secure attachment.
- Add embellishments for flair.
Making a Gold Leaf Easter Egg Display
Creating a gold leaf Easter egg display can be an exciting project that brings a touch of luxury to your holiday decor.
Start by painting ceramic eggs in bright, fun colors, giving them a solid base for the glamorous gold leaf to shine.
Once you’ve turned your eggs into little pieces of art, arrange them in a stylish bowl or tray—just make sure not to let your cat think they’re new toys!
Gold Leaf Application
Imagine the thrill of turning ordinary ceramic eggs into dazzling Easter decorations with just a few simple steps.
Start by painting each egg with colorful acrylic paint, setting the stage for the magical touch of gold leaf. Once the paint is dry, apply an adhesive size, specifically designed for gold leaf, to areas destined for golden glory.
Exercise patience, allowing the adhesive to become tacky as per instructions. Now comes the fun part—carefully place gold leaf sheets over these sticky spots. Use a soft brush to gently coax the delicate gold into place, making sure it sticks without tearing.
Finally, seal with a clear acrylic sealer for protection and shine.
- Paint with vibrant colors
- Apply adhesive carefully
- Use soft brushes gently
- Seal to protect and shine
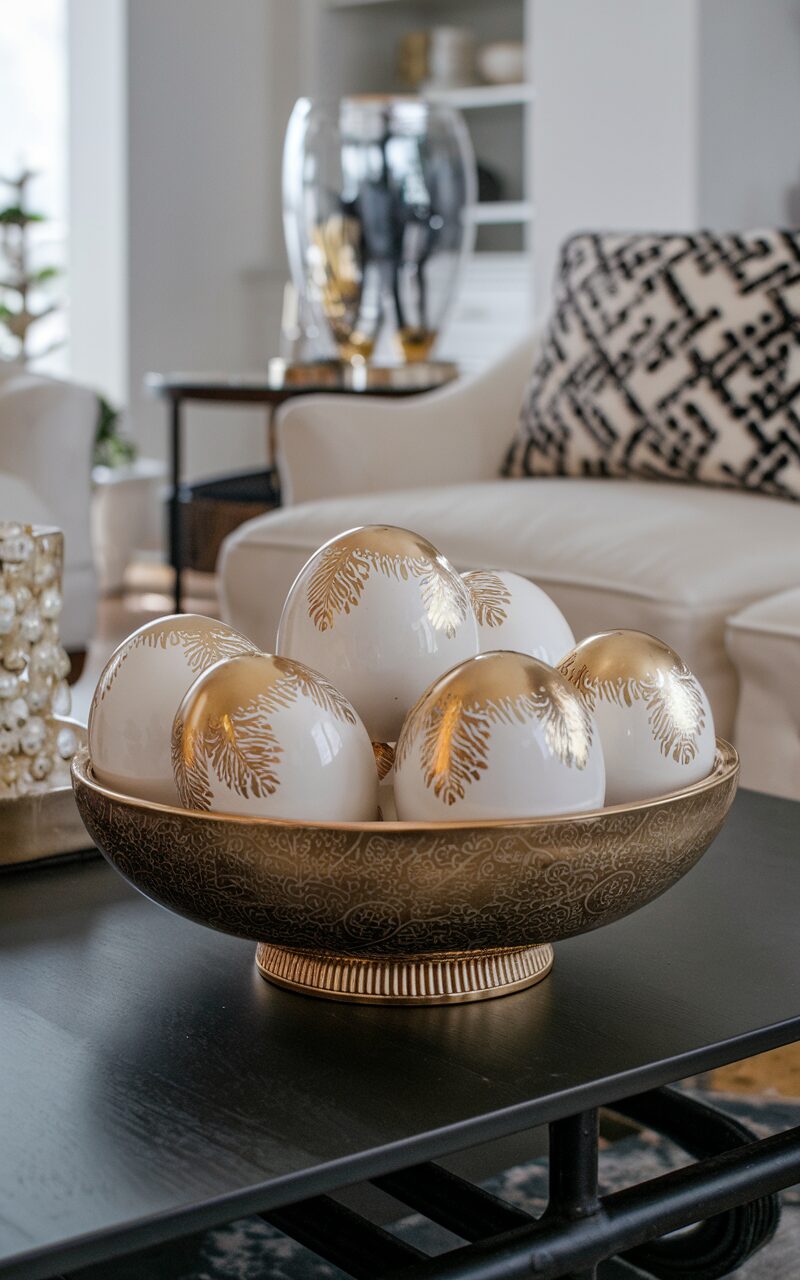
Display Arrangement Tips
A handful of gold leaf Easter eggs can transform any space into a springtime wonderland.
To create a stunning display, start by placing these shimmering beauties in a decorative bowl. Maybe it’s your mom’s fancy bowl that you’re usually not allowed to touch, but this is an exception!
Add faux grass or shredded paper underneath for a cozy nest feel. Wondering how to jazz it up even more? Try adding fresh flowers or sprigs of greenery. These natural elements make the eggs pop like an Easter surprise.
For an extra touch of elegance, sit your bowl on a mirrored surface or even a decorative pedestal.
These display arrangement tips will guarantee your eggs shine like the stars of the show, impressing everyone who sees them.
Assembling an Easter Egg Garland

Plunge into the fun of assembling an Easter Egg Garland, where creativity meets festivity!
Start this delightful project by preparing blown-out eggs. Carefully empty and clean the shells to avoid any breakage.
Next, embrace your egg decorating skills! Consider dyeing the eggs in vibrant colors or painting them with fun patterns.
Once ready, use a beading needle and stretchable jewelry cord to thread the eggs. Space them evenly for a balanced look.
Add charm by placing satin bows or sprigs of greenery between the eggs.
Finally, find the perfect spot to display your masterpiece. Think banisters, mantels, or sunny windows!
- Clean and prep eggshells to prevent breakage
- Get creative with decorating your eggs
- Thread eggs using jewelry cord
- Add bows and greenery for charm
Crafting Gilded Easter Decor
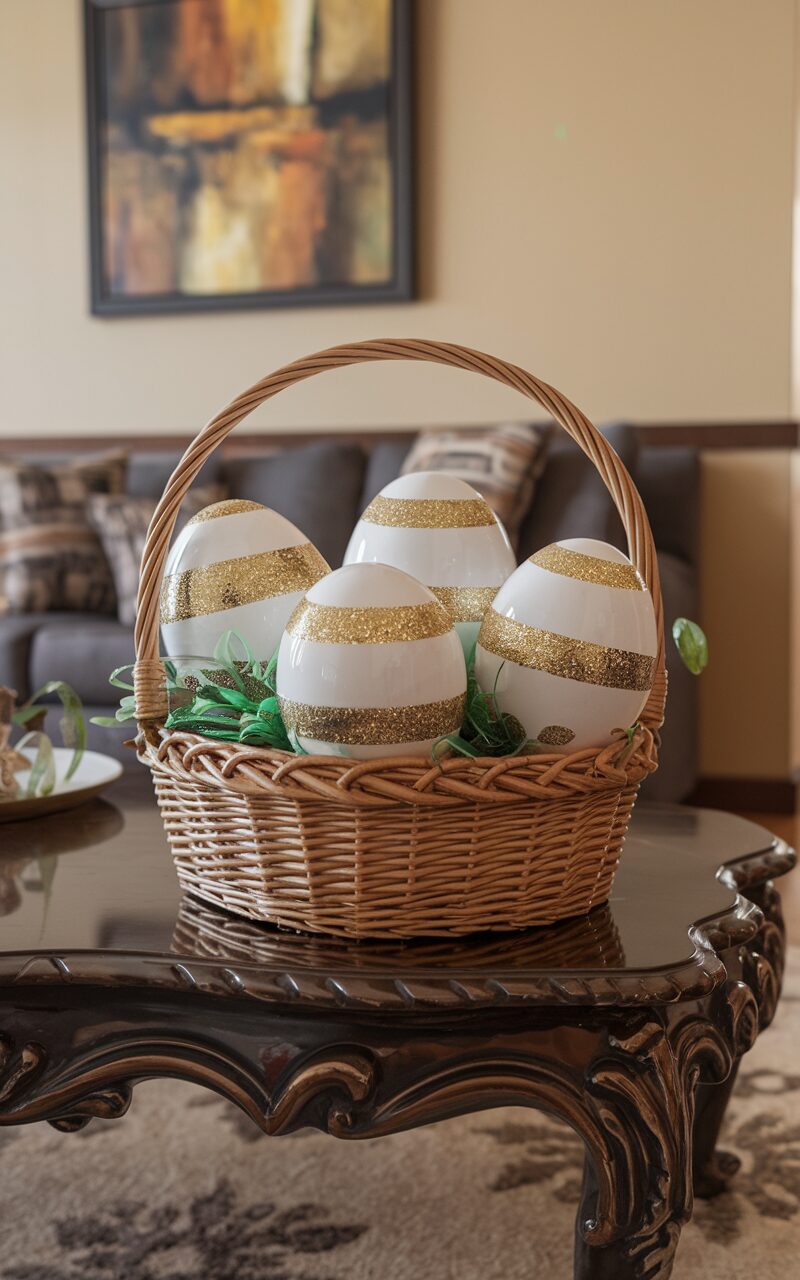
While the Easter Bunny may be busy hiding eggs, anyone can add a touch of elegance to their holiday with gilded Easter decor!
Imagine transforming plain plastic or ceramic eggs into sparkling pieces of art. Start by grabbing some colorful acrylic paints. Give those eggs a vibrant base coat and let them dry.
Then, it’s time for the magic: applying gold leaf! With a bit of adhesive, watch as the eggs turn into glittering treasures.
Ceramic eggs are the sturdy stars here, lasting season after season. This craft is not only quick and easy, but it also requires just a few materials.
Place these gilded eggs on tabletops or in a charming Easter basket, and voilà, your decor is now the talk of the town!
Designing a Stylish Easter Tray Centerpiece
Easter excitement is in the air! Creating a stylish Easter tray centerpiece is a delightful way to celebrate the season.
Start by picking a plain tray and jazz it up with faux grass or paper raffia, making a cozy nest for your display. Next, sprinkle in charm with bunny statues, votive candles, and, of course, beautifully decorated Easter eggs.
Arrange these elements with care—balance is key to a stunning look. Want a little giggle? Toss in some chocolate eggs or other sweet treats for a playful twist.
To wrap it all up, add some floral arrangements or colorful seasonal decorations for that extra wow factor.
- Use faux grass or raffia for a lush base
- Add bunny statues for charm
- Decorate Easter eggs creatively
- Include chocolate eggs for fun
Dyeing Eggs With Silk Tie Patterns
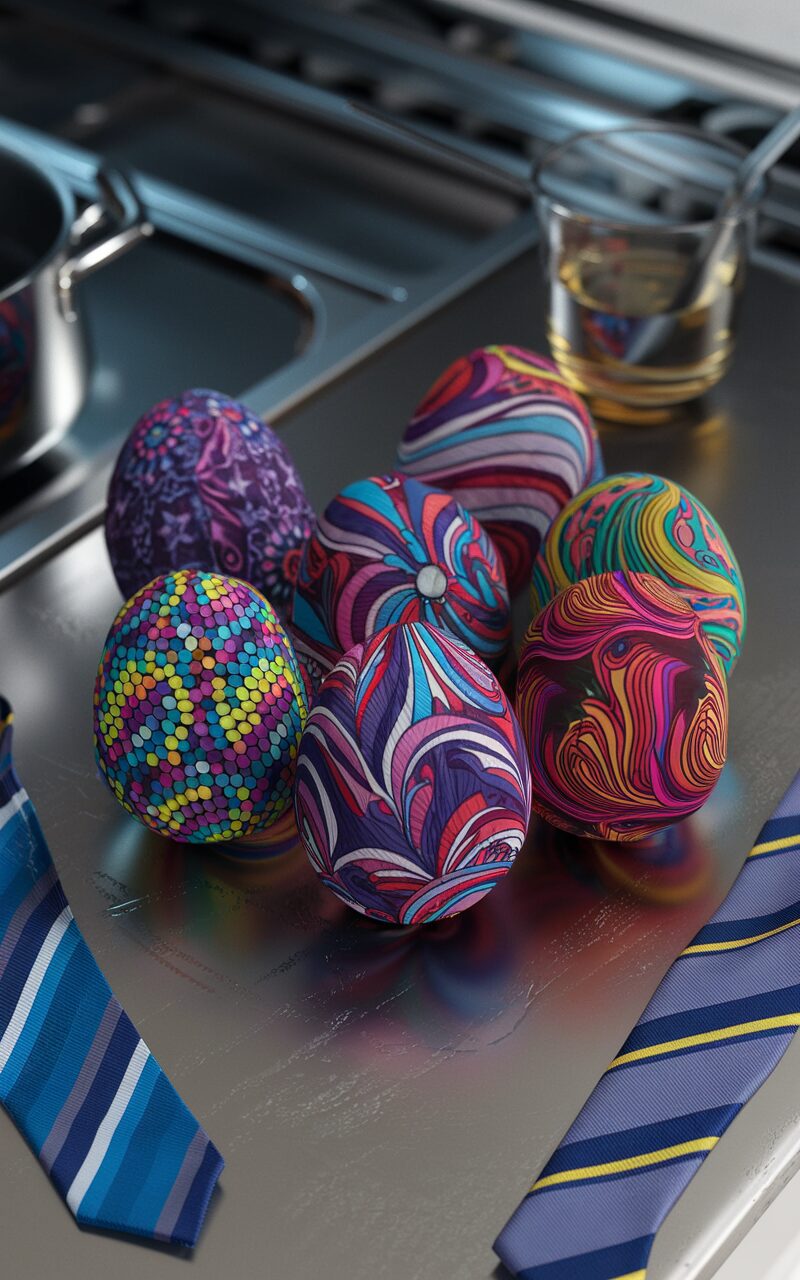
Now, let’s talk about a super fun way to decorate Easter eggs using old silk ties—yes, those ties your dad never wears!
First, you need to pick out some funky silk ties from a thrift store; make sure they’re 100% silk because that’s where the magic happens.
Once you’ve wrapped the eggs in those snazzy tie pieces and boiled them with a splash of vinegar, you’ll be amazed at the vibrant, intricate patterns that appear, turning ordinary eggs into mini masterpieces perfect for showing off.
Silk Tie Selection
Who knew that old silk ties could transform into a magical Easter craft? Selecting the perfect silk ties is like choosing the best crayons for a masterpiece.
These ties are not just for dads anymore; they get a new life, bringing vibrant colors and patterns to Easter eggs. Look for ties with bold, eye-catching designs made from 100% silk, as these fibers work wonders in transferring intricate patterns onto eggshells.
- Choose the brightest, most colorful ties to make your eggs pop.
- Ensure ties are 100% silk for the best pattern transfer.
- Be on the lookout for interesting designs, like paisleys or geometric shapes.
- Raid thrift stores or closets for hidden silk treasures.
With the right silk ties, the magic truly begins!
Egg Dyeing Process
Creating silk tie-dyed eggs is a bit like performing a colorful magic trick, turning plain old eggs into dazzling works of art.
First, the egg dyeing process begins with a vinegar bath for each egg, prepping the shell to soak up color. Imagine thrifted silk ties, snipped into squares, hugging the eggs snugly—printed side in for a surprise reveal!
A little fabric hug secured by white cloth or a rubber band, the anticipation builds as they plunge into a vinegar-laced water bath. For 20-30 minutes, magic brews, as these wrapped wonders boil.
Cooling off, it’s the big reveal moment! Carefully unwrapping each egg is like opening a gift, revealing unique, intricate patterns you never thought possible.
Voilà! Egg art extraordinaire!
Crafting a Pink Peony Wreath
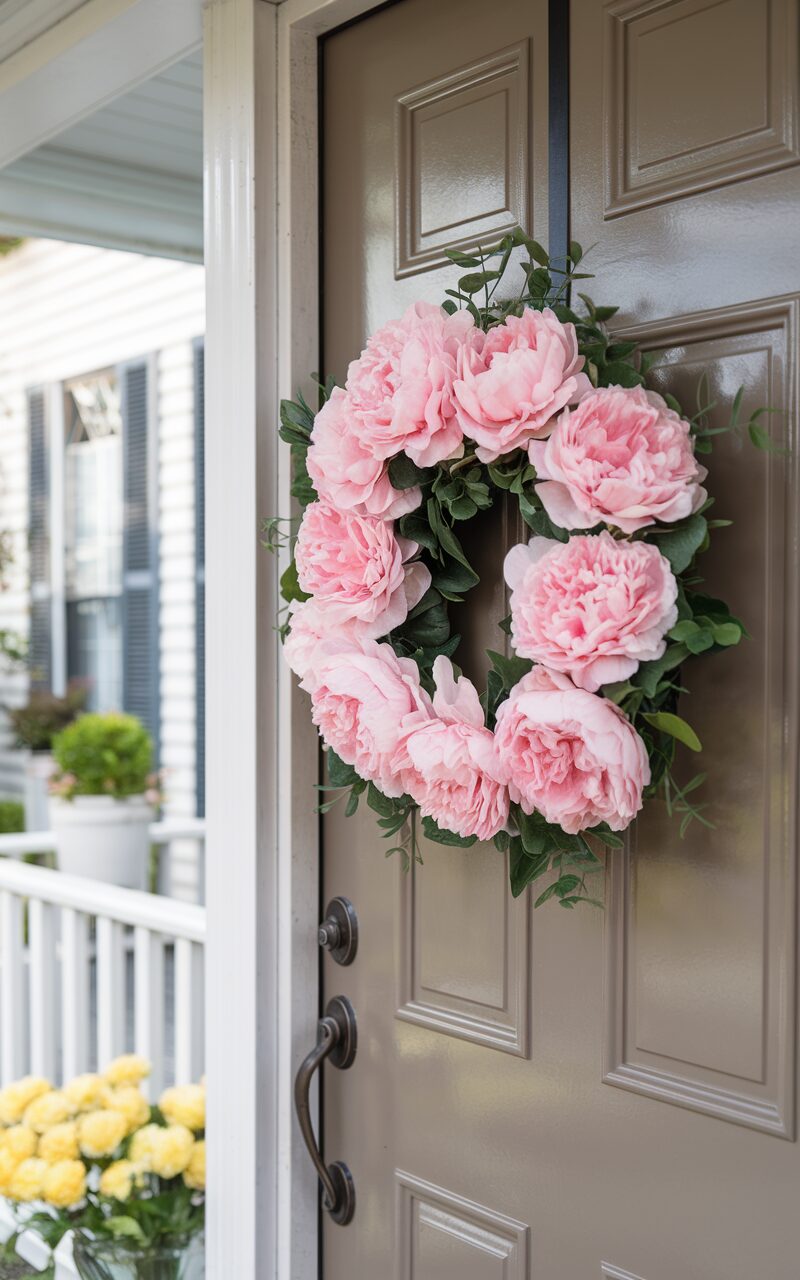
Crafting a pink peony wreath is like painting a spring masterpiece, full of color and life, without the messy cleanup! This easy Easter craft invites creativity and adds a pop of vibrancy to any space.
To start, gather faux pink peonies, a wire wreath form, floral wire, and some ribbon. Trim the flower stems to just the right length, ensuring they snugly fit the wreath. Secure each bloom with floral wire, beginning at the outer edge and making your way inward for that lush, full look.
Once the peonies are in place, add ribbons or any embellishments that tickle your fancy.
- Brighten your home with a splash of pink
- Enjoy crafting without messy paints
- Hang it indoors or outdoors
- Perfect for spring celebrations
Marbling Easter Eggs With Nail Polish

After sprucing up walls with a pink peony wreath, it’s time to jazz up those Easter eggs with some funky nail polish marbling!
Imagine the magic of swirling colors right on an egg’s surface. Start by gathering white eggs, a shallow dish of water, and a rainbow of nail polishes.
The fun begins as colorful drops dance on water, creating a mesmerizing swirl. Grab a skewer, swirl gently, and watch as the design comes alive.
Dip each egg at an angle, letting the nail polish hug its curves. Once out, let them dry on a paper towel.
For that extra sparkle, a clear sealant works wonders. These eggs aren’t just decorations; they’re little works of art ready to wow everyone this Easter!
Building a Jeweled Easter Egg Tree

Creating a jeweled Easter egg tree is like building a sparkling masterpiece, and it all starts with choosing the most eye-catching decorative eggs.
Once you’ve got your shiny treasures, it’s all about giving them a sturdy stage to shine on by securing painted twigs in a vase with some craft foam—no one wants a wobbly tree, right?
Hanging the jeweled eggs at different heights adds a touch of whimsy, and topping off the arrangement with pebbles or decorative stones makes it a dazzling centerpiece that’s sure to impress both indoors and out.
Choosing Decorative Egg Materials
Imagine a tree, but not just any tree—a tree that sparkles and glows with the glint of countless jewels. To create this dazzling Easter egg tree, one must first choose the perfect decorative egg materials.
Decorated plastic eggs are a fantastic choice, as they are lightweight and easy to handle. They can be adorned with glitter or jewels to catch the light just right. Selecting the right embellishments, like rhinestones or sequins, can turn plain eggs into shining stars.
Hot glue is your trusty sidekick for sticking these glimmering treasures onto the eggs.
- Decorated plastic eggs come in various colors and sizes.
- Rhinestones and sequins add an extra sparkle.
- Hot glue guarantees decorations stay put.
- Glitter adds magical shimmer.
Stabilizing Twigs for Display
Building a jeweled Easter egg tree is like being on a treasure hunt, where the first step is finding just the right twigs to create a stable display.
Imagine a sturdy vase as the treasure chest, filled with pebbles or decorative stones to secure the twigs. These twigs, trimmed to a manageable height, become the magical branches to hang jeweled eggs, but first, they must be stabilized.
Insert them at playful angles into the pebbles for a whimsical look. For extra security, floral foam can help hold the twigs in place, making it easier to arrange creatively.
Picture hanging jeweled eggs with ribbons or fishing lines, balancing them perfectly for a dazzling Easter craft. Who knew twigs could be such stars?
Creating a Faux Tulip Wreath
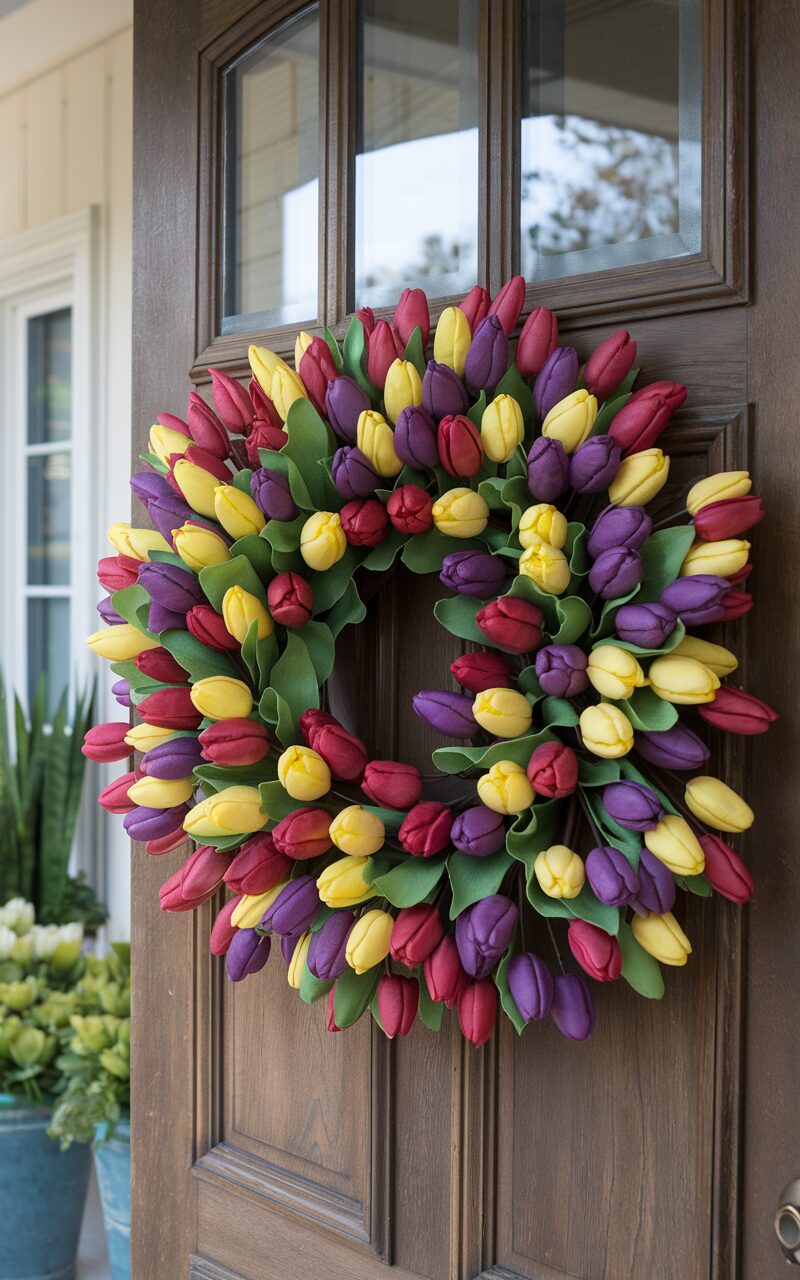
A burst of color and a touch of creativity can transform any space, and making a faux tulip wreath is the perfect way to do just that.
Imagine walking into a room with a vibrant wreath full of faux tulips—it’s like spring is giving you a big, flowery hug!
Start by gathering your materials: a wire wreath form, your favorite faux tulips, floral wire, and scissors.
Arrange the tulips around the form, mixing colors for a fun, lively look. Secure them with floral wire, making sure everything stays put.
Trim any extra wire, and voilà! Your masterpiece is ready to hang.
Whether on your front door or wall, this wreath is a delightful nod to Easter.
- Gather materials: wire form, faux tulips, floral wire
- Mix colors and sizes for a balanced look
- Secure tulips with floral wire
- Trim excess wire and hang your wreath
Decorating Cracked Papier-Mâché Easter Eggs
Get ready to plunge into the fun of decorating cracked papier-mâché Easter eggs! First, grab a set of papier-mâché eggs and some acrylic paint in your favorite colors. Start by painting a base coat and let it dry. For a cracked effect, apply a darker shade randomly, then wipe it off with a cloth. Voilà! A subtle, textured look appears. Sneak a surprise inside by filling the eggs with shiny grass and treats like chocolates. Now, for a creative touch, hang these beauties on pussy willow branches or arrange them in a decorative bowl.
Here’s a quick guide:
| Step | Action | Tools Needed |
|---|---|---|
| 1. Select Eggs | Choose papier-mâché eggs | Papier-mâché eggs |
| 2. Base Paint | Apply base coat and dry | Acrylic paint, brush |
| 3. Crack Effect | Use darker paint, wipe off | Dark paint, cloth |
| 4. Fill & Display | Add treats, arrange creatively | Treats, bowl/branches |
Planting an Egg Planter With Succulents

As the excitement of decorating Easter eggs winds down, something equally creative and fun awaits—planting succulents in egg planters!
This easy-to-make project begins by carefully cracking and emptying eggshells. The key is to keep them intact, turning them into tiny pots.
To guarantee the succulents thrive, add a layer of pebbles for drainage, then top with potting soil. Selecting the right plants, like hens-and-chicks, is vital as they love small spaces.
Remember, succulents are low-maintenance, so water sparingly and place them in a sunny spot.
To up the fancy factor, use ribbons or arrange them on a cute tray. With a bit of time and creativity, egg planters become the centerpiece of your Easter decor.
- Crack and empty eggshells gently
- Add pebbles and soil for drainage
- Choose small succulents like hens-and-chicks
- Use decorative elements for display
Frequently Asked Questions
How Do You Make Easter Special for Adults?
To make Easter special for adults, one can organize elegant gatherings featuring refined decorations and artisanal treats. Hosting creative craft nights or visiting artisan markets enhances the experience, fostering connection and community while celebrating the festive occasion.
What Crafts Can I Make for Easter?
Creating elegant Easter decor can involve crafting pearlized eggs, floral trees, gold leaf eggs, marbled designs, and gilded decor. These projects offer adults unique and sophisticated ways to enhance their Easter celebrations with style and creativity.
How to Make Easter Magical for Kids?
Creating magical Easter experiences for kids involves embracing Easter traditions through vibrant egg hunts, immersive crafting sessions, personalized baskets, and interactive baking activities. These traditions foster excitement, creativity, and a sense of wonder during the holiday season.
How Do You Make an Easy Easter Basket?
To make an easy Easter basket, one can employ basic basket weaving techniques using materials like cardboard or fabric strips. Adding decorative elements and a sturdy handle completes the simple yet charming design for festive celebrations.
Conclusion
In the world of Easter crafts, there’s something truly magical about transforming simple materials into elegant decorations. From crafting delicate pearlized eggs to designing vibrant floral trees, each project offers its own unique charm. Whether you’re gluing, painting, or arranging, the joy comes from creating something beautiful with your hands. So gather your supplies, tap into your creativity, and let your inner artist shine. Remember, it’s not just about the final product, but the fun and memories made along the way.
Leave a Reply