
Creating Easter lily crafts with kids is easy and fun. Gather construction paper, pipe cleaners, pencils, scissors, tape, and ribbon. Trace and cut handprints from colorful paper, making sure to smooth the edges. Curl these into cone shapes, forming flower bases. Add stems with green pipe cleaners and roll green paper for leaves. Tape everything together, then curl petals to perfection. Finally, tie the bouquet with a bright ribbon for a cheerful display. Discover how simple creativity can brighten any day!
Key Takeaways
- Trace and cut out handprints on colorful construction paper for the flower’s shape.
- Curl the handprint’s base into a cone and secure it with tape to form the flower.
- Create realistic petals by gently curling each finger outward from the cone.
- Use green pipe cleaners or rolled paper for the stem, adding yellow for flower centers.
- Assemble the flowers into a bouquet and secure with a ribbon for presentation.
Gather Your Craft Supplies
When it’s time to kick off your Easter lily crafting adventure, getting your supplies together is like gearing up for a fun mission—it’s all about being prepared!
First, grab some good quality construction paper in pink or white for your paper flowers, and don’t forget the green for those sturdy stems. These materials are perfect for crafts for kids because they’re easy to make and won’t rip like regular paper.
Next, gather 6 green and 6 yellow pipe cleaners to form the handprint Easter lilies’ stems and centers. Keep a pencil, scissors, and tape handy to trace and cut shapes smoothly.
Finally, a ribbon will tie it all together, making your bouquet a perfect gift idea for Easter or any special occasion!
Trace and Cut Out Handprints
Kicking off the handprint Easter lily craft is like setting the stage for a creative masterpiece! Imagine the fun of tracing your hand on a piece of beautiful paper. Stretch those fingers outwards to make sure your Easter Lily looks full and fabulous.
Once traced, grab those trusty scissors and carefully cut out handprints, smoothing any jagged edges. A piece of tape will be your trusty sidekick to curl the bottom into a cone, shaping your flower petals.
Feeling artistic? Add some flair with colored paper or markers before the scissors snap into action. Each paper handprint transforms into something amazing, and with just one sheet, you can create three to four lilies.
It’s an exciting adventure in this Easter craft journey!
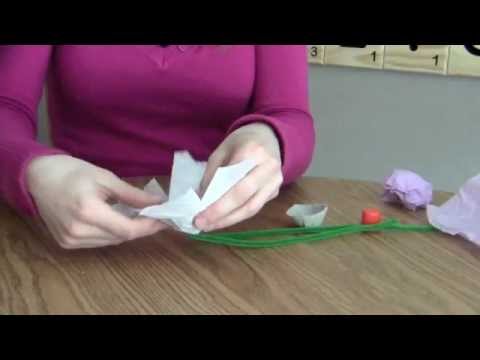
Assemble the Handprint Flower

Transforming a simple handprint into a dazzling Easter lily is like performing a magic trick! With a few clever steps, a child’s handprint becomes a beautiful flower.
Here’s how to assemble this delightful craft:
- Cone Shape: Start by curling the bottom of the handprint into a cone shape, leaving a small hole at the tip. Secure it with tape to form the flower’s base.
- Curl Petals: Gently curl each finger outward using a round pencil. This gives the petal a realistic look, adding charm to the craft.
- Secure the Stem: Take a green pipe cleaner, bend it into a J-shape, and wrap a yellow pipe cleaner around it. Thread it through the cone, securing with tape.
Voilà, a handprint flower masterpiece!
Create the Stem and Leaves
Crafting the stem and leaves for the Easter lily is where the magic continues!
To create the stem and leaves, one can start with a strip of green heavyweight construction paper, rolled tightly for a sturdy base. Secure it with tape, or for a twist, use a chopstick colored green with markers. Older kids might enjoy this more creative challenge!
For the leaves, cut six strips of green paper to attach to the stem. Arrange them so they point in different directions, giving the paper lily a natural appearance. Bending them outward adds that extra flair.
Secure everything with green floral wrapping tape, making sure the Easter lily looks as vibrant as it feels. Voilà, the stem and leaves are ready!
Present Your Finished Lily Bouquet

As the finishing touches are put on your lily bouquet, excitement fills the air! The handprint lilies, crafted with love, are arranged beautifully.
To make the bouquet pop, consider these steps:
- Arrange the Lilies: Make sure the petals curl outward, creating a full bloom effect, perfect for occasions like Easter or Mother’s Day.
- Add a Decorative Ribbon: Tie the stems together with a colorful ribbon. It’s like giving the bouquet a little bow tie—fancy, right?
- Personalize the Presentation: Attach a handwritten note, maybe a joke or a sweet message. It’s a nice way to show you care.
Place the bouquet in a vase, and let kids proudly present their masterpiece.
Crafting memories, one petal at a time!
Frequently Asked Questions
How Do You Make Lilies for Kids?
To make a lily craft, children trace handprints on paper, curl fingers for petals, and use pipe cleaners for stems. This paper flowers activity offers kids sensory play and creative expression, enhancing spring projects with vibrant flower colors.
How to Make a Lily Flower With Paper Step by Step?
Creating a paper flower involves selecting crafting supplies and color choices, utilizing creative techniques for realistic petals. This art project encourages family bonding through kids activities, resulting in elegant flower arrangements suitable for holiday decorations and memorable gifts.
How Do You Start Easter Lilies?
To start Easter lilies, one should understand Easter lily history and symbolism. Planting bulbs in well-drained soil, ensuring proper lily care, and considering seasonal blooms and lily colors contribute to beautiful flower arrangements, enhancing holiday traditions with gardening tips.
How to Draw an Easter Lily Easily?
To draw an Easter lily easily, use simple drawing techniques to capture flower shapes. Choose vibrant color choices and effective art supplies. Instructional videos provide kid-friendly tips, transforming this fun activity into a seasonal theme that boosts creativity.
Conclusion
And there you have it! With a sprinkle of creativity and a dash of fun, those handprint lilies are ready to shine. Kids will beam with pride as they present their handmade bouquets, each petal telling its own story. It’s more than just a craft—it’s an adventure in imagination and a keepsake to cherish. Who knew a few supplies and a lot of giggles could turn into such a masterpiece? Go ahead, admire those blooming beauties!
Leave a Reply