
UV resin typically cures in 2-10 minutes under a strong UV lamp. Thin layers (under 1/8 inch) cure faster, while thicker layers need more time. Sticky surfaces usually result from insufficient curing time, incorrect mixing, high humidity, or oxygen exposure. For best results, maintain a workspace temperature of 70-80°F, use proper UV protection, and follow manufacturer guidelines. Patience is key—rushing the process invites frustration, while proper techniques guarantee that glass-hard, flawless finish you’re dreaming about.
Key Takeaways
- UV resin cures in 2-10 minutes under strong UV lamps (365-405nm), with thin layers needing 1-3 minutes and thicker layers requiring 5-10 minutes.
- Proper curing requires following manufacturer guidelines, maintaining 70-80°F temperature, and keeping humidity below 50% for optimal results.
- Prevent sticky surfaces by ensuring sufficient UV exposure, using correct mixing ratios, and avoiding layers thicker than 1/4 inch.
- Tackle existing sticky surfaces with extended curing time, isopropyl alcohol treatment, or adding another properly cured layer.
- Post-cure in warm, oxygen-free environments for complete molecular bonding and test for hardness and glossiness to confirm proper curing.
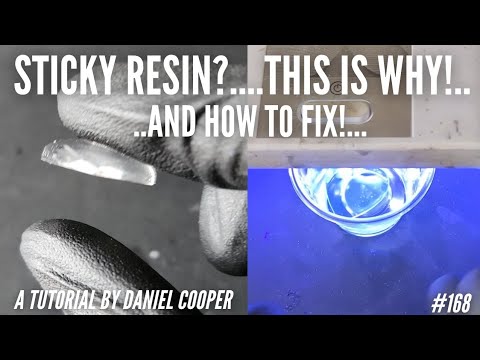
How Long Does It Take to Cure UV Resin? Avoid Sticky Surfaces Forever
When working with UV resin, timing is absolutely everything! Most UV resins need between 2 to 10 minutes under a strong UV lamp to cure properly, depending on how thick you’ve poured it.
If you rush this process, you’ll end up with those frustrating sticky surfaces that ruin your project!
Manufacturers know best, so always follow their recommended cure time—it’s your secret weapon against tackiness!
If you’re using sunlight instead of a lamp (which many crafters do), be prepared to wait at least 30 minutes, and watch out for yellowing effects.
Still got a sticky surface? Don’t panic!
Either give it another blast under your 365-405 nm wavelength lamp, or apply a super thin layer of fresh resin and cure again!
Understanding UV Resin Curing Times Explained
The mystery behind UV resin curing times can make or break your crafting projects! Understanding the curing process helps crafters achieve that perfect, non-sticky finish that looks professionally done.
The recommended curing time typically ranges from 2 to 5 minutes under a strong UV lamp, but several factors can affect this timing.
Most UV resin projects need 2-5 minutes under a good lamp, though your specific creation may require adjustments.
- The thickness of your resin layer matters—thicker pours need longer exposure.
- Your UV lamp’s strength and wavelength (ideally 365-405nm) directly impact curing speed.
- Environmental conditions like temperature and humidity can slow down or speed up curing.
- Different brands of UV resin may have varying formulations requiring different times.
Thin layers cure within 30 to 45 seconds under a UV lamp for the best results.
If your creation feels tacky after the initial cure, don’t panic! Simply give it another minute under the lamp, and you’ll be good to go.
The Science Behind UV Resin Polymerization

Light waves transform liquid resin into solid creations through an amazing process called polymerization! When UV light hits the resin, it activates special chemicals called photoinitiators that start a chain reaction. These tiny particles get super excited and begin linking molecules together, turning your gooey liquid into a rock-solid object. For the resin cure to work properly, you need the right wavelength of light—typically between 365-405nm. It’s like finding the perfect key for a lock! The chemical reaction can be blocked by oxygen in the air (so annoying!), which creates that frustrating sticky layer crafters hate. And remember, thicker resin needs more curing time because the light can’t reach all parts equally. Powerful UV lamps help speed things up, making sure every molecule joins the polymerization party! Additionally, maintaining a dust-free area during the curing process can ensure a smooth and clear finish, similar to working with epoxy resin.
Factors Affecting UV Resin Curing Speed
Many different elements can dramatically impact how quickly your UV resin transforms from liquid to solid! Understanding these factors helps guarantee your projects cure completely without those frustrating sticky surfaces that ruin your hard work.
The chemistry behind curing involves a delicate balance of conditions that must be just right.
- Light intensity and wavelength matter hugely—UV lamps in the 365-405nm range work best for activating the hardening process.
- Layer thickness is critical—thin layers might cure in minutes while chunky pours could take hours!
- Environmental conditions like humidity and temperature can make or break your curing success.
- Proper mixing ratio between resin components guarantees the chemical reaction happens correctly—skimp on mixing and you’ll end up with tacky results!
- Remember, ArtResin’s non-toxic composition ensures that you can work safely indoors without worrying about harmful fumes.
Essential Equipment for Perfect UV Resin Curing

Now that we comprehend what affects curing speed, let’s explore what you’ll actually need in your toolkit!
First and foremost, you’ll need a powerful UV lamp with a wavelength between 365-405nm. Don’t skimp here, folks! A lamp with at least 36 watts will dramatically reduce your cure time and guarantee proper curing.
Those bargain lamps might leave you with sticky, tacky surfaces—yuck!
Remember, thin layers might cure in just minutes, but chunky pieces? They could take up to half an hour! That’s why investing in a UV lamp specifically designed for resin (not just any old UV light) is vital.
Don’t forget safety gear either—UV-blocking glasses and gloves aren’t optional! Your eyes and skin will thank you later.
It’s crucial to verify the food safety of your resin if you plan to use it in applications involving food contact.
Step-by-Step Guide to Properly Cure UV Resin
Every successful UV resin project follows a precise dance of preparation, application, and exposure! Achieving that glass-like finish without any sticky spots means mastering the cure time for your specific resin.
Most beginners panic when their creations remain tacky, but don’t worry—it’s totally fixable!
- Mix your resin thoroughly first—seriously, no shortcuts here or you’ll end up with gooey spots that never harden!
- Position your piece under a 365-405nm UV lamp, keeping it 2-3 inches away for even exposure.
- Watch that cure time clock—thin layers need 2-5 minutes, thicker pours might need 10!
- Check if it’s fully cured by gently touching an edge—if it’s still sticky, zap it again!
- Ensure a dust-free environment during the curing process to prevent any particles from sticking to the surface and compromising the finish.
Common Mistakes Leading to Sticky Surfaces
Battling with sticky, tacky resin surfaces can frustrate even the most patient crafters! When your curing process goes wrong, you’re left with a gooey mess instead of that glass-like finish everyone dreams about.
| Mistake | Consequence | Solution |
|---|---|---|
| Insufficient UV exposure | Partially cured epoxy remains tacky | Increase exposure time by 30% |
| Wrong mixing ratios | Chemical reaction can’t complete | Measure precisely with syringes |
| High humidity | Moisture disrupts polymerization | Work in dry conditions below 50% humidity |
Oxygen exposure is another sneaky culprit that prevents proper hardening, creating that annoying sticky layer on top. And don’t forget about using the wrong UV lamp – it’s like trying to toast bread with a flashlight! Many crafters also rush the process, but remember, even perfectly mixed resin needs adequate time to transform from liquid to solid. To ensure safety and effectiveness, always maintain ventilation during the curing process, which helps manage lingering fumes and improve the overall quality of the finished product.
The Impact of Layer Thickness on Curing Time
When crafters pour UV resin too thickly, they’re fundamentally setting themselves up for a sticky disaster! Layer thickness directly impacts curing time—it’s a relationship that can make or break your resin project. Thinner layers of 1/8 inch or less will cure evenly within minutes, while thicker pours might stay tacky for ages! Thin layers (under 1/8 inch) typically cure in just 1-3 minutes under strong UV light. Thicker layers (approaching 1/4 inch) may need 5-10 minutes or more to fully harden. Multiple layers compound total project time, as each layer needs its own curing session. Pouring beyond 1/4 inch thickness almost guarantees uneven curing and sticky surfaces. Environmental conditions, such as temperature and humidity, also impact resin curing, with ideal conditions being crucial for achieving a smooth, tack-free finish.
Optimal Environmental Conditions for UV Resin
Beyond mastering layer thickness, crafters must set the stage for UV resin success through proper environmental conditions!
The ideal environmental conditions dramatically affect the time to cure and final results. Think of your workspace as a mini-laboratory where temperature matters big time! Keep the area between 70°F to 80°F (21°C to 27°C) to help those resin molecules link up properly.
Humidity is another sneaky factor—keep it below 50% or your beautiful creation might stay frustratingly tacky!
And don’t skimp on your light source, folks. A strong UV lamp (365-405nm wavelength) will always beat unreliable sunlight, which can leave you with patchy curing and longer wait times.
Troubleshooting Tacky UV Resin Projects
Many crafters face the frustrating challenge of tacky UV resin projects that refuse to fully harden! Understanding why your resin can cure improperly is key to achieving that glass-like finish everyone dreams about.
Nothing crushes creative spirit faster than a UV resin masterpiece stubbornly refusing to harden after hours of detailed work.
The sticky surface can ruin hours of creative work, but don’t panic—there are simple solutions!
- Insufficient UV exposure is often the culprit, so try extending your curing time or replacing old UV lamps.
- High humidity creates a moisture barrier, so work in a dry environment (under 60% humidity is ideal).
- Oxygen inhibition causes surface tackiness—try applying a final thin layer after initial curing.
- To Remove Epoxy stickiness, wipe the surface with isopropyl alcohol or add another thin coat of resin.
Maintaining a clean, dust-free workspace is essential to prevent contamination and ensure your resin cures properly.
Proper measurement, mixing, and environmental control will help you say goodbye to sticky surfaces forever!
Professional Techniques for Flawless Finishes
Professional artists take their UV resin projects to the next level with precise temperature control, keeping their workspaces between 70-75°F for ideal resin flow and bubble prevention.
Perfect lighting conditions matter too—working in a dust-free environment with consistent, even UV exposure guarantees that each layer cures uniformly without cloudy spots or variations.
The secret weapon in their arsenal is advanced layering techniques, where they pour ultra-thin layers (sometimes barely thicker than a credit card), letting each one fully cure before adding the next, which creates crystal-clear depth that amateur projects often lack.
Precise Temperature Control
While many factors affect UV resin curing, precise temperature control stands as the cornerstone of professional-quality results.
Artists who achieve flawless finishes understand that maintaining temperatures between 70°F and 80°F isn’t just a suggestion—it’s essential science! Temperature variations can spell disaster for your precious projects, leaving them frustratingly tacky.
- Create a temperature-controlled curing station using a simple box with a thermometer
- Monitor ambient humidity levels, as moisture can sabotage even perfectly temperature-controlled curing
- Avoid drafty areas that cause uneven cooling and potential cold spots
- Use thermal imaging (or even a basic infrared thermometer) to identify problem areas in larger pieces
When artists control temperature with precision, their cure times become predictable and their results consistently spectacular.
Optimal Lighting Conditions
Beyond temperature mastery, the perfect lighting setup transforms ordinary resin projects into breathtaking creations.
Experts recommend using UV lights with wavelengths between 365-405nm for ideal curing, as this sweet spot triggers the polymerization process most effectively.
Position your lamp just right—not too close, not too far—to guarantee even exposure across your entire piece.
Curing time varies dramatically based on thickness! Thin layers might need just 1-3 minutes under a strong lamp, while chunkier sections could demand a full 10 minutes or more.
For the best results, keep humidity levels under 50% (moisture is resin’s sneaky enemy!), and maintain that perfect room temperature around 70°F.
Who knew light could be so picky? With these conditions in place, your projects will cure completely—no more tacky surfaces ruining your masterpieces!
Advanced Layering Techniques
Mastering the art of layering UV resin takes creators from amateur to artist in their resin journey.
The secret to stunning, perfectly cured resin pieces lies in how you build each layer. Professional results happen when creators pay careful attention to thickness and curing times!
- Apply each thin layer of resin under 1/4 inch thick to guarantee complete curing without tackiness.
- Let each layer fully cure for 2-5 minutes before adding the next one – patience pays off!
- Use clear epoxy between colored layers for amazing depth and to prevent colors from mixing.
- Zap those pesky bubbles with a quick pass of a heat gun right after pouring each layer.
These techniques will transform your resin projects from sticky disappointments to smooth, glossy masterpieces that look store-bought!
Comparing Different UV Light Sources and Their Effectiveness
Since UV resin needs specific light conditions to properly harden, choosing the right UV light source can make a huge difference in your project’s success.
Professional UV lamps operating at 365-405nm wavelengths deliver the most consistent results in the shortest time. The good news is that higher-wattage lamps (36W+) can cure thin layers in just 1-3 minutes!
Lower-powered lamps might seem budget-friendly, but they often lead to frustratingly long cure times and sometimes incomplete hardening.
While sunlight can technically cure UV resin, it’s the slowest option and may cause yellowing. For best results, make sure your chosen light covers the entire project evenly—patchy exposure equals patchy curing!
Post-Curing Methods to Ensure Complete Hardening
UV resin sometimes needs a boost after its initial cure, and heat can be a game-changing ally in this process.
Placing your partially cured projects in a warm environment, like a sunny windowsill or near a space heater set to low, can help molecules bond completely and eliminate that annoying stickiness.
Another powerful technique involves creating an oxygen-free environment for your resin pieces—simply sealing them in a clear container or submerging them in water during final UV exposure can prevent oxygen inhibition, which often causes that persistent tacky layer that drives crafters crazy!
Heat-Assisted Final Curing
Four key methods of heat-assisted final curing can transform your UV resin projects from sticky disappointments to professional-quality creations.
When your resin feels tacky after UV exposure, applying gentle heat is the secret weapon for a complete cure!
- Heat guns work wonders at low settings, just keep them 6-8 inches away to prevent bubbling.
- Warm sunlight (around 100°F) naturally finishes the curing process without damaging your creation.
- Heat lamps provide controlled warmth, perfect for delicate projects that need extra TLC.
- Kitchen ovens set to the lowest temperature (under 150°F) work for larger pieces—but watch them like a hawk!
Remember to apply heat in short bursts, checking frequently.
Your patience will pay off with glass-hard, super-durable results that’ll make everyone ask, “How’d you do that?!”
Oxygen-Free Hardening Techniques
While heat works magic for most sticky resin situations, sometimes your creations need a different approach altogether!
Oxygen is the sneaky culprit behind those frustratingly sticky surfaces on your mixed resin projects. It actually inhibits the polymerization process, preventing complete hardening.
Professional crafters use vacuum chambers to create oxygen-free environments during curing. You can achieve similar results at home by covering your resin with a clear seal while it cures under your UV lamp (365-405nm wavelength works best).
Another effective trick involves post-curing in an inert gas environment, which promotes further crosslinking of the resin molecules.
For especially stubborn pieces, try combining methods—cover your project while curing, then apply gentle heat afterward.
These oxygen-free hardening techniques virtually guarantee a perfectly cured, tack-free finish every time!
Testing for Complete Curing: When Is It Really Done?
Have you ever wondered exactly when your UV resin project is truly finished curing? Testing for complete curing is essential to ensuring your creation’s durability and appearance.
When you’re enthusiastic to handle your masterpiece, here’s how to check if it needs more time:
- Perform the tacky test—lightly touch the surface with your fingertip; stickiness means it’s not done!
- Look for a glossy finish and clear appearance—cloudiness suggests incomplete curing.
- Check for consistency—any soft spots mean certain areas need more exposure.
- Remember that thickness matters—thicker pours require longer curing times than thin layers.
Don’t rush the process! A properly cured resin piece should feel hard, look shiny, and have zero tackiness.
Your UV lamp’s strength plays a huge role, so always follow the manufacturer’s recommendations.
Resin projects can face bubble and cracking prevention challenges if not properly cured, affecting the final result’s finish and integrity.
Frequently Asked Questions
How to Make UV Resin Not Sticky After Curing?
Proper UV resin curing techniques include using 365-405nm wavelength lamps, mixing components thoroughly, curing in low humidity, minimizing oxygen exposure, and applying additional thin layers when needed.
Will Sticky Resin Eventually Cure?
Sticky resin won’t eventually cure on its own. UV resin tips emphasize proper light exposure is essential. Effective sticky resin solutions include additional UV exposure or removing the oxygen inhibition layer.
Will UV Resin Eventually Cure?
UV resin properties include the ability to fully cure when exposed to sufficient UV light. The curing process will eventually complete with adequate exposure time based on resin thickness.
How Long Does UV Adhesive Curing Take?
UV resin curing time typically ranges from 1-5 minutes under strong UV light, with full hardness developing within 24-48 hours. Factors affecting curing include light wavelength, adhesive thickness, and environmental conditions.
Conclusion
Mastering UV resin curing isn’t rocket science, but it does require patience and the right tools. Remember, proper curing prevents that dreaded sticky surface forever! With the right UV light, correct layer thickness, and a quick post-cure, you’ll create flawless projects every time. Don’t rush the process—good things come to those who wait, especially in resin crafting. Now go create something amazing, sticky-free!
Leave a Reply