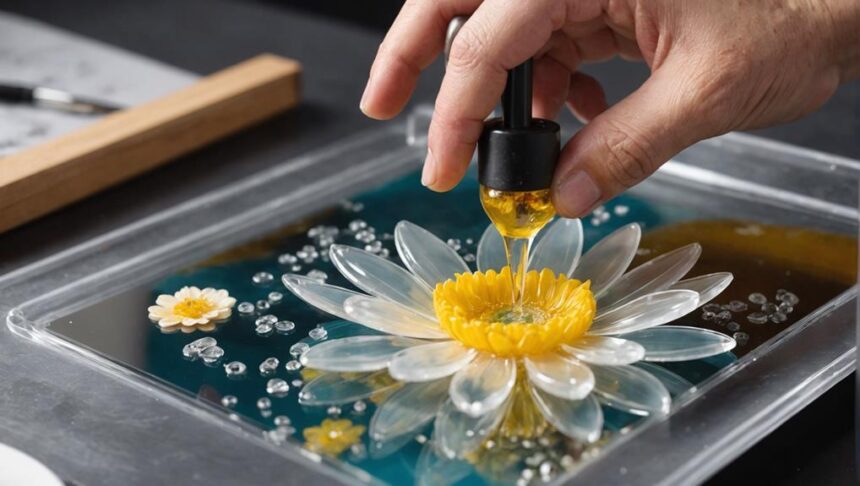
Creating a lovely piece of memorial resin art is easy with three steps. Gather your materials: high-quality epoxy resin, meaningful mementos, a solid canvas, plastic cups, and a heat gun. Accurately mix equal parts of resin and hardener, pour into separate cups, adding colors for a unique touch; let the resin flow over your base, using a heat gun to pop bubbles. For the final touches, cover your artwork to protect it during curing, which takes about 24 hours. Once cured, inspect and sand if needed, adding another resin layer for a glossy finish. Ready to craft your own masterpiece?
Key Takeaways
- Select clean, dry encapsulation items such as dried flowers, mementos, or ashes.
- Measure and mix epoxy resin and hardener accurately for optimal blending.
- Pour resin into separate cups for each color, then pour onto the base canvas.
- Use a heat gun to eliminate bubbles and ensure a smooth finish.
Gather Your Materials
To begin creating memorial resin art, gather all essential materials including high-quality epoxy resin, suitable encapsulation items, and a sturdy base canvas.
The first step in material selection is vital. Choose a high-quality epoxy resin, like a 1:1 ratio type from Pro Marine Supplies, which guarantees a durable and glossy finish. This particular type is easy to work with and produces professional results.
Next, think about what items you want to encapsulate. These could be dried flowers, small mementos, or even ashes. Whatever you choose, make certain they are clean and dry. Proper preparation techniques will make a huge difference in the final appearance of your artwork. For example, dried flowers should be pressed and completely moisture-free to prevent any reactions with the resin.
As for your base canvas, 1/2-inch Baltic birch plywood is an excellent choice. It's affordable and sturdy, providing a reliable foundation for your project.
Make sure you also have disposable plastic cups at hand, one for each color of resin you plan to use. Finally, a heat gun will be indispensable for eliminating bubbles and guaranteeing a smooth, clear finish.
With all these materials ready, you're set for a successful start to your memorial resin art.
Mix and Pour Resin
Accurately measuring and mixing the epoxy resin and hardener is vital for achieving a flawless finish in your memorial resin art. Start by carefully measuring equal parts of resin and hardener, following a 1:1 ratio. Mix them together slowly for at least 3 to 7 minutes, as this helps to minimize bubble formation.
Once mixed, pour the resin into separate plastic cups, one for each color you plan to use. This step is important for effective resin color mixing, giving you control over the intensity and shade of each hue. Pour the resin onto your prepared surface, letting it flow naturally to create your desired design. Keep in mind that the resin will continue to move and change slightly as it sets, adding a bit of unpredictability to your artwork.
To achieve a smooth, bubble-free finish, use a heat gun or torch immediately after pouring the resin. This will help in bubble elimination and guarantee a clear, professional-looking surface.
- Measure Accurately: Guarantees a proper mix and minimizes bubbles.
- Separate and Mix Colors: Controls color intensity and prevents muddling.
- Use a Heat Gun: Eliminates bubbles for a smooth finish.
Final Touches and Curing
After carefully pouring and manipulating the resin, attention must now shift to the final touches and curing process to guarantee a flawless and durable memorial piece.
First, cover your piece with a protective cover to keep dust and debris away during the curing process. This step is essential because even the tiniest particle can ruin the smooth surface.
Allow the resin to cure for at least 8 hours, but ideally, 24 hours for maximum durability.
Once the initial curing period is over, inspect your piece for any imperfections or bubbles. If bubbles are present, don't panic! Use a heat gun to eliminate them. Just be gentle, as too much heat can cause other issues.
If the final piece isn't as glossy or perfect as you'd like, lightly sand the surface and apply another resin layer for that smooth finish.
Frequently Asked Questions
How to Do Resin Art Beginners?
To start resin art as a beginner, prioritize resin safety by working in a well-ventilated area and wearing gloves. Begin with basic color mixing techniques, using small batches to experiment and gradually build confidence in your creative process.
How to Make Resin Keepsakes With Ashes?
To create resin keepsakes with ashes, mix epoxy resin and hardener as directed, incorporate ashes carefully for even distribution, and use staged casting techniques. This method guarantees ash preservation and enhances the sentimental value of the keepsake.
How to Put Pictures Into Resin?
To guarantee ideal picture preservation using resin techniques, print the photo on non-inkjet paper. Apply a thin layer of clear epoxy resin, position the photo, and encapsulate with another resin layer, guaranteeing the photo is flat and bubble-free.
How Do You Start Making Resin Crafts?
To start making resin crafts, prioritize resin safety by ensuring a clean, well-ventilated workspace. Gather essential tools including a 1:1 ratio epoxy resin, disposable mixing cups, and a heat gun. Follow manufacturer instructions for accurate resin preparation.
Conclusion
To summarize, the creation of memorial resin art involves three fundamental steps: gathering materials, mixing and pouring resin, and applying final touches followed by curing.
Each step requires careful attention to detail to guarantee the preservation of cherished memories.
By adhering to these simple yet precise processes, one can create a lasting tribute that encapsulates personal significance while demonstrating artistic craftsmanship.
The result is not only an art piece but a meaningful keepsake that honors and immortalizes special moments.


Leave a Reply