
Epoxy resin consists of two critical components: Part A (the resin) and Part B (the hardener). When mixed in the correct ratio—which varies by brand from 1:1 to 100:47—these liquids trigger a chemical reaction where epoxide groups in Part A cross-link with Part B. Temperature affects viscosity and curing time, with 70-75°F being ideal. Proper measurement using digital scales guarantees successful projects, while gloves and ventilation protect from potential health hazards. The chemistry behind this transformation reveals fascinating material science principles.
Key Takeaways
- Part A contains epoxide groups forming the base resin, while Part B has catalysts that trigger cross-linking during curing.
- Proper mixing ratios vary by brand (Entropy 100:47, BALTIC DAY 1:1, ArtResin 1:1) and are critical for successful curing.
- Viscosity differences between parts (Part A thicker than Part B) affect flow and final texture of epoxy projects.
- Temperature significantly impacts resin behavior—ideal working range is 70-75°F for proper curing and bubble prevention.
- Thorough mixing for 2-3 minutes ensures complete chemical reaction between components for optimal strength and clarity.
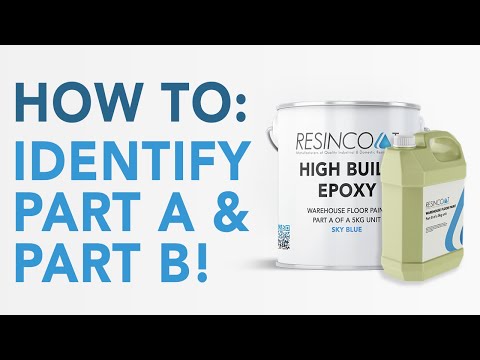
Resin Ingredients: Breaking Down the Basics of Part A & B
Every successful epoxy resin project begins with understanding the magical two-part dance between ingredients.
Epoxy resin comes with two essential components: Part A (the resin) and Part B (the hardener). These chemical soulmates must be united in just the right mix ratio—like Entropy Resins CLR’s 100:47 by weight or 2:1 by volume—to create a perfect bond! Understanding the properties of resin is crucial for effective art creation, particularly when working with epoxy resin, which is known for its strong adhesion and high gloss finish.
Getting this partnership wrong can lead to a sticky disaster! Accurate measuring cups are absolute must-haves for properly portioning both components.
Once you’ve measured precisely, you’ll need to complete the mixture by stirring thoroughly for 2-3 minutes. No shortcuts here, folks! A well-mixed batch will be streak-free and ready to transform from liquid to solid through an amazing chemical reaction.
The Chemical Composition of Epoxy Resin Systems
Epoxy resins have a fascinating molecular structure that gives them their superpower-like strength and stickiness.
At the microscopic level, Part A contains ring-shaped molecules (called epoxide groups) that are just waiting to grab onto the special chemicals in Part B.
When these components meet, they trigger an amazing dance called cross-linking, where molecules hook together like tiny puzzle pieces to form a super-strong network that won’t easily break apart.
One of the most popular types of resin is epoxy resin, known for its exceptional clarity and versatility, making it ideal for detailed art projects.
Molecular Structure Breakdown
Chemically speaking, the magic of epoxy happens at a microscopic level where molecules join forces to create something incredible! When you mix the right amount of epoxy resin with hardener, a fascinating chemical reaction begins.
The components correctly bond together, forming a three-dimensional network of cross-linked chains—like tiny molecules holding hands in all directions!
These molecular chains are what give epoxy its legendary strength and durability. Think of it as a microscopic jungle gym where each connecting point is super strong!
Getting the measuring ratio perfect (like the 100:47 weight ratio in CLR epoxy) guarantees those molecules link up properly. If the mixture is off, some molecules might get left out of the party, creating weak spots.
The resulting structure resists chemicals, heat, and pressure—all because molecules found their perfect partners!
Cross-Linking Reaction Mechanics
Let’s take a closer peek at what happens during that amazing molecular dance we just explored! When you combine Part A (resin) and Part B (hardener) in the proper mixing ratio, something magical begins.
The ingredients aren’t just blending—they’re getting married in a wild chemical party called a cross-linking reaction!
Think of it like building a giant molecular jungle gym. The hardener molecules grab onto the epoxy groups in the resin, creating super-strong connections in all directions.
Temperature plays a huge role in how fast this happens—warmer conditions speed up the curing times, while cooler temperatures slow things down.
Get the ratio wrong (like the Super SAP CLR’s vital 100:47 weight ratio), and you’ll end up with a sticky mess instead of a rock-solid creation!
Understanding the Role of Part A: Base Resin Properties

The base resin, or Part A, acts as the foundation of any epoxy system with its unique chemical structure of epoxy oligomers that provide the finished product’s clarity and shine. Its thick, honey-like consistency requires careful handling during mixing, as any trapped air bubbles can ruin the perfect glass-like finish that makes resin projects so stunning. Proper storage away from extreme temperatures and direct sunlight extends Part A’s shelf life, ensuring your resin remains ready for that next amazing project you’ve been planning! Additionally, it’s important to select high-quality resin supplies, such as those offered by Resin Art Supplies, to ensure clarity and durability in your projects.
Chemical Composition Breakdown
Base resins, known as Part A in epoxy systems, form the foundation of countless projects from jewelry to boat repairs. The chemical composition of these magical substances contains special epoxide groups that spring into action when mixed with hardeners.
Like a recipe for super-strength glue, Part A’s ingredients determine how thick it flows, how clear it looks, and how well it sticks to surfaces!
Most epoxy resins come from petroleum (yes, the same stuff that makes gasoline!), but manufacturers often add secret ingredients to make them resist sunlight or bend without breaking.
Different formulations require specific mix ratios and affect curing times—some dry in minutes while others take days! Understanding this chemistry isn’t just for nerds; it helps crafters and builders choose the perfect resin for everything from delicate jewelry to massive boat repairs!
Viscosity And Texture
When resin enthusiasts mix their magical concoctions, they’re actually dealing with a fascinating property called viscosity! This thickness factor determines how easily the resin flows and ultimately affects the final texture of your project. Part A, the base resin, is typically thicker than Part B (hardener), creating that perfect balance for beautiful results.
| Temperature | Viscosity Effect | Mixing Tip | Final Texture |
|---|---|---|---|
| Cold (60°F) | Super thick | Use sturdy mixing cups | More textured |
| Room (70°F) | Moderate flow | Standard mixing | Balanced finish |
| Warm (80°F) | Thinner flow | Gentle stirring | Smoother surface |
| Hot (90°F+) | Very runny | Work quickly! | Ultra smooth |
Temperature dramatically changes how your resin mixture behaves! Warming Part A makes it flow better, perfect for achieving glass-like surfaces, while cooler resin creates more texture and dimension.
Shelf Life Factors
As every resin crafter knows, understanding what affects your Part A’s shelf life can save you from disastrous project failures! The base resin typically lasts 1-2 years when stored properly, but several factors can either extend or cut short this timeline.
- Storage in a cool, dry place keeps your Part A happy and ready to perform!
- Sunlight exposure is your resin’s worst enemy, turning it cloudy or thick before its time!
- Regular check-ups on your resin’s consistency can prevent heartbreaking project fails!
- Those manufacturer’s instructions aren’t just suggestions—they’re your resin’s survival guide!
- Keeping lids tightly sealed preserves chemical integrity and prevents the dreaded moisture invasion!
Always check Part A’s clarity before mixing with Part B to guarantee perfect results every time.
The Function of Part B: Hardeners and Catalysts
The magic ingredient in your epoxy resin system, Part B transforms ordinary liquid resin into something extraordinary. This hardener contains special catalysts that kick-start a chemical reaction when mixed with Part A. Think of it as the spark that lights the fire!
The secret catalyst that brings your resin to life, turning liquid potential into solid reality.
When the two parts meet, they begin cross-linking molecules, turning from gooey liquid to rock-solid material—amazing, right?
Getting the mix ratio correct is super important. Whether it’s 100:47 by weight or 2:1 by volume, always follow the instructions!
Skimp on the hardener, and you’ll end up with a sticky mess that never fully cures.
Temperature plays a huge role too—warmer rooms speed up curing, while high humidity can cause problems. Humidity and temperature are crucial factors that affect the curing process of epoxy resin, ensuring a smooth, durable finish. Who knew that chemistry could be so picky about the weather?
Critical Mix Ratios: Why Precision Matters
When mixing resin, the exact measurement of each part can make or break your entire project. Different brands require totally different mix ratios—some need twice as much of Part A as Part B, while others have weird fractions like 100:47 that you absolutely must follow! Using a digital scale gives you way more accurate measurements than cups or spoons, which is super important when you’re creating something that needs to be perfectly clear and rock-solid. Remember to follow the manufacturer’s recommended mixing ratio to ensure proper curing and performance.
Measurement Determines Success
Successful resin projects depend completely on precise measurement, because even the smallest measuring error can doom your creation from the start.
When mixing the two parts of epoxy, using a digital scale or proper measuring cup guarantees that Part A and Part B combine in perfect harmony to cure properly. The Super SAP CLR system, for example, demands a strict 100:47 weight ratio that won’t tolerate guesswork.
- Watching your beautiful project remain sticky forever because of a tiny measurement mistake is heartbreaking!
- Feeling the pride when a perfectly measured mix results in glass-clear perfection is worth the extra care!
- Air bubbles trapped from hasty mixing will haunt you with permanent imperfections!
- Throwing away expensive materials due to measuring shortcuts hurts your wallet AND your creativity!
- Achieving that professional-quality shine comes from respecting accurate measurement above all else!
Ratio Varies By Brand
Every brand of epoxy resin has its own unique personality when it comes to mixing ratios, making it absolutely critical for crafters to pay attention to the specific instructions on their product. Seriously, folks, this isn’t a time to wing it!
Different brands require totally different approaches to combining resin and hardener. Check out these examples:
| Brand | Ratio Type | Resin:Hardener | Measurement Method |
|---|---|---|---|
| Entropy | By Weight | 100:47 | Digital Scale |
| Entropy | By Volume | 2:1 | Measuring Cups |
| BALTIC DAY | By Volume | 1:1 | Measuring Cups |
| ArtResin | By Volume | 1:1 | Graduated Containers |
Accurate measurement is super important because getting it wrong can leave you with sticky, bendy results instead of the gorgeous, glass-like finish you’re hoping for. Your masterpiece deserves the right mix!
Scales Beat Cups
Looking at those mix ratios, you might be wondering – what’s the best way to measure your resin components? When it comes to accurate measurement, scales measure with much greater precision than cups ever could.
- Your gorgeous creation might end up a sticky, uncured mess if your ratios are even slightly off!
- Digital scales help you nail that critical 100:47 or 2:1 ratio every single time!
- Even small projects need at least 1.47 ounces total combined weight to cure properly!
- That perfect pour you’ve been dreaming about depends on consistent mixtures!
- Nothing ruins a resin day faster than watching your hard work stay gooey forever!
For professional results, invest in a digital scale that measures in both grams and ounces. Your projects will thank you, and you’ll avoid the heartbreak of failed cures!
Measuring Techniques: Weight vs. Volume Methods
Deciding between weight and volume measurements can make or break your resin project! When mixing epoxy, precision is everything. Measuring by weight using a digital kitchen scale offers superior accuracy, especially for those tricky mixing ratios like 100:47. Remember to zero out your scale before adding the mixing cup—this tiny step prevents major disasters! For volume measurements, graduated measuring cups work well, but always read at eye level to catch the meniscus correctly. Most pros prefer weight measurements for small batches where precision matters most. A 2:1 ratio by volume might seem simpler, but scales don’t lie! Before mixing anything, double-check your specific resin system’s requirements. Different brands have different needs, and getting it wrong means wasted materials and tears! Precise measurement of resin and hardener is essential for proper curing; common mixing ratio is 1:1 by volume.
Common Additives and Their Effects on Curing
When you toss colorants, fillers, or other fun stuff into your epoxy mix, you’re actually tweaking its whole personality. The curing process can speed up, slow down, or completely change depending on what you add.
- Pigments make your creation pop with color but might slow down curing – so exciting but tricky!
- Microballoons and silica fillers boost strength while making your project lighter – magic!
- Silicone oils create those mesmerizing cell patterns everyone loves – but mess up your resin-to-hardener ratio if you add too much!
- Accelerators give you super-fast results when you’re in a hurry – goodbye waiting!
- Thickeners dramatically increase viscosity, perfect for building up layers – no more runny messes!
It’s crucial to use pigments specifically designed for resin to ensure proper curing and avoid any sticky residue.
Temperature Sensitivity in Resin Components
While additives can transform your resin’s properties, temperature plays an equally powerful role in your crafting success! Both Part A (Resin) and Part B (Hardener) are surprisingly finicky about their environment, performing their best magic between 70-75°F.
Think of this as the “Goldilocks zone” for perfect curing!
When temperatures drop below 70°F, the curing process gets lazy, leaving you with sticky surfaces and half-hardened projects—yikes!
Too hot (above 75°F), and your working time vanishes faster than ice cream on a summer sidewalk. Cold conditions are especially troublesome, creating pesky micro bubbles that ruin your crystal-clear masterpiece.
High humidity slows curing and can lead to sticky surfaces, so maintaining a controlled environment is crucial for optimal results.
For best results, keep your workspace at room temperature and monitor those thermometers! Your resin will thank you with stunning, bubble-free results.
Shelf Life and Storage Requirements for Parts A & B
Proper storage of your resin components isn’t just recommended—it’s absolutely essential for preserving their magical properties!
Both Part A and Part B have specific shelf life and storage requirements that, when followed correctly, guarantee your creations turn out perfectly every time.
A proper resin home keeps the chemistry alive, ensuring your artistic vision materializes flawlessly with every pour!
- Keep those precious bottles tightly sealed—moisture is the sneaky enemy that ruins resin dreams!
- Store in a cool, dry place away from sunlight, like treasure that needs protection from the elements!
- Maintain a cozy temperature between 70-75°F—your resin likes to be comfortable too!
- Watch for weird separation or funky smells—they’re screaming “Don’t use me!”
- Remember that most resins only live 6-12 months, even with perfect care—use them before they retire!
- Ensure good air quality by opening windows or using fans to circulate air when working with resin to avoid harmful vapors.
Always check the manufacturer’s guidelines, as different brands have their own special needs.
Distinguishing Between Casting and Coating Resins
Resin enthusiasts face an essential fork in the road when selecting the perfect product for their projects—casting versus coating resins!
These two types serve completely different purposes, so choosing wisely means project success!
Casting resins, with their lower viscosity, pour beautifully into molds to create solid, three-dimensional objects. They can handle thicker applications without compromising the curing process—perfect for those chunky paperweights or dazzling jewelry pieces!
Meanwhile, coating resins excel at what their name suggests—creating glossy, protective finishes on surfaces like wood or artwork.
The mix ratio varies between products (often 1:1 or 2:1), but what’s super important to remember is that curing times differ dramatically!
Casting resins typically take longer to fully harden due to their thickness, while coating resins zip along faster. Each resin type offers unique properties that enhance creative possibilities in resin picture art, allowing artists to tailor their choice based on specific project needs.
UV Stabilizers and Yellowing Prevention in Modern Formulations
Many resin creators despise that dreaded yellowing effect that turns beautiful, crystal-clear creations into disappointing, amber-tinted disappointments!
Modern epoxy formulations now include powerful UV stabilizers that fight against this frustrating problem. The battle against yellowing has led to amazing breakthroughs in advanced chemical technologies that keep your projects looking pristine for years.
Today’s high-tech epoxy formulas contain revolutionary UV stabilizers that win the war against yellowing, preserving your creations’ beauty for the long haul!
- HALS (hindered amine light stabilizers) work like tiny shields, blocking harmful rays!
- UV absorbers trap and convert dangerous light into harmless heat energy!
- These ingredients work together like superheroes to keep clarity intact!
- Higher concentrations of stabilizers mean longer-lasting beauty!
- For outdoor applications, specialized formulations provide extreme protection!
These scientific advances mean your resin projects can maintain their sparkle and transparency even when faced with sunshine and time—a true game-changer for artists and crafters everywhere!
Health and Safety Considerations When Handling Components
When handling resin components, safety must always come first to protect your health and keep your creative journey joyful! Wearing proper personal protective equipment like nitrile gloves and safety goggles shields you from potential irritants that can ruin your crafting fun.
| Safety Must-Haves | Why It Matters | How It Helps |
|---|---|---|
| Nitrile gloves | Prevents skin contact | Avoids nasty allergic reactions |
| Safety goggles | Protects eyes | Keeps splashes away |
| Good ventilation | Reduces fume inhalation | Keeps your lungs happy |
Always check the safety data sheets from manufacturers—they’re like treasure maps for handling resin safely! Keep your workspace well-ventilated, and if resin touches your skin, clean it off quickly with isopropyl alcohol. Remember, resins and heat sources don’t mix—they can create a fiery disaster!
Troubleshooting Mix-Related Curing Problems
Almost every resin artist has experienced that dreaded moment—peeling back a mold to find sticky patches or soft spots where beautifully hardened resin should be!
When mixing resin and hardener, several factors can cause these frustrating curing problems:
- Oops! Using the wrong ratio might leave you with a gooey mess that never fully hardens!
- Yikes! Insufficient mixing time (under 2-3 minutes) means components don’t blend properly!
- Brrr! Cold temperatures trap pesky bubbles and slow down chemical reactions!
- Ugh! Contaminated measuring tools can sabotage your project before you even begin!
- Oh no! High humidity introduces unwanted moisture that fights against proper curing!
To fix sticky or improperly cured areas, you’ll need to sand down the problem spots, clean thoroughly, and apply a fresh layer of properly mixed resin.
Remember to remove bubbles by warming your workspace slightly before pouring!
Frequently Asked Questions
Is Part a or Part B the Hardener in Resin?
In epoxy resin systems, Part B is the hardener. Among various hardener types, proper mixing techniques guarantee ideal curing process. Accurate measurement of both components is essential for successful application tips.
What Are the Main Ingredients in Resin?
Different resin types contain epoxy compounds, hardeners like amines, and various additives. Understanding these ingredients impacts the curing process, safety precautions needed, and proper mixing techniques for ideal results.
What Is Part B in Epoxy?
Part B in epoxy is the hardener component that activates the curing process when properly mixed with resin. Safety precautions are essential as mixing techniques directly impact epoxy applications’ success.
What Is the Ratio of Part a and B in Epoxy Resin?
Epoxy resin ratios vary by manufacturer, typically ranging from 1:1 to 3:1. Mixing epoxy tips emphasize precision measurement to avoid common mistakes affecting curing time factors. Always follow product-specific instructions for best results.
Conclusion
Understanding resin’s two-part chemistry isn’t just science—it’s the key to your creative success! With the right mix ratio, safety gear, and a bit of patience, you’ll be crafting stunning pieces in no time. Remember, precision matters with Parts A and B, just like following a recipe. When things go wrong, don’t panic—troubleshoot methodically, and soon you’ll be the resin expert your friends turn to for advice!
Leave a Reply