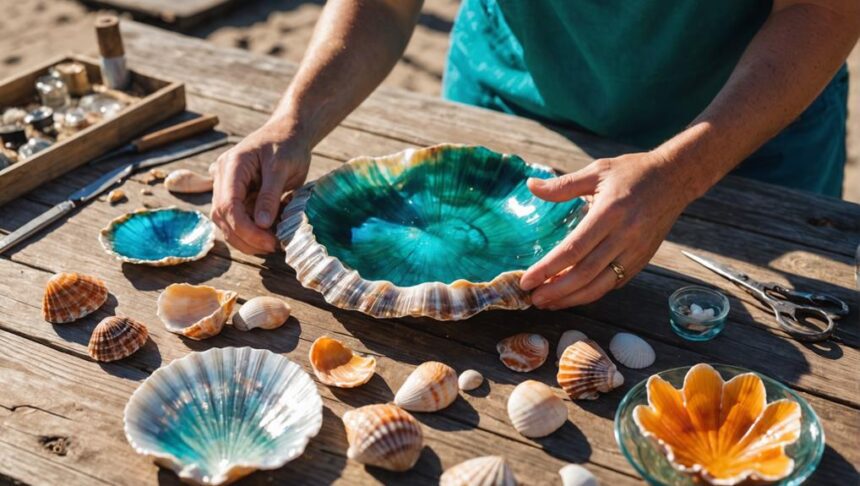
Creating your own sea shell resin art masterpiece is super fun and easy with these three steps! First, grab your materials: a clean scallop shell, navy, teal, and white alcohol inks, and epoxy resin. Mix the resin with the hardener in a 1:1 ratio, then split it into separate cups, mix in the inks, and pour from dark to light colors. Finally, create wave effects by layering white resin on top, using a stir stick for lines, and a heat gun to spread it out. Allow it to cure for depth. Ready to bring the ocean into your art? Keep going, and you'll master this craft!
Key Takeaways
- Select a clean scallop shell free of debris and cracks for optimal resin bonding and appearance.
- Mix epoxy resin and hardener in a precise 1:1 ratio and divide into cups for coloring.
- Add pigments to resin, stirring until it reaches a honey-like consistency.
- Layer colored resin from darkest to lightest, using a heat gun to remove bubbles and manipulate flow.
Gather Your Materials
To begin your sea shell resin art project, gather a clean scallop shell and make certain it is free of any debris for ideal resin bonding.
Shell selection is super important because the right shell can make your art pop! Look for a shell that's smooth and has no cracks.
Once you have the perfect shell, think about your color choices. For a stunning ocean-themed effect, you'll need alcohol inks in navy, dark teal, light teal, and white.
Next, grab your clear epoxy resin and hardener. These are the magical ingredients that will make your shell look like it's filled with ocean waves.
Safety first, though! Put on gloves and a respirator mask. Resin can be sticky and the fumes aren't great to breathe in.
You'll also need some silicone cups and stir sticks to mix the resin. Make sure to follow the instructions on the resin packaging carefully. Trust me, you don't want any goopy messes!
Mix and Pour Resin
Once all your materials are assembled and prepared, the next step is to measure and mix the epoxy resin and hardener according to the manufacturer's instructions, guaranteeing a precise 1:1 ratio for ideal curing. This step is essential because the right balance guarantees that your resin masterpiece will harden properly and look stunning.
Next, divide the mixed resin into separate cups. Add your desired pigment colors—navy, dark teal, and light teal work beautifully. Stir each cup until the colors are fully blended, aiming for a honey-like consistency. This consistency makes pouring easier and more accurate.
Now, it's time to layer the colored resin. Start with the darkest hue and gradually pour the lighter colors in sections. This technique adds depth and dimension to your artwork. To make your piece even more amazing, use a heat gun. It helps to remove bubbles and manipulate the resin's flow, creating cool wave effects and detailed cellular patterns.
Here's a quick checklist to keep you on track:
- Measure and mix resin and hardener with a precise 1:1 ratio
- Divide and color the resin in separate cups
- Layer colors from darkest to lightest
Create Wave Effects
Frequently, achieving wave effects in resin art requires careful manipulation of white resin over the colored layers to simulate the natural appearance of ocean waves. This process begins by applying a thin layer of white resin on top of the colored base.
Using a small stir stick, you can draw fine lines in this white layer to shape the waves and add ocean textures. It's like painting with a toothpick, but more fun!
To make your waves look like they're moving, grab a heat gun. Wave techniques involve gently spreading the white resin with the heat gun. This encourages cell formation, which makes the waves look more real and dynamic. Imagine a tiny, magical wind blowing across your ocean!
After the first wave layer cures for about 4 hours, you can add more layers. This waiting time guarantees the colors underneath stay vibrant and clear.
If you want your waves to stand out even more, add a second layer of white resin higher up. This creates a striking contrast and adds depth to your masterpiece.
Keep experimenting with these steps, and soon you'll be creating waves that look like they're ready to splash right out of your art!
Frequently Asked Questions
How Do You Make Sea Resin Art?
To create sea resin art, prepare a shell with sand and secure coral and smaller shells. Mix resin colors, apply in layers, and manipulate with a heat gun. Enhance with clear and white resin for wave effects.
How Do You Make Resin Art Steps?
To create resin art, start by preparing your base surface. Mix epoxy resin accurately, then use color mixing techniques to layer hues strategically. Utilize various resin techniques to manipulate the resin for desired effects and let it cure.
What Is the Best Art Resin for Beginners?
For beginners, ArtResin and Alumilite Clear Resin are highly recommended resin types. Key beginner tips include using non-toxic, UV-resistant resins with a 1:1 mixing ratio and extended working times for easier handling and professional results.
How to Get Wave Effect in Resin?
To achieve a wave effect in resin, employ wave techniques by layering white resin over a colored base, using a stir stick for fine lines. Enhance color blending and create cells with a heat gun for a realistic finish.
Conclusion
In summary, the creation of sea shell resin art involves three straightforward steps: gathering materials, mixing and pouring resin, and creating wave effects.
This process allows for the transformation of ordinary sea shells into extraordinary pieces of art.
The simplicity of these steps guarantees accessibility for individuals at various skill levels, while the potential for creativity and personalization remains vast.
Consequently, sea shell resin art represents both an engaging and rewarding artistic endeavor.


Leave a Reply