
Clay crafting offers tons of fun, easy projects for crafters at any skill level. Beginners can start with simple pinch pots or decorative jewelry trays, while more adventurous creators might try polymer clay earrings or miniature figurines. Personalized keychains, small planters, seasonal ornaments, custom magnets, and trinket dishes round out these accessible options. No special equipment needed for most projects—just hands, imagination, and a willingness to get a little messy. These tiny treasures await your personal touch!
Key Takeaways
- Simple pinch pots transform into beautiful planters and can be decorated with patterns or handles for beginners.
- Air dry clay jewelry trays and trinket dishes require no kiln and can be customized with textures and colors.
- Polymer clay earrings and magnets allow for creating lightweight, colorful accessories with unique designs and textures.
- Miniature figurines and seasonal ornaments showcase creativity while developing skills in shaping clay into complex designs.
- Personalized clay keychains and tags make practical, customizable gifts using simple tools and household items for texturing.
Simple Clay Pinch Pots for Beginners

Every beginner’s journey into the wonderful world of clay starts with a pinch pot! These adorable little vessels are the perfect project for a beginner because they require zero fancy tools—just your hands and imagination.
To create clay pinch pots, simply roll clay into a ball, press your thumb into the center, and pinch the walls between your thumb and fingers. It’s like magic watching the clay transform! Kids love the squishy feeling as they shape their creations, while adults appreciate the zen-like focus it brings.
The best part? Once finished and decorated with fun textures or patterns, these tiny treasures can hold jewelry, keys, or even tiny succulents.
Who knew something so simple could be so versatile and fun?
Decorative Air Dry Clay Jewelry Trays
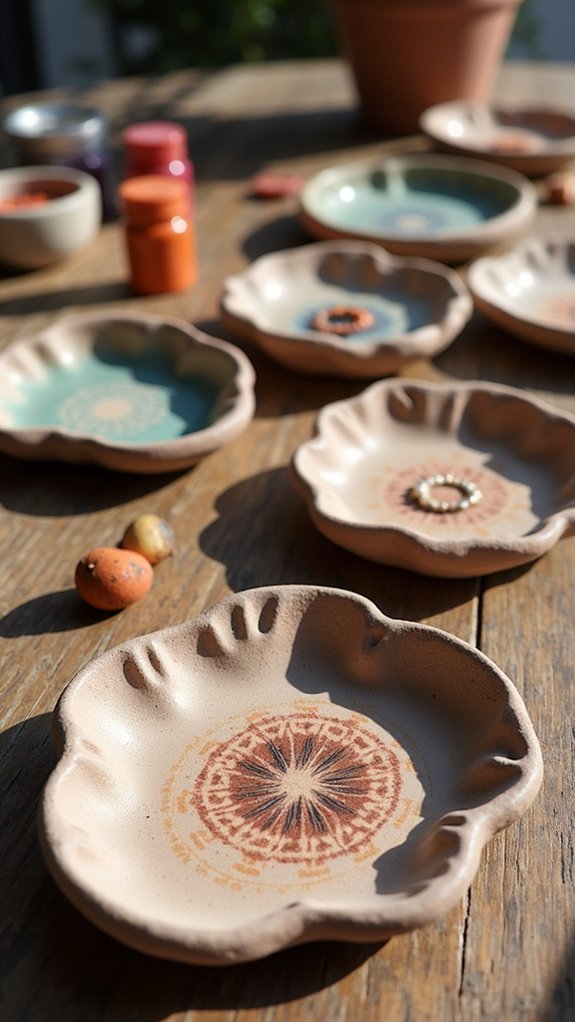
Countless crafters have fallen in love with decorative air dry clay jewelry trays, and it’s easy to see why!
These beginner-friendly clay crafts don’t require fancy kilns or equipment—just shape, mold, and let them dry naturally over time. The best part? You can create any size or shape to perfectly fit your jewelry collection!
After drying, these lightweight trays transform into the perfect home for rings, earrings, and other tiny treasures. Crafters can express their creativity by painting designs, adding patterns with stamps, or pressing textures into the soft clay before it hardens.
With simple tools like cutters and texture mats, even first-time clay artists can create stunning results! Air dry clay projects like these trays add both functionality and style to any dressing table, making them practical decorative pieces that show off your personal flair.
Polymer Clay Statement Earrings

Crafters worldwide are dazzling their friends with homemade polymer clay statement earrings that pack a serious style punch! The colorful, lightweight accessories are super easy to make and totally customizable.
Clay crafting enthusiasts love how polymer clay can be shaped into literally any design imaginable—from funky geometric shapes to tiny food replicas that look good enough to eat!
- Mix different clay colors to create marbled effects, rainbow swirls, or gradient ombré designs that’ll make everyone ask, “Where did you get those?!
- Add texture using household items like toothpicks, bottle caps, or even crumpled aluminum foil before baking your creations.
- Take your earrings to the next level by adding glitter, metallic paint, or resin coating after they’ve cooled from baking.
Miniature Clay Figurines and Sculptures
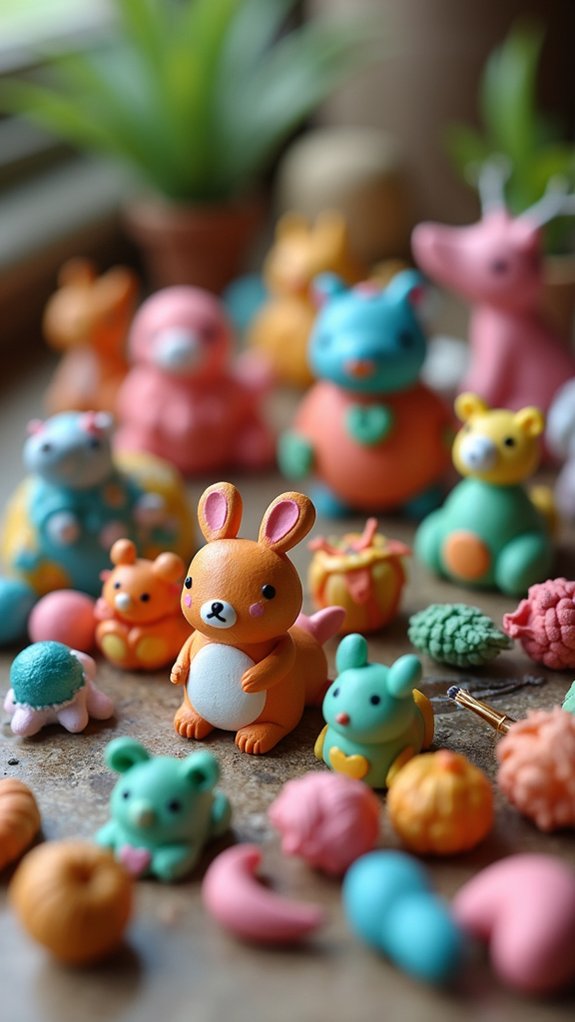
While polymer clay earrings make stunning accessories, the world of miniature clay figurines and sculptures opens up an entirely different creative dimension! These tiny masterpieces allow artists to craft adorable animals, characters, or whatever their imagination dreams up.
Beginners can start by mastering basic shapes that form the foundation of more complex designs. Polymer clay, with its vibrant colors and pliable texture, is perfect for intricate details like facial expressions or fur patterns.
For those without a kiln, Air-Dry Clay offers a fantastic alternative that dries naturally on its own!
The beauty of miniature clay figurines is that they can be painted or left in their natural state. Each small creation becomes a personal expression of creativity, patience, and artistic vision—tiny treasures that pack a big artistic punch!
Personalized Clay Keychains and Tags

Creating personalized clay keychains and tags allows everyone to make practical, one-of-a-kind accessories that express their unique style.
With just a few simple tools and some air-dry clay, crafters can transform plain keychains into mini works of art that friends will beg to know where they bought them!
From monogrammed bag tags to tiny food replicas hanging from your keys, these lightweight clay creations are both fun to make and seriously useful in everyday life.
Design Inspiration Ideas
Why not transform simple clay into charming personalized keepsakes that friends and family will adore? These clay projects offer endless possibilities, from adorable animal shapes to meaningful symbols that tell a story.
Crafters can press designs onto the soft clay using ordinary household items like buttons, lace, or even leaves for unique textures!
Looking for inspiration? Here are three ideas to spark your creativity:
- Nature-inspired keychains featuring leaf imprints, tiny flowers, or miniature vistas
- Foodie favorites like pizza slices, ice cream cones, or tiny donuts complete with colorful “sprinkles”
- Custom name tags with marbled clay backgrounds and metallic accents for a touch of glamour
The best part? These small treasures make big impressions while allowing your personality to shine through every creation!
Clay Preparation Steps
Every successful clay project begins with proper preparation! To create amazing clay sculptures like personalized keychains and tags, start by kneading the clay thoroughly to smoosh out those pesky air bubbles.
Trust us, this simple step prevents cracks later—total game-changer!
Next, roll the clay to about 1/4 inch thickness using a rolling pin (or just your hands if you’re feeling adventurous).
Then comes the fun part: cut out your shapes with cookie cutters or a knife! Don’t forget to poke holes for keychain rings before the clay dries.
After your creation is completely dry—which might take different times depending on your clay type—it’s decoration time!
Paint, carve, or add sparkly bits to make your clay keychains uniquely yours.
Finishing Techniques
Many fantastic clay keychains and tags are ruined in the final steps, but not yours! Perfect finishing techniques are what transform a simple clay creation into a lasting treasure.
After your clay is completely dry (super important!), you’re ready to add those intricate designs that make each piece special.
Three key steps to amazing clay tags and keychains:
- Use fine-tip brushes or markers to add names, patterns, or tiny details.
- Try different glazing methods – dipping creates a smooth finish while brushing lets you control thickness.
- Attach sturdy metal rings or clasps to guarantee your keychain actually works as a keychain!
Don’t forget to experiment with stamps or embossing tools before the clay dries.
These simple tools can add texture and personality without requiring artistic skills!
Textured Clay Coasters for Your Home
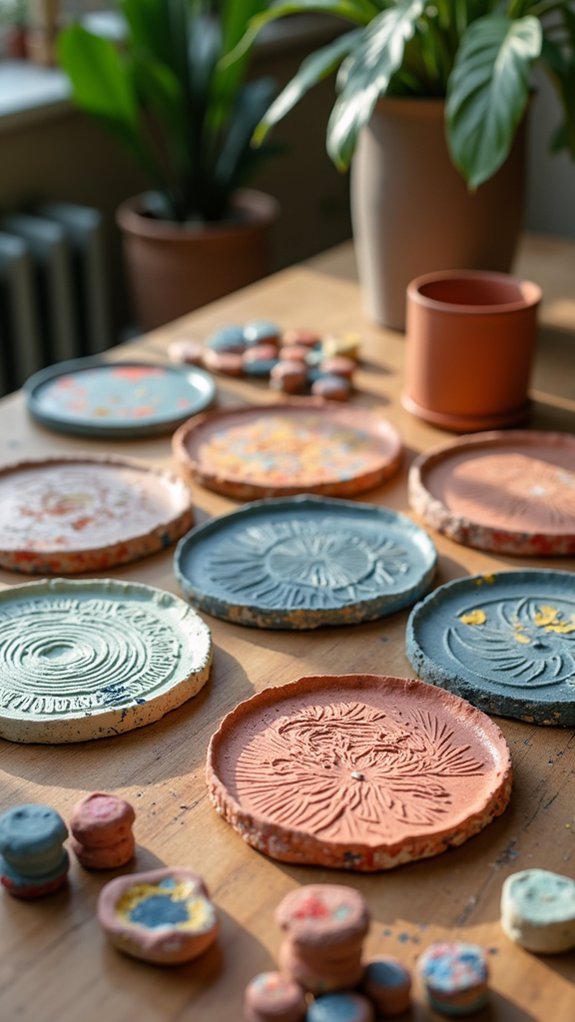
Countless homes across the country could use a touch of handmade charm, and textured clay coasters offer just that perfect blend of creativity and functionality.
These beginner-friendly projects transform simple clay into conversation pieces that protect furniture while showcasing personal style.
Making textured clay coasters couldn’t be easier! Simply roll out air dry or stoneware clay, press household items like lace, leaves, or buttons into the surface, and cut into desired shapes.
After drying completely, the coasters are ready to use—or take things up a notch by adding paint or glaze for extra flair!
The non-porous material keeps drinks from seeping through, making these adorable creations as practical as they are pretty.
Who knew something so useful could also be such a fun way to express creativity?
Handcrafted Clay Plant Pots and Planters
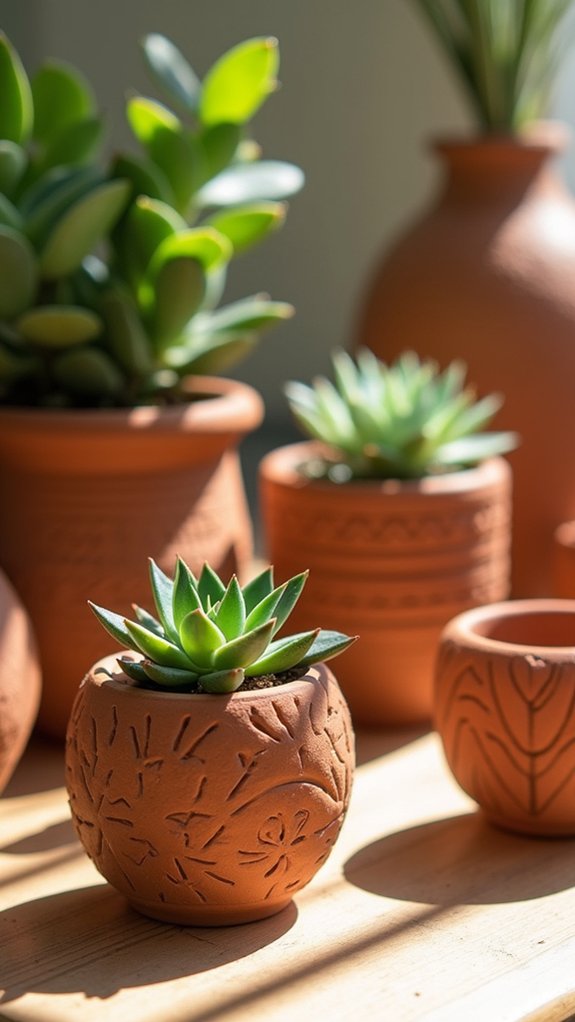
Just as your tables deserve handmade protection, your plants deserve beautiful homes! Crafting your own clay plant pots lets you express creativity while giving your green friends stylish containers to thrive in.
Working with stoneware, earthenware, or air dry clay offers different looks and feels for your botanical creations.
- Start with simple pinch pots – these beginner-friendly clay ideas let you shape small planters using just your hands and imagination!
- Try slab-building techniques for larger planters that can showcase indoor or outdoor plants.
- Create shallow succulent containers with fun textures and patterns – they’re easier to make and look absolutely amazing on windowsills!
Adding handles, patterns, or carved designs transforms basic pots into conversation pieces that reflect your personal style. Your plants will thank you!
Seasonal Clay Ornaments and Decorations
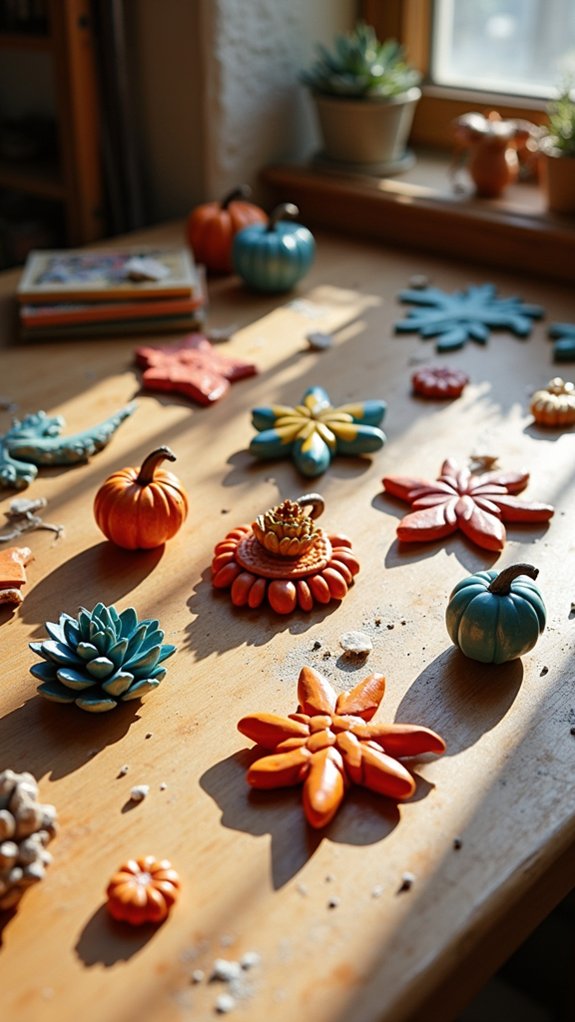
Fall and winter months bring endless possibilities for creating charming seasonal clay ornaments that brighten homes during the holidays.
Fall leaf impressions capture the intricate details of nature by pressing real leaves into clay, creating stunning keepsakes that celebrate autumn’s beauty.
Festive hanging ornaments, shaped like stars, snowflakes, or holiday symbols, add a personal touch to Christmas trees and can become treasured family heirlooms passed down through generations.
Fall Leaf Impressions
The vibrant colors of autumn provide perfect inspiration for creating beautiful clay impressions that capture nature’s intricate details. Using air dry clay, this fun project lets even a beginner looking to explore crafting create stunning seasonal decorations without needing a kiln.
Simply press real leaves into rolled clay, then allow to dry completely.
- Gather freshly fallen leaves with pronounced veins for the clearest impressions – oak, maple, and fern leaves work wonderfully!
- After drying, paint your impressions with fall-inspired colors like amber, crimson, and gold to make the details pop.
- Add a small hole at the top before drying if you want to turn your creation into a hanging ornament or gift tag.
These versatile decorations bring a touch of autumn’s magic indoors all season long!
Festive Hanging Ornaments
Every home deserves a touch of handmade charm during the holiday season, and clay ornaments offer the perfect way to add that personal flair to your decorations. Creating festive hanging ornaments with air dry clay means anyone can join the fun—no fancy kiln required! Simply roll out your clay, cut your favorite shapes, and poke a hole at the top before leaving them to dry.
| Shape Ideas | Decoration Tips | Finishing Touches |
|---|---|---|
| Stars | Paint with metallics | Add glitter |
| Snowflakes | Press in textures | Seal with gloss |
| Animals | Use cookie cutters | Attach ribbons |
| Names | Stamp with letters | Add dried herbs |
These personalized ornaments become treasured keepsakes that families pull out year after year. Plus, they make heartfelt gifts that friends will actually want to keep!
Customized Clay Magnets and Pins
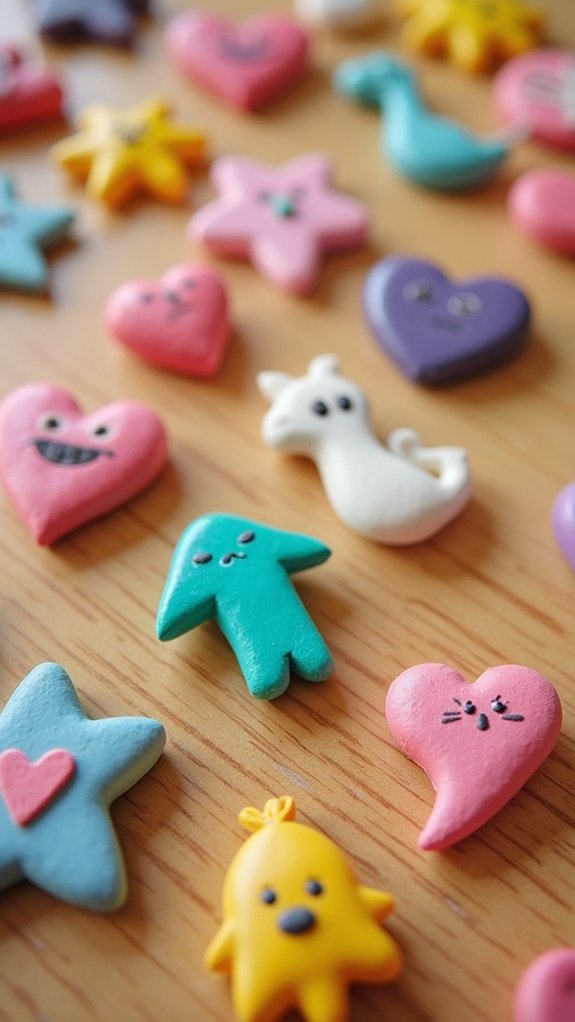
Many creative crafters have discovered the joy of making customized clay magnets and pins, turning simple materials into eye-catching accessories and practical decorations.
These beginner-friendly projects require minimal supplies but deliver maximum personality, whether adorning a refrigerator or jazzing up a jacket lapel.
Creating with clay is simplicity itself, yet the results become personal treasures that transform everyday objects into showcases for your creativity.
- Start by rolling and shaping polymer or air dry clay into fun designs—think mini pizzas, cute animals, or colorful geometric shapes!
- Use simple tools like toothpicks or pencils to add texture and details before the clay dries or bakes.
- Once your creation is ready, attach a magnet or pin back with strong glue, and consider adding paint for extra pop!
The beauty of customized clay magnets and pins lies in their versatility—they make perfect gifts and can express anyone’s unique style!
Functional Clay Trinket Dishes and Bowls
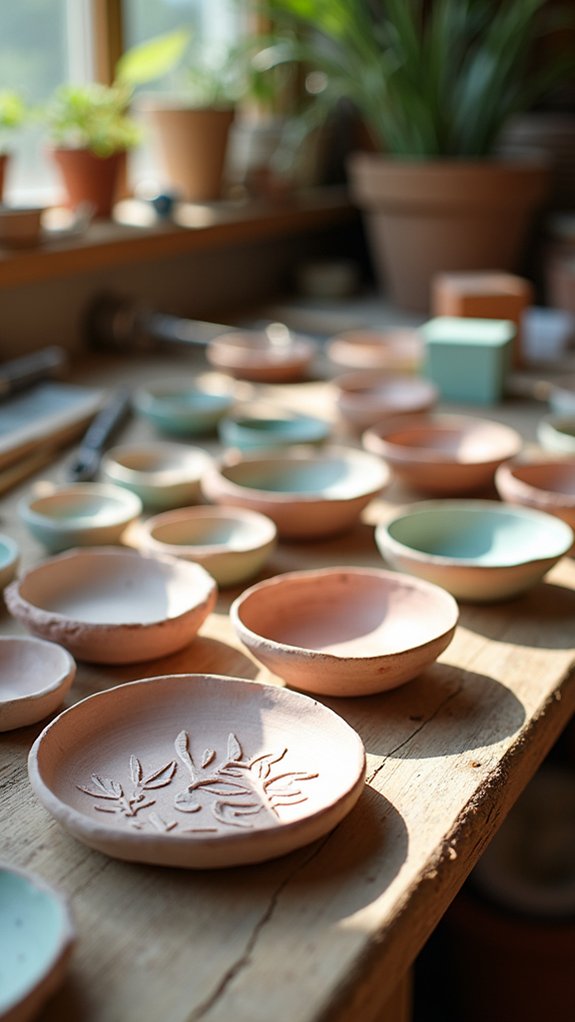
Creating functional clay trinket dishes and bowls transforms ordinary crafting into practical art that serves a purpose in everyday life.
Even beginners can jump right in, using air dry clay or stoneware to craft containers that corral scattered jewelry, keys, or loose change.
The simple pinch pot technique—just pushing your thumb into a clay ball and gently pinching the sides—creates perfectly imperfect bowls with tons of character!
Crafters can experiment with textures by pressing leaves, lace, or even bubble wrap into the soft clay.
Once dry, these functional clay trinket dishes become mini canvases for creativity.
Paint them bright colors, add metallic edges, or leave them natural for an earthy vibe.
The best part? Every time you drop your rings into your handmade dish, you’ll feel a spark of pride!
Frequently Asked Questions
What Small Things Can I Make With Clay?
Individuals can craft various items with clay, including pinch pots, coiled vases, decorative tiles, beads, jewelry trays, clay ornaments, miniature figures, animal figurines, and succulent planters using basic techniques.
What to Sculpt With Clay for Beginners?
Beginners can sculpt pinch pots, animal figurines, and decorative tiles using basic sculpting techniques. These simple projects require minimal beginner clay tools while developing fundamental skills in molding, texturing, and hand-building.
How to Make Clay With 3 Ingredients?
Homemade clay recipes typically combine 1 cup flour, 1/2 cup salt, and 1/2 cup water. Mix thoroughly, then knead for 5-10 minutes to achieve proper clay consistency. Tips include adding oil for flexibility.
How to Make Clay With 4 Ingredients?
Making four-ingredient homemade clay requires combining flour, salt, water, and cream of tartar. This mixture creates one of the most versatile clay alternatives after cooking, cooling, and kneading until pliable.
Conclusion
Clay projects offer endless creative possibilities for beginners and experienced crafters alike. These ten simple ideas can transform ordinary clay into stunning, personalized pieces that brighten your space or make heartfelt gifts. Don’t worry about being perfect—each fingerprint and wobble adds character! So grab some clay, set aside an afternoon, and immerse yourself in the squishy, wonderful world of handmade creations. You might just discover a new favorite hobby!
Leave a Reply