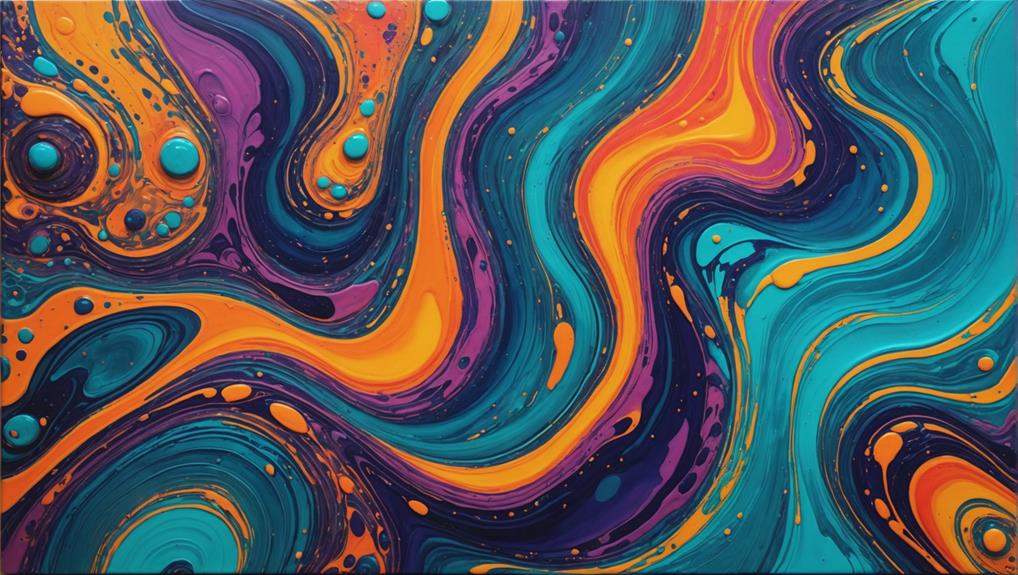
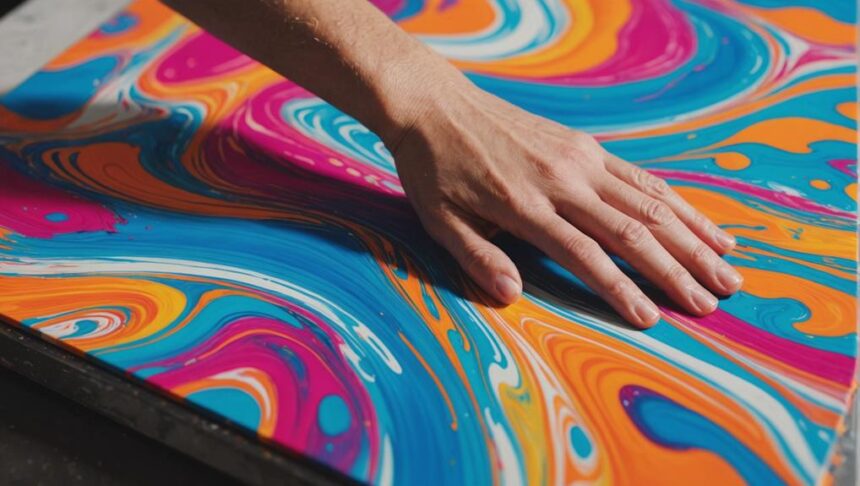
The swiping technique in acrylic pour painting is like magic! You begin by pouring vibrant colors onto a smooth surface, letting them mingle. Then, using a swipe tool like a damp paper towel or a plastic card, you gently drag the paint across the canvas. Think of it as spreading icing on a cake, but way cooler! This creates mesmerizing cells and patterns that shift and change, making your artwork come alive. The trick lies in achieving the right paint consistency and pressure while swiping. If you’ve ever wondered how artists create those beautiful, flowing abstracts, you’re in for a fun journey ahead!
Key Takeaways
- Use damp paper towels, plastic cards, or palette knives for effective swiping, ensuring even paint distribution.
- Apply a white base coat to maintain color vibrancy and prevent blending.
- Integrate one drop of silicone per two ounces of paint to create cells.
- Experiment with swipe direction and pressure for varying patterns and contrasts.
Essential Supplies
The swiping technique in acrylic pour painting necessitates specific supplies to achieve ideal results.
First and foremost, choosing the right colors is essential. You’ll want to pick acrylic paints that complement each other beautifully. Think about how colors blend and contrast, creating a mesmerizing visual effect.
Next, let’s talk about surface preparation. Whether you choose canvas or wood, ensuring a clean, smooth surface is important. A prepped surface allows the paint to glide effortlessly, making your swipes more fluid and dynamic.
Before diving in, gather mixing cups and sticks to blend your paint and pouring medium. The right consistency is key—too thick, and the paint won’t move; too thin, and it won’t cover properly. Distilled water can help adjust this, but remember, your swipe paint should be slightly thicker for the best results.
Don’t forget a drip-catching item like plastic sheeting or silicone mats to keep your workspace tidy. For beginners, a swipe tool such as a damp paper towel or plastic card can make a world of difference, helping you achieve that perfect swiping effect with ease.
Happy painting!
Paint Mixing
Achieving the perfect paint consistency is foundational to mastering the swiping technique in acrylic pour painting.
When mixing your paints, you want a viscosity that allows for smooth color blending and stunning effects. The ideal consistency should create a small mound when dripped, which then disappears within a few seconds. This guarantees the paint flows perfectly without being too thick or too runny.
To get the right mix, start with a common ratio: two parts pouring medium to one part paint. If needed, you can thin it further with distilled water until you reach that sweet spot. Craft paint often works well at a 1:1 ratio, providing vibrant colors and good flow.
Silicone drops can be a game-changer for cell formation but use them sparingly—just one drop per two ounces of paint—to avoid unwanted divots in your masterpiece.
You can also experiment with different mixing recipes, like a 2:1 ratio of Floetrol to paint or a blend of 60% Elmer’s Glue-All with 40% water.
Pouring Medium
When it comes to perfecting the swipe technique in acrylic pour painting, understanding the role of the pouring medium is essential.
Mixing mediums at the right ratios, such as 2 parts medium to 1 part paint, guarantees the paint flows smoothly and maintains the right consistency.
Additionally, adjusting the mixture with other ingredients, like silicone for cell formation and distilled water for texture, can greatly enhance the final results.
Mixing Medium Ratios
Understanding the appropriate ratios for mixing pouring medium is vital to mastering the swiping technique in acrylic pour painting. With the right mixing techniques, achieving the perfect consistency for your paint can make all the difference in your artwork. Ratio variations are key, and knowing how to adjust them for different mediums and paints can help you get those beautiful swiping effects.
Here’s a handy table to guide you:
| Type of Paint | Pouring Medium Ratio | Notes |
|---|---|---|
| Regular Acrylic | 2 parts medium to 1 part paint | Standard for most pours |
| Floetrol | 2:1 Floetrol to paint | Great for even flow |
| Elmer’s Glue-All | 60% Glue-All to 40% water | Budget-friendly alternative |
| Craft Paint | 1:1 with pouring medium | Guarantees smooth flow |
When using silicone, a tiny bit goes a long way: just 1 drop per 2 ounces of paint is enough to promote cell formation, which is essential for the swiping technique. Remember, the goal is to have a paint mixture that can form a small mound and disappear when dripped, making sure that your swipes are smooth and free of unwanted divots. Keep experimenting and you’ll find the perfect blend for your artistic needs!
Thinning and Adjustments
Thinning and adjusting the pouring medium is vital for attaining the proper paint consistency required for effective acrylic pour painting techniques.
To start, the recommended pouring medium ratio is 2 parts medium to 1 part paint. This guarantees the paint flows smoothly while maintaining the right consistency for swipe techniques. It’s a bit like making the perfect pancake batter—too thick, and it won’t spread; too thin, and it’ll run everywhere.
One of the key thinning techniques is using distilled water to tweak your paint’s consistency. You want your paint to form a small mound that disappears quickly when it drips, indicating it’s slightly thicker than swipe paint. Think of it as the Goldilocks zone—not too thick, not too thin, but just right.
Consistency adjustments might also involve adding silicone to the base color. A drop per 2 ounces of paint can help create those cool cells everyone loves, but be careful—too much silicone can cause undesirable divots.
And don’t worry if you mix different paint brands; just keep the paint-to-medium ratio consistent for the best results.
Adjusting Consistency
Achieving the perfect consistency for the swipe technique in acrylic pour painting requires balancing the paint’s viscosity to form a small mound that quickly disappears upon dripping. This ideal consistency is vital for achieving spectacular swipe effects and avoiding common consistency troubleshooting issues, such as paint being too thick or too thin.
To reach the right balance, start with a common mixing ratio of 2 parts pouring medium to 1 part paint. However, you may need to thin your mixture further with distilled water to get the desired flow. The swipe paint should be slightly thinner than your base coat to swipe smoothly without disturbing the layers underneath.
Here’s a handy table to guide you:
| Paint Type | Pouring Medium Ratio | Thinning Tip |
|---|---|---|
| Craft Paint | 1:1 | Add water as needed |
| Artist Paint | 2:1 | Guarantee smooth flow |
| Swipe Paint | 2:1 + water | Slightly thinner than base |
Silicone for Cells
When it comes to creating those stunning cells in your acrylic pour paintings, silicone is your best friend, but it’s essential to get the ratios right.
Adding just a drop of silicone per 2 ounces of paint can make all the difference, helping those beautiful cells to form without causing unwanted divots.
However, be careful not to go overboard because too much silicone can ruin your masterpiece.
A little experimentation with different brands and amounts will help you achieve the perfect effect.
Ideal Silicone Ratios
For ideal cell formation in acrylic pour painting, the recommended silicone ratio is 1 drop of silicone per 2 ounces of paint. This specific ratio is vital because it helps create the beautiful, bubbly silicone effects that artists love to see in their work. When you get the ratio just right, the cells form perfectly, adding texture and intrigue to your painting.
Experimentation results can vary, though, so don’t be afraid to play around a bit. Some artists find that tweaking the ratio slightly can lead to even more mesmerizing results. Remember, it’s all about finding what works best for you and your artistic style.
Adding silicone only to the base color is key. This technique guarantees that the silicone rises through the layers and creates those stunning cells without messing up the top colors. But watch out—overusing silicone can lead to unwanted divots, making your painting look more like a cratered moon than a piece of art. So, moderation is your friend here.
Even when mixing different brands of paint, stick to the suggested silicone ratio to keep things consistent. Happy pouring, and may your cells be ever in your favor!
Cell Formation Tips
To effectively promote cell formation in acrylic pour painting, integrating a single drop of silicone per two ounces of paint into your base color mix is vital. This technique is essential in achieving those mesmerizing, organic patterns known as cells. Silicone serves as a catalyst in the cell formation techniques, where its hydrophobic nature repels the water-based acrylic paint, creating pockets that evolve into stunning cells.
A significant practice for ideal cell development is maintaining consistency with the pouring medium, despite mixing different paint brands. Additionally, the application of heat after the swipe can greatly enhance the visibility of cells, as it helps to release the silicone trapped in the paint layers. Confirm that your swipe paint is slightly thinner than the base coat to facilitate better cell formation, enriching your artistic expression.
Here’s a quick reference table for better understanding:
| Technique | Benefit |
|---|---|
| 1 Drop of Silicone per 2 oz | Promotes cell formation |
| Consistent Pouring Medium | Ideal cell development |
| Heat Application Post-Swipe | Enhances cell visibility |
| Thinner Swipe Paint | Improved cell formation |
Avoiding Silicone Overuse
Maintaining a delicate balance in silicone usage is paramount to achieving ideal cell formation without compromising the integrity of your acrylic pour painting. Overusing silicone can be a common pitfall, leading to unsightly divots or pockmarks that mar the beauty of your artwork.
To avoid this, remember the golden rule: just one drop of silicone per 2 ounces of paint. This keeps your cell density just right without going overboard.
Interestingly, it’s best to add silicone only to your base color. This tip helps maintain balance, preventing excess silicone from creeping into every color and causing chaos on your canvas. If you’re not seeing the cells you want, tweak your paint consistency first. Sometimes, the magic lies in achieving the right fluidity rather than dumping in more silicone.
Don’t forget to experiment! Start with a minimal amount of silicone and increase gradually, watching how it transforms your painting. Exploring silicone alternatives can also be a fun way to discover different effects.
Keep these pointers in mind, and you’ll master the art of cell creation without the headache of overuse, making your swiping technique truly shine.
Pouring Techniques
Various pouring techniques in acrylic pour painting, such as the straight pour and dirty pour, offer distinct methods for creating unique patterns and effects on the canvas.
The straight pour technique involves layering different colors in rows to create distinct bands, which can be particularly effective when combined with a strong understanding of color theory to guarantee harmonious blends and contrasts. This method often serves as a source of artistic inspiration, allowing for precise control over the final outcome.
On the other hand, the dirty pour technique combines multiple colors in a single cup before pouring them onto the canvas. This approach results in a more blended, often unpredictable effect, fostering a sense of spontaneity and creativity. By experimenting with both techniques, artists can discover a range of visual textures and patterns, enhancing the overall appeal of their artwork.
Furthermore, experimenting with various pouring directions and techniques can yield unique artistic results. This exploration can lead to the discovery of new methods that may better suit an artist’s style, contributing to their individual artistic journey.
Each technique offers a different way to interact with the medium, providing endless possibilities for creativity and expression.
Base Coat Application
In preparing for the swipe technique, applying an even and consistent base coat is fundamental to achieving distinct and controlled color patterns. The base coat importance cannot be overstated, as it sets the stage for the entire painting process. A white base coat is often recommended to prevent colors from rolling over each other during the swipe, guaranteeing the colors remain vibrant and well-defined.
The base coat should be applied evenly across the painting surface to guarantee proper coverage before adding the swipe paint. This layer’s consistency should be slightly thicker than the swipe paint to provide a stable foundation. Additionally, mixing a pouring medium with the base coat helps achieve the desired fluidity and enhances the overall effect of the painting. Allowing the base coat to dry slightly before applying the swipe colors is advisable, as this minimizes mixing and maintains distinct layers.
Below is a table highlighting key aspects of the base coat application:
| Aspect | Recommended Practice | Importance |
|---|---|---|
| Base Coat Color | White | Prevents color blending and rolling |
| Application Consistency | Slightly thicker than swipe paint | Provides a stable foundation |
| Mixing Medium | Pouring medium mixed with base coat | Achieves desired fluidity, enhances effects |
Swipe Tools
Selecting the appropriate swipe tool is crucial for achieving the desired effects and maintaining control over the acrylic pour painting process.
One popular swipe tool for beginners is a damp paper towel. It offers a gentle touch, minimizing disturbances to the base layer. Just be certain to wet only the edge to keep the towel strong and intact—no one wants a torn swipe tool mid-painting!
Plastic cards and palette knives are other common swipe tool materials. They can create different effects depending on how you position and apply them. Plastic cards are great for smooth, straight swipes, while palette knives can add texture and variety to your artwork.
To get the best results, use a swipe tool that covers the entire length of the painting surface. This guarantees even coverage and a smooth flow of paint. Practicing with different swipe tool techniques can also help you discover unique and visually appealing outcomes.
Swipe Method
Executing the swipe method requires careful application of a swipe paint over the base layer, ensuring the swipe paint is slightly thinner for best blending. This technique opens up endless possibilities for creative variations and design exploration. Beginners often find success using a damp paper towel as their swipe tool, allowing for a light touch that minimizes disruption of the base layer.
Swipe direction plays an essential role, whether it’s top to bottom or center out, as it greatly impacts the painting’s overall appearance. A swipe tool that spans the full width of the canvas can help achieve consistent effects, making your artwork look polished and intentional.
Experimenting with different swipe methods and pressures can lead to unique and stunning results. For instance, a gentle swipe can create soft, flowing patterns, while a firmer swipe might reveal more dramatic contrasts and intricate designs.
Here’s a handy table to summarize some key aspects:
| Swipe Direction | Tool Used | Effect Achieved |
|---|---|---|
| Top to Bottom | Damp Paper Towel | Smooth, flowing patterns |
| Center Out | Palette Knife | Radial, dynamic designs |
| Diagonal | Plastic Sheet | Unique angled textures |
| Horizontal | Sponge | Even, consistent blending |
| Random | Brush | Abstract, spontaneous effects |
These variations are just the beginning of your design exploration in acrylic pour painting.
Heat Application
After mastering various swipe techniques, applying heat can greatly improve the visual appeal of your acrylic pour painting. The heat effects help to highlight the intricate details of cells and lacing, making them more vivid and eye-catching.
Here are key points to think about when using heat:
- Torch Usage: Utilize a torch, but keep it at a safe distance from the surface to prevent burning the paint. Move the torch slowly to guarantee even heat distribution.
- Surface Warming: Gently warming the surface encourages silicone to rise, fostering the creation of unique patterns and textures. This subtle change can transform your artwork considerably.
- Bubble Monitoring: While applying heat, keep an eye out for bubbles. These need to be popped promptly to maintain a smooth finish and avoid disrupting the overall aesthetics.
Careful control of heat is essential. Too much heat can damage your masterpiece, while too little might not produce the desired fluidity and movement.
By keeping these tips in mind, you can achieve stunning heat effects that enhance your work.
Cell Formation

Understanding cell formation is vital for achieving the intricate patterns that define successful acrylic pour painting. Cell structure, created through various techniques, adds depth and complexity to the artwork, enhancing the overall artistic expression.
One of the primary ways to promote cell formation is by incorporating silicone into the paint mixture, typically using a ratio of 1 drop of silicone per 2 ounces of paint. This combination helps create the coveted cells that many artists aim for.
The swipe technique also plays an important role in revealing these cells. By swiping a lighter color over a darker base, artists can uncover the underlying layers, showcasing the cell structures hidden beneath.
After swiping, applying heat can greatly boost cell formation. Warming the paint allows the silicone to rise to the surface and encourages movement within the pour, resulting in more pronounced cells.
Additionally, using thinner layers of paint during the swipe process leads to better-defined cells. Experimenting with different pouring and swiping directions can further enhance cell patterns.
Through practice and exploration, artists can master the technique and achieve unique, enchanting designs that highlight their artistic expression.
Tilting Technique
The tilting technique is essential for achieving an even distribution of paint across the canvas, ensuring the harmonious integration of colors and patterns.
When using tilting techniques, it’s vital to be both gentle and controlled to prevent the distortion of cells and lacing created during the swipe process. The goal is to maintain the integrity of the design while achieving full canvas coverage, including the edges, for a polished and cohesive final artwork.
To master the tilting technique, consider the following steps:
- Minimal Movement: Avoid excessive tilting to prevent unwanted effects and maintain the design’s integrity.
- Edge Coverage: Make sure to tilt the canvas in such a way that the paint covers the edges, giving the piece a finished look.
- Observation: Pay close attention to how the paint moves during tilting to gain insights for future projects.
Final Touches

Having achieved an even distribution of paint through careful tilting, the next step involves applying the final touches to improve the artwork’s overall impact. This phase is where finishing techniques and embellishment ideas come into play, allowing artists to uplift their pieces to new heights.
First, guarantee the edges of the canvas are fully covered. This may seem minor, but exposed edges can distract from the otherwise stunning composition. Use a small brush to carefully apply paint to these areas, matching the colors and patterns on the front.
Next, consider adding a few final flourishes. Some artists like to drizzle thin lines of contrasting paint or use a palette knife to create subtle textures. Others might prefer to use tools like silicone oil to refine and define the cells and lacing that have formed. These embellishment ideas can add depth and interest, making your artwork stand out.
Reflecting on your process is also essential. Take a moment to step back and observe your creation. Think about what worked well and what could be improved next time. This reflection helps you grow as an artist, honing your skills for future masterpieces.
Community Learning
Engaging with online forums and channels enables artists to share tips, techniques, and outcomes, thereby fostering a supportive community centered around the swipe technique in acrylic pour painting. These platforms offer a treasure trove of insights and community feedback, helping artists refine their skills and expand their creative horizons. By actively participating, artists can not only exchange ideas but also gain valuable critiques that enhance their understanding of the swipe technique.
The power of community learning is evident in several ways:
- Idea Exchange: Artists share their unique approaches, leading to new, innovative techniques.
- Feedback Loop: Constructive criticism helps artists improve their methods and achieve better results.
- Collaborative Projects: Joint efforts on projects can push creative boundaries, combining multiple perspectives and skills.
Continuous experimentation and sharing within these communities often lead to breakthroughs that individual artists might not achieve on their own. Documenting and reflecting on personal swipe attempts allows artists to learn from their experiences, making adjustments for future projects.
Collaboration and discussions within these groups inspire new projects and ideas, encouraging artists to explore various techniques and push their creative limits. This sense of community not only supports individual growth but also advances the collective knowledge and evolution of the swipe technique in acrylic pour painting.
Future Engagement

Building on the collaborative spirit fostered in online communities, future engagement focuses on encouraging artists to explore new techniques and share their evolving processes with a broader audience.
Viewers are encouraged to immerse themselves in more videos that demonstrate various acrylic pour painting methods, with a special emphasis on the swipe technique. This not only leads to unique visual outcomes but also sparks creativity.
Viewer feedback plays an essential role in this process, as engaging through likes and comments helps to build a sense of community. This interaction enhances learning experiences for aspiring artists, making it a collective journey. The anticipation for viewer reactions, especially to the drying processes of the artwork, creates excitement and motivates artists to experiment further.
Community challenges can be an effective way to keep this engagement lively. Artists might take on challenges that involve new color combinations or methods, inviting viewers to witness the evolution of their style.
Sharing personal experiences and outcomes with the swipe technique can inspire others, making the whole community richer in knowledge and creativity. This collective sharing not only fosters growth but also strengthens bonds within the art community.
Frequently Asked Questions
What Is the Swipe Technique Acrylic Pour?
The swipe technique in acrylic pour painting entails color blending by dragging a swipe color across a prepared canvas. This method, often enhanced by heat application, achieves unique patterns and cell formations, resulting in visually striking effects.
What Is the Recipe for Acrylic Swipe?
For an effective acrylic swipe, mix 2 parts pouring medium with 1 part paint. Use Onyx Black with coconut oil hair serum for the swipe color. Guarantee slightly thinner consistency than the base, incorporating silicone for cell formation.
What Is Swiping in Art?
Swiping in art involves using swipe techniques to drag a tool across a painted surface, blending colors and creating patterns. This method allows for unique artistic expression by manipulating paint layers to produce dynamic and intricate designs.
What Causes Lacing in Acrylic Pouring?
Lacing patterns in acrylic pouring are primarily caused by paint interaction of differing densities and viscosities. Thinner paints flow over thicker layers, enhancing the effect. Silicone additives and heat application further promote lacing by encouraging color separation.
Conclusion
In conclusion, mastering the swiping technique in acrylic pour painting involves an extensive understanding of essential supplies, paint mixing, the pouring medium, and consistency adjustments.
Additionally, the use of silicone to create cells, the tilting technique to manipulate flow, and the final touches for refinement are vital.
Engaging with the artistic community for shared learning and pursuing future engagement will further enhance one’s proficiency in this fascinating art form.


Leave a Reply