Drying fluid art can be quite the adventure, requiring some finesse and patience! Start by ensuring you’re using a stable, primed canvas to prevent warping. Thin your paint layers for quicker drying and avoid the dreaded cracks. Keep the room comfortably cool (between 65-75°F) and dry using fans for steady airflow. But beware of the pesky direct sunlight—it can wreck your vibrant colors and lead to uneven drying. If you’re feeling brave, try a heat gun to speed things up, but always move it around to dodge hotspots. Want your masterpiece to really shine? There’s more to discover!
Key Takeaways
- Apply multiple thin layers instead of one thick layer to speed up drying and reduce cracking risks.
- Maintain an ideal temperature range of 65-75°F (18-24°C) and use fans to improve airflow around the artwork.
- Use specialized acrylic pouring paints for better flow, drying characteristics, and vibrant results.
- Prime your canvas with acrylic gesso to ensure even drying and reduce warping or cracking.
Understanding the Drying Process
The drying process of acrylic pour art, frequently underestimated, involves several distinct stages from wet paint to fully cured artwork.
At first, the paint is quite malleable, and this is when the solvents begin to evaporate. This initial stage usually lasts about 4 to 8 hours, during which a skin forms on the surface. However, don’t be fooled—the underlying paint is likely still wet. This is where understanding drying techniques becomes essential.
After around 24 hours, the surface might feel touch-dry, but it’s important to resist the urge to handle the artwork too soon. Doing so can result in smudges or other damage. Full curing of the painting takes considerably longer, generally between 7 to 14 days. During this period, paint interactions intensify, with molecules becoming densely packed and stable. This makes the artwork ready for additional layers or varnishing.
Factors such as humidity, temperature, and airflow play a notable role in drying times. Ideal conditions for fast evaporation are around 65-75°F (18-24°C) with low humidity. So, if you’re keen to see your masterpiece come to life, paying attention to these elements can make all the difference.
Selecting the Right Surface
When choosing the right surface for fluid art, several factors can impact both the drying time and quality of your work.
Opting for a porous material like canvas can help speed up the drying process by allowing moisture to escape more easily.
Additionally, using a primed canvas over an unprimed one offers a smoother surface and can aid in achieving more even drying results.
Canvas Material Benefits
Choosing the appropriate canvas material plays an essential role in optimizing the drying speed and overall quality of fluid art. The texture and weight of the canvas are critical factors that can influence how your artwork dries and its final appearance. A canvas with the right texture provides a better grip for the paint, ensuring even application and preventing pooling. Heavier canvas weights can support thicker layers of paint without warping, ensuring that your artwork maintains its intended form throughout the drying process.
To help you understand the impact of different canvas materials, we’ve compiled a table outlining the benefits and considerations of various canvas types:
| Canvas Type | Texture | Weight |
|---|---|---|
| Primed Canvas | Smooth and even | Medium |
| Unprimed Canvas | Rough and absorbent | Light |
| Stretched Canvas | Taut and flat | Heavy |
| Flat Canvas | Flexible and portable | Varies |
| Heavyweight Canvas | Durable and sturdy | Very Heavy |
Each canvas type offers unique advantages. Primed canvases, for instance, allow solvents and water to escape efficiently, promoting quicker drying. On the other hand, unprimed canvases absorb moisture differently, which can affect the drying time and overall finish. By selecting the right canvas material, you can enhance the quality and speed of your fluid art drying process.
Porous Surface Advantages
Selecting a porous surface for fluid art not only accelerates drying times but also enhances the aesthetic qualities of the finished piece. When you opt for materials like canvas, you’re not just choosing a classic artist’s staple—you’re leveraging the advantages of canvas textures and paint absorption.
Porous surfaces like canvas allow moisture to escape more efficiently, both through the top layer and the back, speeding up the evaporation process. This means your artwork will dry faster, which is great if you’re enthusiastic to see the final result.
But it’s not just about speed. The paint absorption properties of a porous surface can considerably affect the consistency and flow of your paint during the pour. Whether you’re using acrylics or water-based mediums, a canvas can help you achieve that perfect balance, making your colors pop and flow seamlessly. Plus, the texture of the canvas itself adds an extra layer of depth to your artwork, making the end result more visually appealing.
Different porous surfaces like wood or specialty boards can also be explored for unique textural effects. Each choice influences not only how quickly your piece dries but also how the paint behaves and interacts with the surface, adding to the overall charm of your fluid art.
Primed Vs. Unprimed
The decision between primed and unprimed surfaces plays an essential role in determining the overall quality and drying efficiency of fluid art. Let’s explore why this choice is so important!
Primed surfaces, like those pre-stretched canvases, offer a smooth, even texture that really lets your paint flow effortlessly, speeding up drying time. One of the key primed benefits is that it stops the canvas from soaking up too much moisture, giving you better control over your paint consistency and reducing the risk of cracking. Imagine painting on a primed surface as having a well-prepared stage for your art to shine.
On the flip side, unprimed surfaces are a bit like unpredictable performers. They’re more porous, which means they absorb more moisture from the paint. This can lead to uneven drying and even warping—definitely unprimed drawbacks you want to avoid. Think of it as trying to paint on a sponge; it’s just not suitable.
Moreover, the primer type matters too. Acrylic gesso is a popular choice, providing ideal absorption and a stable foundation. Artists often prefer primed surfaces, especially for techniques like acrylic pouring, where consistent drying and paint manipulation are essential.
Using Thinner Paint Layers
Using thinner paint layers in your fluid art can make a big difference both in how quickly your artwork dries and its final look.
By applying multiple thin layers, you can achieve beautiful depth and avoid the annoying cracks that thicker layers often get.
Plus, thinner layers let the paint flow more smoothly, creating those stunning, clear patterns that everyone loves.
Layering Techniques
Thinner paint layers in fluid art not only expedite drying times but also enhance the artwork’s depth and minimize the risk of cracking. When you use thinner layers, it helps with color blending and creates interesting texture variation in your masterpiece. Imagine the paint flowing smoothly like cream or honey, allowing each hue to mix gently with the next, forming enchanting patterns.
Layering thin coats lets you build up the piece gradually, giving it more dimension and complexity. This technique is like adding layers of magic, each one contributing to the final effect without overwhelming the canvas. Plus, thinner layers dry faster, which means less waiting time and more painting time!
To get the best results, consider using specialized acrylic pouring paints designed for fluid art. These paints flow beautifully and dry evenly, making the whole process much easier. Also, keeping an eye on the environment can make a big difference. Lower humidity and good airflow help the paint dry faster, so maybe open a window or use a fan.
In short, by layering thinner coats, you not only speed up the drying process but also create a rich, vibrant work of art that stands the test of time without cracking.
Drying Speed
For fluid art enthusiasts, achieving faster drying times is crucial, and employing thinner paint layers greatly contributes to this goal. Imagine finishing your vibrant masterpiece quicker without sacrificing the depth and richness of your colors—sounds perfect, right?
One of the key benefits of thinner paint layers is their rapid drying time. Unlike thick layers that can take days to dry, thin layers guarantee your artwork is ready in a fraction of the time. This technique also minimizes the risk of your art cracking or warping during the drying process, which can be a real headache.
Here’s how you can enhance your paint drying using thinner layers:
- Consistency Matters: Aim for a consistency between water and traditional acrylic paint for better flow and quicker solvent evaporation.
- Layer Wisely: Instead of one thick layer, apply multiple thin layers to enhance drying speed and maintain the integrity of your art.
- Use Specialized Paints: Opt for acrylic pouring paints designed specifically for fluid art, guaranteeing ideal flow and drying properties.
Lastly, don’t forget to keep an eye on your environment. Lower humidity and increased airflow can greatly speed up drying times, making your process even smoother.
Happy painting!
Choosing Specialized Paints
Selecting specialized acrylic pouring paints designed for fluid art is essential for achieving ideal flow and drying characteristics in your artwork. These paints are specifically formulated to balance color mixing and paint viscosity, ensuring that your creations maintain their vibrancy and structure throughout the drying process.
Unlike traditional acrylics, which can be too thick or too thin, specialized pouring paints have a consistency that falls perfectly between the two, providing the best thickness for fluid art techniques.
Using high-quality pouring mediums further enhances the paint’s ability to spread and interact with other colors, creating dynamic patterns and effects that are often sought after in fluid art. Many of these specialized paints also contain additives that encourage cell formation and lacing, adding intriguing textures and visual interest to your work.
When selecting your paints, look for those specifically labeled as ‘pouring’ or ‘fluid acrylics.’ These products are designed to maintain their integrity as they dry, reducing the risk of cracking or other undesirable outcomes.
Controlling Humidity Levels
Maintaining ideal humidity levels is vital for guaranteeing the proper drying of fluid art pieces. Humidity control plays an important role in achieving the best results for your acrylic pour paintings. When the humidity is too high, it can slow down the evaporation process, leading to longer drying times and even potential damage to your artwork.
To keep your art in pristine condition, here are some key strategies to manage humidity effectively:
- Use a Dehumidifier: Invest in a good dehumidifier for your workspace. This device will help reduce the moisture content in the air, speeding up the drying process and preventing issues like gumminess.
- Monitor Humidity Levels: Regularly check the humidity in your workspace using a hygrometer. Aim to maintain levels around 40%, as anything above 60% can cause complications.
- Choose Your Days Wisely: Keep an eye on local weather conditions. Dry, low-humidity days are perfect for working on your acrylic pours, while rainy or humid days should be avoided to guarantee ideal drying.
Optimizing Air Flow
Enhancing airflow around your fluid art pieces is vital for achieving ideal drying conditions and preventing common issues such as uneven drying and cracking. To optimize airflow patterns, consider the strategic placement of fans.
Placing a fan in the room can greatly increase evaporation rates, helping the paint dry faster by allowing solvents and water to escape more efficiently. However, be mindful not to direct the fan straight at your artwork; instead, aim for a gentle breeze to avoid disturbing the paint’s surface.
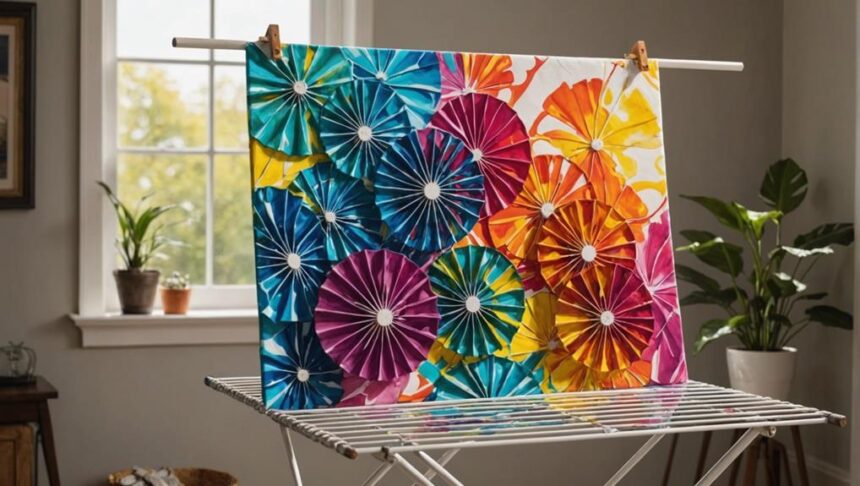
Elevating your artwork on a drying rack or other raised surface can also contribute to better airflow. This setup allows air to circulate underneath the canvas, reducing moisture buildup and promoting more even drying. Stagnant air conditions can hinder the drying process, so avoid placing your artwork in closed-off spaces.
Using multiple fans or adjusting the orientation of your artwork can further enhance airflow patterns, ensuring that no area is left out. This consistent airflow is essential for maintaining the integrity of your design and minimizing the risk of cracks.
With these strategies, you can create the perfect environment for your fluid art to dry beautifully.
Managing Environmental Conditions
To guarantee ideal drying conditions for fluid art, it is essential to regulate environmental factors such as temperature, humidity, and airflow. These conditions can greatly affect the drying techniques and overall environmental impact of your fluid art pieces. Proper management guarantees that your artwork dries evenly and without issues.
To optimize your drying environment, follow these three steps:
- Maintain Temperature: The ideal temperature range for drying fluid art is 65-75°F (18-24°C). Temperatures below 49°F or above 75°F can cause drying problems. Too cold, and the paint may not dry properly; too hot, and it could dry too quickly, leading to cracks.
- Control Humidity: Low humidity levels promote faster drying, while high humidity can slow down the process. Aim for a moderate humidity level to avoid these extremes. Using a dehumidifier can help manage moisture levels in your workspace.
- Increase Airflow: Good airflow is vital for drying fluid art. Use fans to keep the air moving around your piece. However, avoid stagnant air as it can delay the drying process. Just make sure the airflow isn’t too strong, as it might disturb the fluid patterns.
Utilizing Heat Lamps
Incorporating heat lamps into your drying process can considerably accelerate the drying time of fluid art while maintaining ideal temperature conditions. Heat lamps work by raising the ambient temperature, ideally between 65-75°F (18-24°C), which helps the paint dry faster and more evenly. However, proper heat lamp positioning is vital. Place the lamp at a safe distance from the artwork to prevent overheating, which can damage the paint layers.
Safety precautions are also important when using heat lamps. Guarantee proper ventilation to avoid the buildup of fumes, which could be harmful. Additionally, using the heat lamp on low settings provides gentle warmth, allowing for controlled drying without compromising your artwork’s integrity. By following these guidelines, you can achieve smoother finishes and more vibrant colors in your fluid art.
Here’s a quick reference table for utilizing heat lamps effectively:
| Aspect | Recommendation | Reason |
|---|---|---|
| Temperature Range | 65-75°F (18-24°C) | Best drying conditions |
| Heat Lamp Positioning | Safe distance from the artwork | Prevents overheating and damage |
| Ventilation | Guarantee proper airflow | Avoids buildup of harmful fumes |
| Lamp Settings | Use low settings | Provides gentle warmth and controlled drying |
Employing Heat Guns
Heat guns offer a powerful tool for artists looking to expedite the drying process of fluid art with precision and control. By mastering heat gun techniques, artists can achieve quicker drying times without compromising their artwork. Here are some key points to take into account:
- Adjustable Heat Settings: Heat guns typically come with adjustable temperature settings, allowing for customized drying times. Two-speed heat guns can be particularly useful, enabling you to choose between gentle or rapid drying based on your needs.
- Sweeping Motion: To avoid hotspots that can cause uneven drying or cracking, always move the heat gun in a sweeping motion. This technique guarantees a more uniform application of heat, promoting a smoother finish.
- Eliminating Air Bubbles: One of the added benefits of using a heat gun is its ability to eliminate air bubbles trapped in the paint. This can greatly enhance the final appearance of your fluid art.
While heat guns are incredibly effective, it is essential to follow safety precautions. Always maintain a safe distance between the heat gun and your artwork to prevent overheating.
Following these guidelines can help you harness the full potential of heat guns, transforming the drying process into an efficient and controlled experience.
Monitoring Temperature
Maintaining an ideal temperature range is essential for ensuring the smooth and even drying of fluid art. To achieve optimal outcomes, the temperature should be kept between 65-75°F (18-24°C). If the temperature drops below 49°F, the drying process can slow down considerably, much like trying to dry a wet towel in winter—it just doesn’t work well!
On the other hand, if the temperature exceeds 75°F, the top layer of your painting might dry too quickly, leaving the underlying paint wet. This unfortunate situation can lead to cracking, which is about as fun as finding a scratch on your favorite record.
Temperature fluctuations are the enemy here. Keeping the temperature stable with minimal fluctuations is vital for preventing uneven drying. Think of it like baking a cake: if the oven temperature keeps changing, your cake won’t bake evenly, and the same goes for your fluid art.
Using heat lamps can be a part of your drying techniques, but be sure to keep them at a safe distance to avoid overheating the paint. Monitoring and adjusting the temperature in your drying space will help enhance drying time and improve the finished artwork’s quality.
Avoiding Direct Sunlight
When drying your fluid art, keeping it out of direct sunlight is essential to prevent a series of unfortunate events.
Direct sunlight can speed up the drying process too much, leading to cracks and uneven textures, and those harmful UV rays can fade your vibrant colors over time.
Instead, opt for shaded areas or indoor spaces with controlled lighting.
Consider using protective covers to shield your masterpiece while ensuring proper airflow.
UV Damage Prevention
Exposing fluid art to direct sunlight can result in notable heat damage and color fading, making it vital to display these pieces in shaded areas or use UV-protective glass for framing. UV rays can degrade the quality of acrylic paints over time, causing them to lose vibrancy and potentially lead to cracking or crazing in the paint layer. To guarantee your artwork’s longevity, employing effective UV protection strategies is essential.
Here are three key tips to help preserve your fluid art:
- Shade is Your Friend: Always display your artwork in a location that avoids direct sunlight. This simple step can greatly reduce the risk of fading and structural damage.
- UV-Protective Glass: When framing your artwork, use UV-protective glass. This type of glass filters harmful UV rays, helping to maintain the vibrancy and integrity of your piece.
- Regular Inspections: Make it a habit to regularly inspect your artwork for any signs of UV damage, such as fading or discoloration. If you notice any issues, consider repositioning the artwork to a safer location.
Temperature Control Tips
Proper temperature control is essential to ensuring the successful drying of fluid art without compromising its quality. One key factor to contemplate is avoiding temperature fluctuations, as they can lead to various drying challenges.
For instance, temperatures below 49°F can greatly slow down the drying process, which can be frustrating if you’re excitedly waiting to see your masterpiece. On the flip side, high room temperatures above 75°F can cause surface drying issues. You might find that the top layer dries too quickly, leading to unwanted results like cracking or uneven textures in the paint layers.
To avoid these pitfalls, aim to maintain a temperature range of 65-75°F (18-24°C), which is ideal for drying fluid art.
Another important tip is to avoid direct sunlight exposure. While it might seem like a good idea to speed up the drying process, direct sunlight can accelerate it too much, causing more harm than good. The intense heat can lead to cracking and other issues, so it’s best to keep your artwork in a shaded, well-ventilated area.
Lastly, steer clear of drying your art in humid areas like kitchens or bathrooms. High humidity can complicate the drying process and affect the final outcome, making it essential to control both temperature and humidity for the best results.
Alternative Drying Methods
Utilizing alternative drying methods can markedly enhance the quality of fluid art by preventing issues associated with direct sunlight exposure. Sunlight can cause rapid drying, leading to cracks and unwanted textures in your artwork. To avoid this, consider these drying techniques and alternative materials:
- Ventilated Area: Choose a well-ventilated space with stable temperature control, ideally between 65-75°F (18-24°C). This helps your paint dry evenly without the harsh effects of direct sunlight.
- Airflow Enhancement: Use fans to improve airflow around your artwork. This can speed up the evaporation process without causing the paint to crack or develop unwanted textures.
- Protective Coverings: Cover your art with a clean cloth or tent it with plastic sheeting. This protects it from dust while still allowing airflow, aiding in even drying.
Additionally, monitoring humidity levels is essential. Aim for around 40% humidity to avoid issues like gummy paint or uneven drying.
Preventing Paint Cracks
Guaranteeing the integrity of your fluid art begins with managing paint thickness, as thinner layers are less susceptible to cracking. Crack prevention is key in achieving a flawless finish, and one way to do this is by using high-quality acrylic paints. These paints have strong binders, reducing the likelihood of cracks compared to cheaper, weakly formulated alternatives.
Maintaining a stable environment is vital. Aim to keep the temperature between 65-75°F (18-24°C) and the humidity low. This stable climate helps the paint dry evenly, reducing the risk of cracks. Place your artwork in a well-ventilated area to guarantee good airflow, as stagnant air can slow evaporation and cause uneven drying, leading to cracks.
It’s also important to avoid applying excessive heat. While it might be tempting to use a hairdryer or heat gun to speed up the drying process, doing so can cause the surface to dry too quickly, creating cracks underneath. Instead, allow your artwork to dry naturally.
Ensuring Full Curing Time
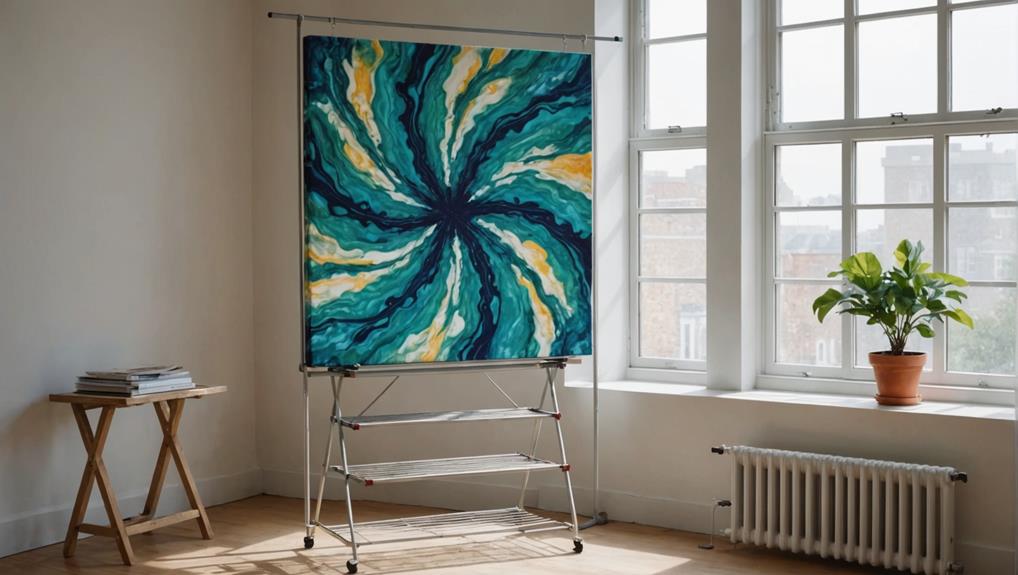
Allowing sufficient curing time is essential for achieving the best possible durability and finish in fluid art. Guaranteeing this patience during the curing process can make the difference between a stunning masterpiece and a disappointing result. Acrylic pour paintings typically need 7 to 14 days to fully cure, allowing the paint to stabilize and solvents to evaporate.
During this period, pay attention to these key aspects:
- Avoid premature varnish application: Applying varnish too soon can lead to poor adhesion and potential surface issues. Always wait for the full curing period before sealing your artwork.
- Monitor environmental conditions: Humidity and temperature play significant roles in curing techniques. Ideally, keep your artwork in a space with low humidity and stable temperatures to speed up the process.
- Minimize movement and contamination: To guarantee the best curing, avoid moving your piece during the initial drying phase and keep it in a dust-free environment.
Frequently Asked Questions
How Do You Make Fluid Art Dry Faster?
To expedite fluid art drying, utilize effective drying techniques such as applying thinner paint layers and enhancing airflow with fans. Additionally, consider environmental factors like maintaining a warm, low-humidity environment and using porous surfaces like canvas.
How Long Does Fluid Acrylic Take to Dry?
Fluid acrylic paintings typically dry within 24 to 72 hours, depending on drying techniques and paint consistency. Thicker layers and higher humidity may prolong drying time, while ideal conditions and proper airflow can expedite the process.
Can You Use a Hair Dryer for Acrylic Pouring?
Yes, a hair dryer can be used for acrylic pouring. Effective hair dryer techniques include using low settings, maintaining a distance from the canvas, and employing quick movements. These acrylic pouring tips help avoid paint disturbance and unwanted effects.
Will a Hair Dryer Make Acrylic Paint Dry Faster?
Yes, a hair dryer can expedite the drying process of acrylic paint. Effective hair dryer techniques, including low settings and controlled movements, are among the efficient paint drying methods to achieve quicker, uniform results without damaging the artwork.
Conclusion
In conclusion, achieving ideal results in fluid art drying involves understanding the drying process, selecting appropriate surfaces, applying thinner paint layers, utilizing specialized paints, and controlling both humidity and temperature.
Additionally, it is essential to avoid direct sunlight, prevent paint cracks, and guarantee adequate curing time.
Mastery of these techniques will greatly enhance the quality and longevity of the artwork, thereby contributing to the overall success and satisfaction of the fluid art endeavor.

Leave a Reply